HughDog

Advanced Member
Joined
Oct 27, 2017
Messages
89
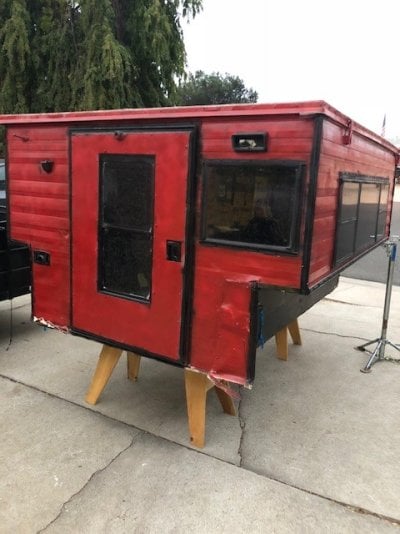
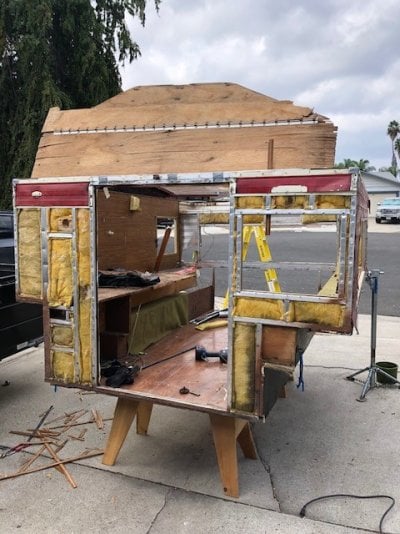
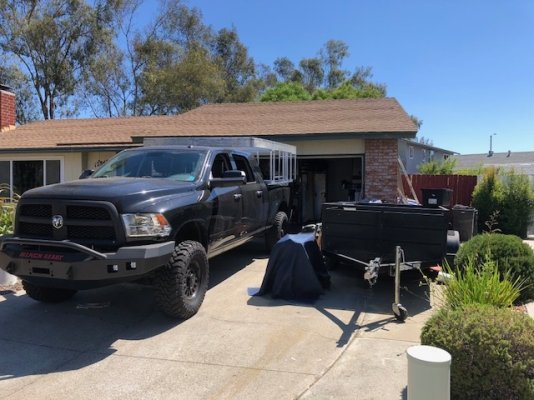
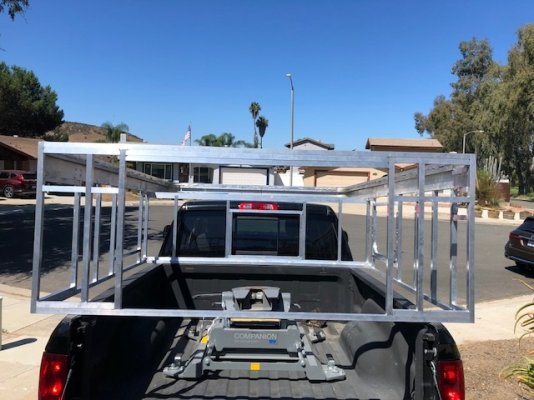
Got a new project delivered. Not sure what year though?

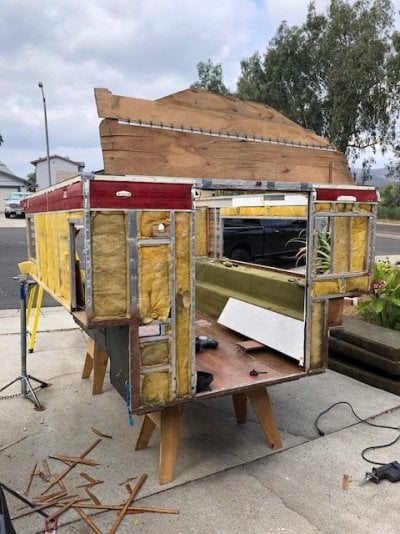
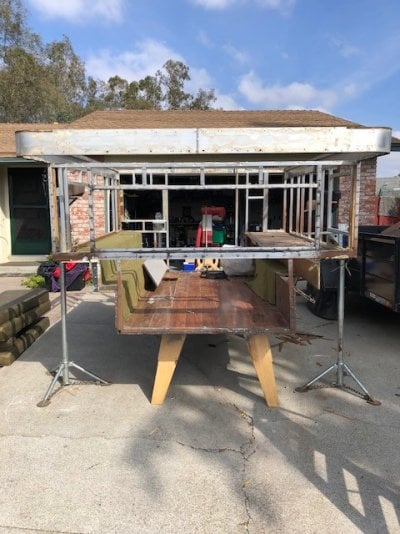
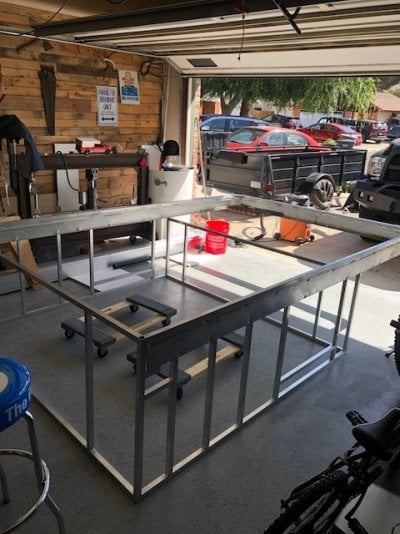
Got it delivered on Saturday and stripped down Sunday! Had a sink and stove, but did not see a furnace.

I am thinking to do the following and appreciate any advice for this build:

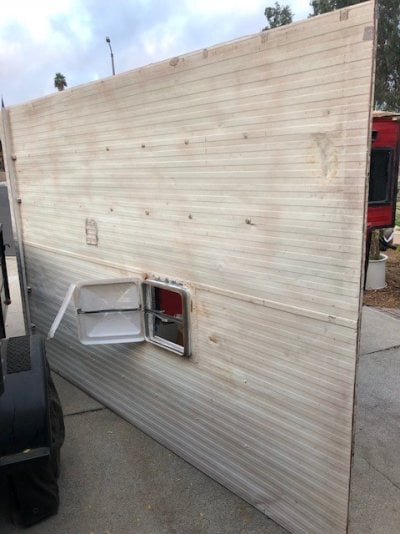
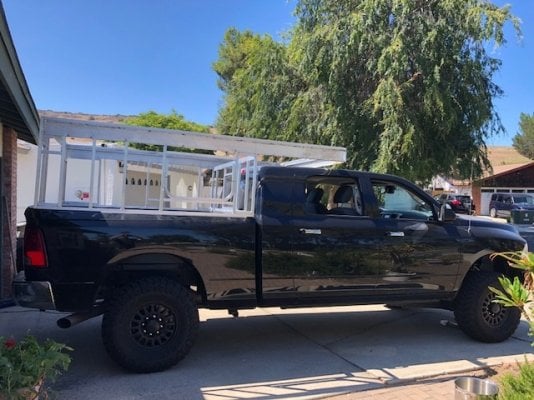
  • Make it a shell that rest on the truck's bed rails
  • Chop the frame so that the base is 6.5' to fit my truck (cabover nub will go full size)
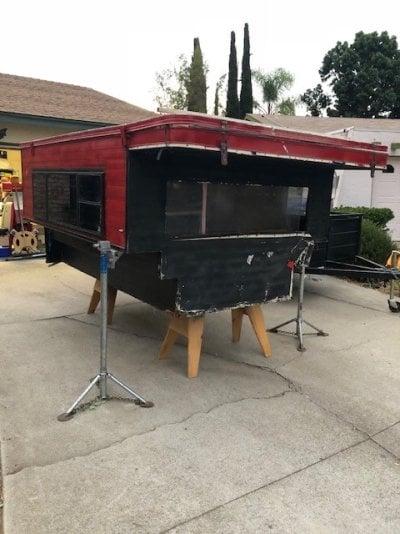
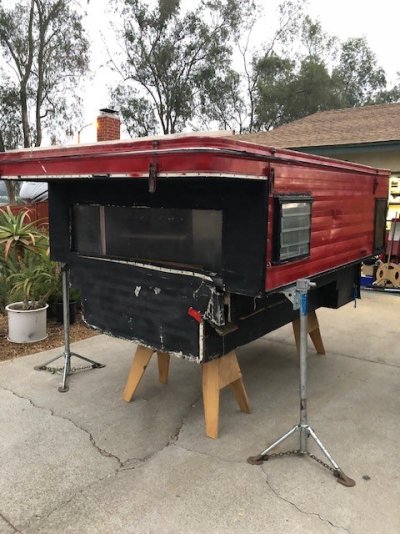
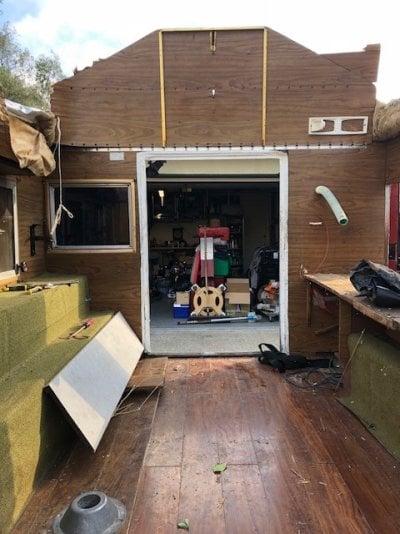
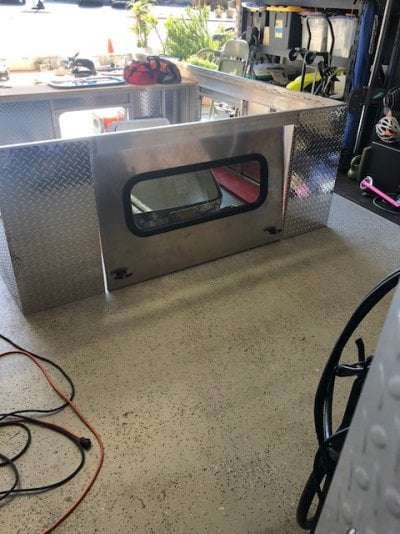
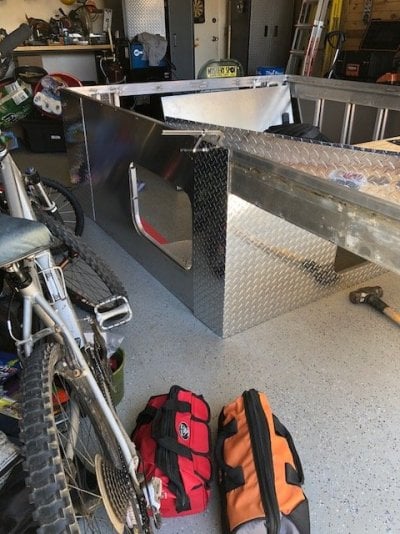
  • Chop most of the back wall so that I can make a hatch opening and keep my tailgate
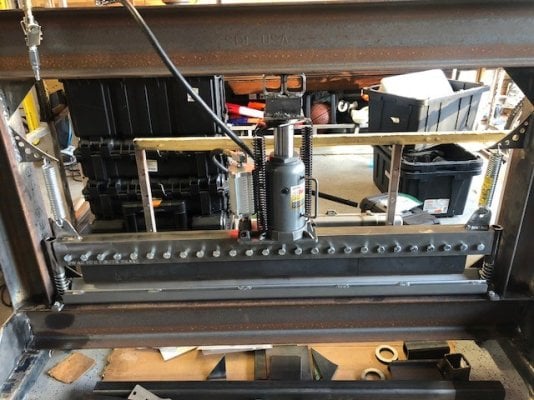
  • Fabricate Jack Brackets
  • New Canvas
  • Will incorporate solar and quick release appliances ran from LiPo (i.e. fridge)
  • Not sure on lift mech, probably will avoid re-making panels.
  • Not sure on windows, but will update these too
  • Not sure on skin, but love FWC's Silver Spur look and Project M diamond plate
  • Not sure about interior on this one
 

Attachments

  • IMG_1804.jpg
    IMG_1804.jpg
    110.1 KB · Views: 282
  • IMG_1805.jpg
    IMG_1805.jpg
    114.9 KB · Views: 287
  • IMG_1809.jpg
    IMG_1809.jpg
    111.4 KB · Views: 279
  • IMG_1807.jpg
    IMG_1807.jpg
    142.3 KB · Views: 272
[SIZE=11pt]More photos of the teardown process. I was excited to do this build having recently completed one (83 Fleet) that was very similar.[/SIZE]
[SIZE=11pt] [/SIZE]
[SIZE=11pt]Last time, it took 3 or 4 days to end up at the same point (frame off), because I had contemplated keeping and fixing certain things and working around them – pretty much a dream stage of doing a light fix up before the OCD kicks in. [/SIZE]
[SIZE=11pt]This time, I only had to think about what to rip apart, what to keep, how to store it, and how to get it done quickly so that the honey-do’s could also be accomplished. [/SIZE]

[SIZE=11pt]And BTW, since we are sharing, my advice is don’t ask for permission and beg for forgiveness. My approach on this is to have all of your good friends “randomly” stop by just as your new toy is being delivered. This helps buffer the rage when you have honey-do’s and a heap of rotted wood and 30 year FWC smell gets dropped onto the driveway! [/SIZE]
 

Attachments

  • IMG_1819.jpg
    IMG_1819.jpg
    138.4 KB · Views: 353
  • IMG_1815 (1).jpg
    IMG_1815 (1).jpg
    123.4 KB · Views: 388
  • IMG_1818.jpg
    IMG_1818.jpg
    146.9 KB · Views: 341
Off to the Dump and Back to engineering / "dreamer" stage.

Will get the frame on a jig (aka my utility trailer) and begin figuring out what I'm going to cut and what support aluminum I will need.

Probably a good idea to figure out the window situation and base platform I will use to secure it to the bed rails. May be a while!
 

Attachments

  • IMG_1860.jpg
    IMG_1860.jpg
    144.5 KB · Views: 273
  • IMG_1824.jpg
    IMG_1824.jpg
    136.7 KB · Views: 297
Back at it ! Finally got the honey-do's finished (for now), . . .

Basically chopped pretty much everything but kept the roof and the crown piece. Working the aluminum has been a lot of fun!
 

Attachments

  • IMG_2901.jpg
    IMG_2901.jpg
    133.9 KB · Views: 300
  • IMG_2904.jpg
    IMG_2904.jpg
    130.7 KB · Views: 339
  • IMG_2905.jpg
    IMG_2905.jpg
    158.9 KB · Views: 250
HughDog said:
Back at it ! Finally got the honey-do's finished (for now), . . .

Basically chopped pretty much everything but kept the roof and the crown piece. Working the aluminum has been a lot of fun!
Nice Dog that will be a sweet camper!!!
 
HughDog said:
Back at it ! Finally got the honey-do's finished (for now), . . .

Basically chopped pretty much everything but kept the roof and the crown piece. Working the aluminum has been a lot of fun!
looks to have fewer cross members in the alum framing than what I recall seeing in either my Hawk or Puma. Are you going for ultra-lite?
 
Vic Harder said:
looks to have fewer cross members in the alum framing than what I recall seeing in either my Hawk or Puma. Are you going for ultra-lite?
Kind of ironic - I know ! Ultra-lite on a 1-ton truck !

So as of now, I'm minus the tub and its tubing, . . Also reduced the base length back by >1.5,' . . The entire back end should look different and will only have a bit of space on each side of a hatch lid . .. . In it's current state, the same amount of vertical supports are on the side and front as when it was a Grangby, but I chose to use a fatter gauge tube all around and welded on multiple sides at the point of contact(s) vs. the single weld that these old frames use to get. I'll have a few truss spots that will be incorporated with the platform that will rest on the bed rails.

I've wanted to build a shell / topper for a long time for just skiing and biking and because my bed is not always accessible on the fly, . . this next photo tells a little more about that story -
 

Attachments

  • IMG_2907.jpg
    IMG_2907.jpg
    115.7 KB · Views: 221
Nothing like explaining to the wife why you got 300lbs of rusty I-beam in the back of her suv! I got the press brake kit from SwagOffroad - they have some pretty sick stuff for micro garage fabricating and playing w/metal.

I'll incorporate into custom brackets for my pickup bed and to do something fun with exterior skins !
 

Attachments

  • Brake press 2.jpg
    Brake press 2.jpg
    139 KB · Views: 178
Finally got the skin bent the way I had sketched it. Cut and fitted windows. got a front slider to match the pass through portion of the truck's rear cab window Bent the rear hatch door in place and backed it with some welded tubes for rigidity.

Really wanted to offset the body's sheet metal for some contrast while also bringing a robust appearance.

Had a lot of room to work with the back end but decided early on that I wanted it to somewhat resemble a shell from the past (i.e. international scout or cruiser top).

Will paint the diamond plate and keep the other sheet metal closer to natural aluminum.

Been staring for 15 hours at a lift mechanism re-design, probably going to do something similar to the "easy up bars" that Jayco uses.
 

Attachments

  • skin 2.jpg
    skin 2.jpg
    136.4 KB · Views: 224
  • skin.JPG
    skin.JPG
    95.5 KB · Views: 234
Got my lifters on, . . . freakish how well the lifts work and lock with the correct hinge points and offsets to geometry!

Will have to post more pics, but the angle was tough. I decided to go with some ginormous height (canvas is 34"), which put standing height truck floor to roof at 84."

Seems kinda high, but I like it, think it created enough room to sit right on the bunk and allows a better angle for snow to drop of the back when only one end is kept up.
 

Attachments

  • lifter.jpg
    lifter.jpg
    128.1 KB · Views: 220
HughDog said:
Got my lifters on, . . . freakish how well the lifts work and lock with the correct hinge points and offsets to geometry!

Will have to post more pics, but the angle was tough. I decided to go with some ginormous height (canvas is 34"), which put standing height truck floor to roof at 84."

Seems kinda high, but I like it, think it created enough room to sit right on the bunk and allows a better angle for snow to drop of the back when only one end is kept up.
more pics, diagrams needed! This looks wicked!
 
mrpeepers74 said:
Yes please


Vic Harder said:
more pics, diagrams needed! This looks wicked!
Thanks guys! Have you seen the Jayco easy up lift bars? I think Hallmark has used them or something like them as well . . . at any rate, those are what I had to reverse engineer without physically having them, . . Funny thing is, jayco sells it's lift system for $100 AU a pair, but I couldn't get them shipped out of Australia. Seems wild that there is not enough demand in the US (though I'm glad I made a pair so I didn't have to size in the lift height based off an out of the box product).

I'll provide some additional photos and schematics after the long weekend.
 
HughDog said:
Thanks guys! Have you seen the Jayco easy up lift bars? I think Hallmark has used them or something like them as well . . . at any rate, those are what I had to reverse engineer without physically having them, . . Funny thing is, jayco sells it's lift system for $100 AU a pair, but I couldn't get them shipped out of Australia. Seems wild that there is not enough demand in the US (though I'm glad I made a pair so I didn't have to size in the lift height based off an out of the box product).

I'll provide some additional photos and schematics after the long weekend.
I would LOVE to see your lift bar solution and details from building it.

I'm redoing a 1986 Keystone and the lift panel over the bed had water damage and whoever tried to fix it before didn't reuse the rivet holes and drilled new holes to put screws in. The entire thing is a massacre. I'm worried about trying to remount the panel (after I rebuild it or buy a new one) and having the integrity of the mounting spot so compromised that it doesn't work. Thinking of replacing the panel in the front with a lifter bar of some sort and maybe just keeping a panel in the back only. (Though I like the more minimal solution of a lift bar).
 
12valve said:
Excellent work, really nice. Since the job is such a complete rebuild, are there any parts of the old camper you are using?
Thx 12valve !

Probably should have started from scratch ! But, yes, I'm re-using the roof frame and the very top of the body (crown aluminum) just under the roof. Saved me a bit of work I guess, but oddly, I've got a square tube die on my bender that matches the same radius of the roof and the crown piece . .. If you look really close at the crown piece, you can see that I added a tube to the top of it - didn't even have to cut the slits to get the bend !

I'll probably do another build or so for the neighbors and start from scratch !
 
TravelingTuttles said:
I would LOVE to see your lift bar solution and details from building it.

I'm redoing a 1986 Keystone and the lift panel over the bed had water damage and whoever tried to fix it before didn't reuse the rivet holes and drilled new holes to put screws in. The entire thing is a massacre. I'm worried about trying to remount the panel (after I rebuild it or buy a new one) and having the integrity of the mounting spot so compromised that it doesn't work. Thinking of replacing the panel in the front with a lifter bar of some sort and maybe just keeping a panel in the back only. (Though I like the more minimal solution of a lift bar).
I'll get the detail out soon on the lift bars that I made(I did take a funny video, but forgot to take pictures and don't know how to post a video on the site).

I too have been through the lift panel rebuild "massacre" as have many before me ! Though my forearms could use the "rivet workout" I just wasn't into redoing lift panels again ! I would however say that provided a rivet gun, some hinges, and wood, it's pretty easy to do when short on tools (just really undesirable in my opinion)

Any possibility you could tack weld some 1/16' strip aluminum over the existing holes? Additionally, if its the bottom hinge area that's trashed, you could throw a strip behind the plate facing you, then go nut and bolt ... If its the top hinge area - I get that's a bit more tricky (but that's where I would tack some new fresh sheet metal and keep the mounting point for the quick and easy redo)

The new bars that I made, I did weld at certain points and used a tube bender - So there was still a bit of work, but way worth it. Again, i'll post details and pics after the 3-day!
 
HughDog said:
I'll get the detail out soon on the lift bars that I made(I did take a funny video, but forgot to take pictures and don't know how to post a video on the site).
Hello HughDog, I'm at the same point on my build and have been thinking on a similar solution. I would be definitely interested in any details you might have! I'll be looking up the jayco lifts for some insight too.

You can likely upload your video to youtube and share a link here if you need a way to share it.
 
Ipschnug said:
Hello HughDog, I'm at the same point on my build and have been thinking on a similar solution. I would be definitely interested in any details you might have! I'll be looking up the jayco lifts for some insight too.

You can likely upload your video to youtube and share a link here if you need a way to share it.
Hey lpschnug - I'm totally tardy with my homework and had the camper kicked to the side (literally on its side) for a long time to make room for other projects - until this weekend! I just started the roof skin and will flip /move to the ceiling soon....

At any rate, I'll get some photos when I'm back out there, but yes, I literally decided where I wanted my attachment points (ceiling and back wall) then did something very very similar to those jayco easy lifters.... the only real brain damage was how much to bend the tubes so that they could intersect with one another and lock in a nice upright position when extended.... I'll draw it out soon -
 
HughDog said:
At any rate, I'll get some photos when I'm back out there, but yes, I literally decided where I wanted my attachment points (ceiling and back wall) then did something very very similar to those jayco easy lifters.... the only real brain damage was how much to bend the tubes so that they could intersect with one another and lock in a nice upright position when extended.... I'll draw it out soon -
Thanks for getting back, I never was able to find info on the Jayco lifts but looking at your picture closely I think I have a pretty good idea of the mechanism. I'm hoping to have some time to get back on my camper in the coming week as well.
 

Latest posts

Back
Top Bottom