K7MDL
Senior Member
I plan to carry a motorcycle on a hitch mounted carrier that will mostly obstruct the rear truck tail lights. I can add lights to the carrier, but I would also like to add them up high along the top back edge of my 2006 Grandby camper. I also like the idea of adding a flood light on the back later.
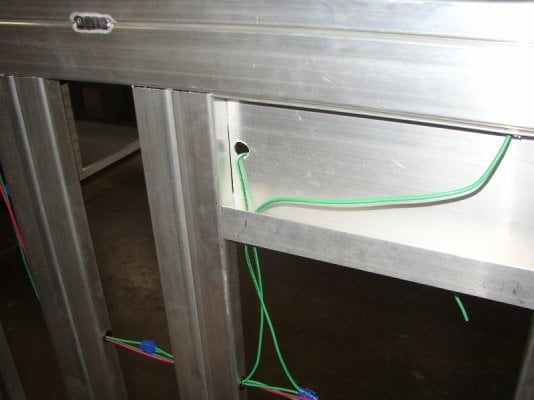
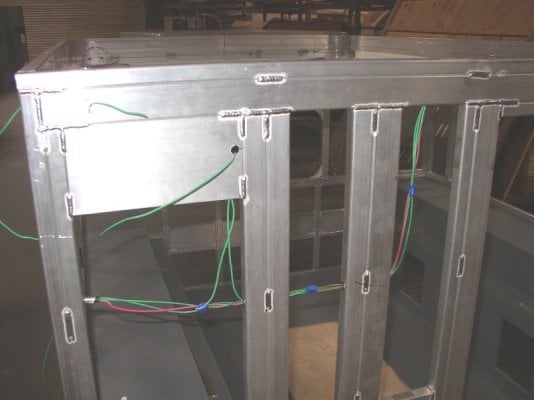
I am looking for information on how the internal framing is built that might allow pulling wire up through the wall(s) without pulling siding or paneling if possible. I looked at the FWC website bare frame pictures but cannot tell if top rails are C-shaped or rectangular tubes. This would inform me where best to mount the lights with screws, drill holes for wire passage to the outside, and where I could pull wires through without obstruction. I have not traced the wiring from the DC panel yet either to see how it gets to the rear wall.
One option is to run a cable outside from my extra 4-pin trailer connector under my rear bumper up alongside the door hinge with small p-clamps on the door frame up to a new center mounted LED brake/running light. That is not a bad option as the door frame extrusions would almost hide the cable appearance wise. An outside cable run to the outside edges for left/right turn/running lights would be quite obvious however. So I quest for the interior wire pull option.
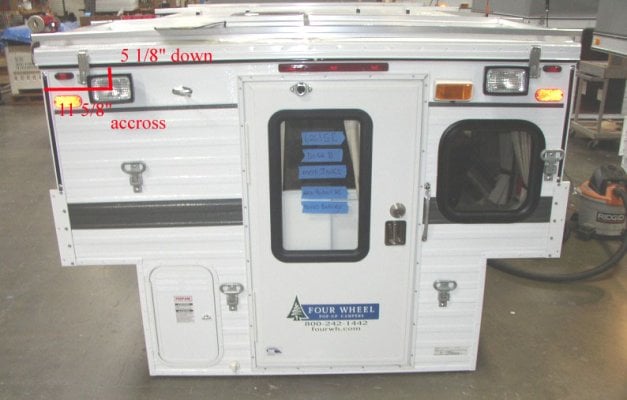
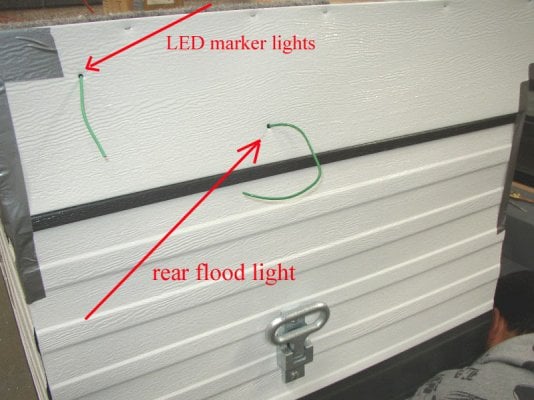
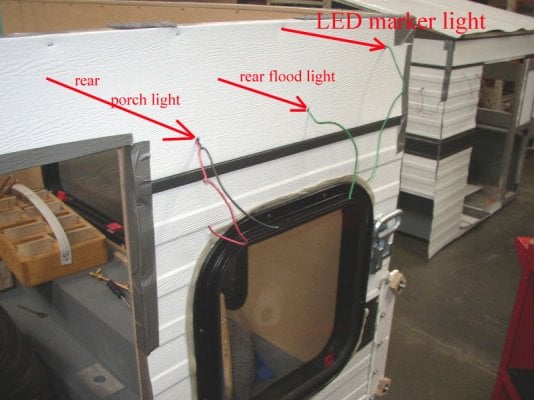
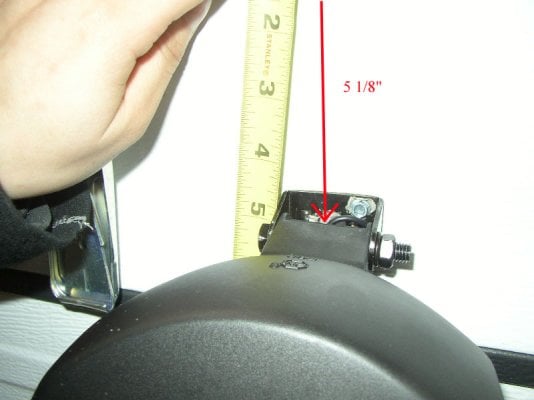
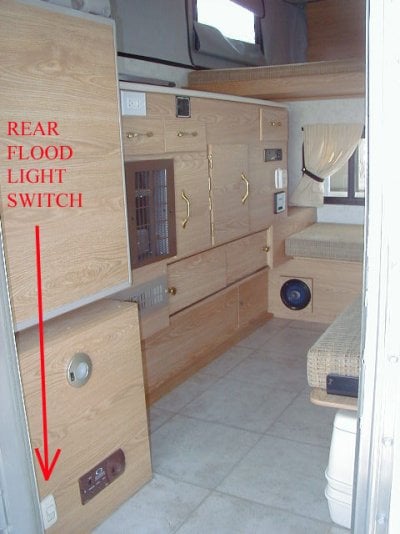
While installing my gas spring mounts over the rear door, I drilled just above the door frame on the siding material and I did not see the top frame tube I was expecting, it seems like it might be open or a C-shape section, with the vertical wall on the inside of the frame. The only metal thickness I saw was the siding itself and I could see the green wire heading over to the right side flood lamp(s). Where does that wire run along the back? Across the whole length? Can I access it from the left side top via an outside hole I drill (3-way fridge on the other side of that wall)? Using the existing green wire would be OK for flood lights. On the right side I can get at it from behind the existing rear flood light, but would still need to pull new wires for the truck powered running/brake and turn signals to both sides and center.
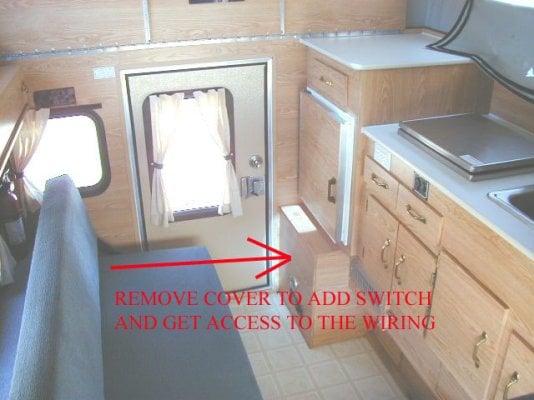
One thought is I can use the existing green wiring as a pull cable to pull through the new wire bundle. That would only work if there was sufficient clearance in any frame holes and channels. I would not want it to get stuck or break. Since I can access the inner rear wall via the fridge upper vent cover, I know I can run wiring from the DC panel to the upper left rear wall OK. So the biggest question is how to run the wiring bundle from the left side to the rear side. If the top channel is an open C channel or tube, it might be very easy. The same question could be asked about running wire forward from the fridge area down the left top channel to the front for front marker lights.
Some of you reading this might have rebuilt your (likely older) campers and noticed the wiring. Perhaps Stan will see this and have some pictures/description to offer. I will send a note to FWC if nothing pops up here, but thought others might be interested in this project or have already done this.
- Mike
I am looking for information on how the internal framing is built that might allow pulling wire up through the wall(s) without pulling siding or paneling if possible. I looked at the FWC website bare frame pictures but cannot tell if top rails are C-shaped or rectangular tubes. This would inform me where best to mount the lights with screws, drill holes for wire passage to the outside, and where I could pull wires through without obstruction. I have not traced the wiring from the DC panel yet either to see how it gets to the rear wall.
One option is to run a cable outside from my extra 4-pin trailer connector under my rear bumper up alongside the door hinge with small p-clamps on the door frame up to a new center mounted LED brake/running light. That is not a bad option as the door frame extrusions would almost hide the cable appearance wise. An outside cable run to the outside edges for left/right turn/running lights would be quite obvious however. So I quest for the interior wire pull option.
While installing my gas spring mounts over the rear door, I drilled just above the door frame on the siding material and I did not see the top frame tube I was expecting, it seems like it might be open or a C-shape section, with the vertical wall on the inside of the frame. The only metal thickness I saw was the siding itself and I could see the green wire heading over to the right side flood lamp(s). Where does that wire run along the back? Across the whole length? Can I access it from the left side top via an outside hole I drill (3-way fridge on the other side of that wall)? Using the existing green wire would be OK for flood lights. On the right side I can get at it from behind the existing rear flood light, but would still need to pull new wires for the truck powered running/brake and turn signals to both sides and center.
One thought is I can use the existing green wiring as a pull cable to pull through the new wire bundle. That would only work if there was sufficient clearance in any frame holes and channels. I would not want it to get stuck or break. Since I can access the inner rear wall via the fridge upper vent cover, I know I can run wiring from the DC panel to the upper left rear wall OK. So the biggest question is how to run the wiring bundle from the left side to the rear side. If the top channel is an open C channel or tube, it might be very easy. The same question could be asked about running wire forward from the fridge area down the left top channel to the front for front marker lights.
Some of you reading this might have rebuilt your (likely older) campers and noticed the wiring. Perhaps Stan will see this and have some pictures/description to offer. I will send a note to FWC if nothing pops up here, but thought others might be interested in this project or have already done this.
- Mike
")