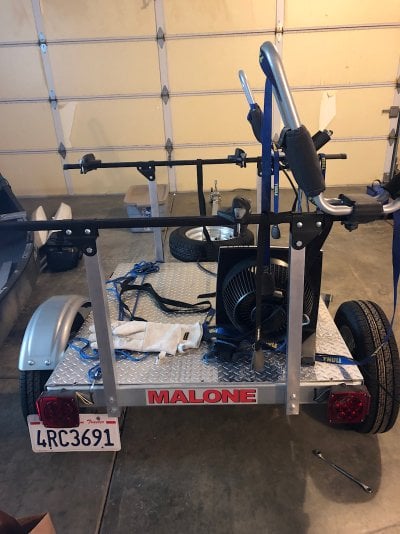
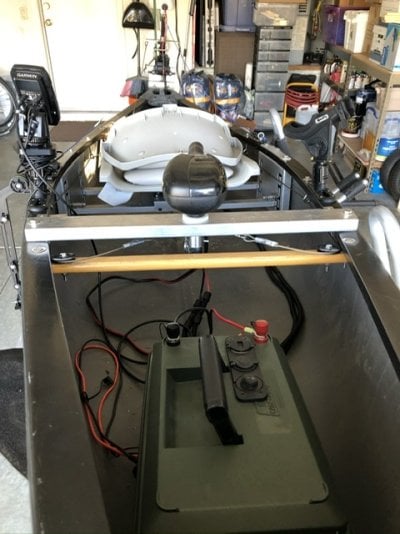
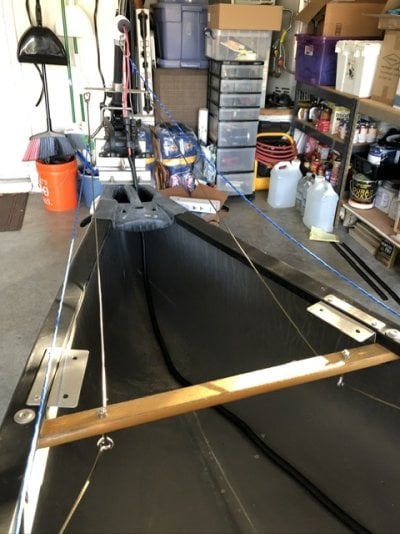
There is no silver lining to COVID-19. But, been having a lot of spare time. A long term project is very near fruition. Modeled this after seeing variations of these in the Carolina’s. Move the seat forward, use a kayak paddle, accessorize, add propulsion or not. I have outriggers, as I plan to fly cast as well as troll. I had help, from a friend who is a metal fabricator, adding custom touches including seating. Same generous guy who helped with my FWC Shell build. Posting this just to share some of that “human touch”. It’s been a big adventure interrupt. Please tap to enlarge the thumbnails.
You are using an out of date browser. It may not display this or other websites correctly.
You should upgrade or use an alternative browser.
You should upgrade or use an alternative browser.
DIY Power Box, outriggers & rigging contribute to flexibility
- Thread starter Stokeme
- Start date
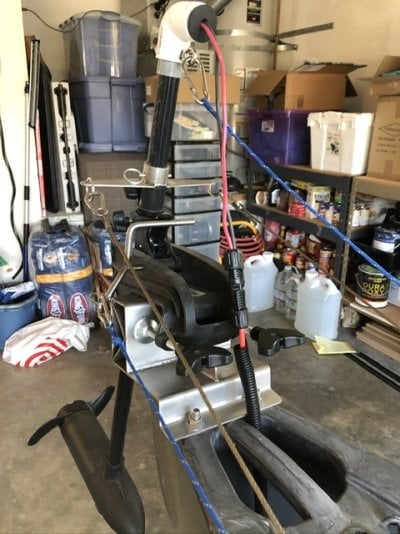
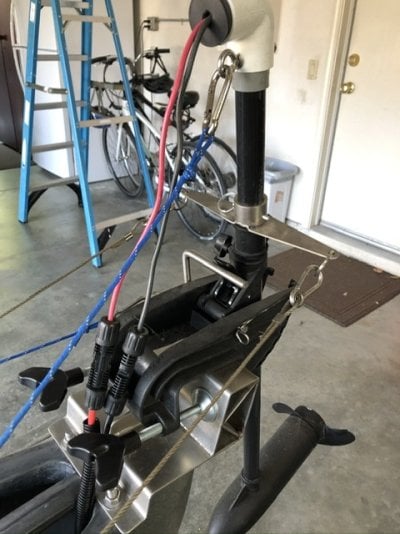
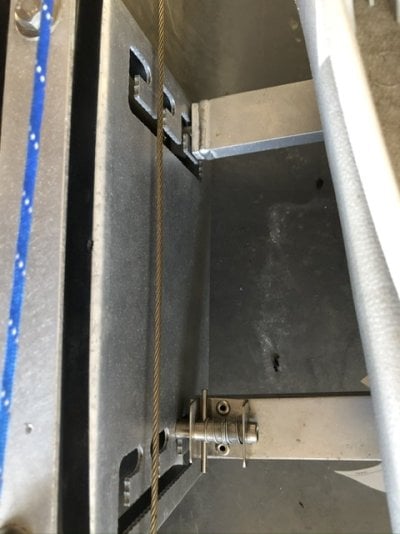
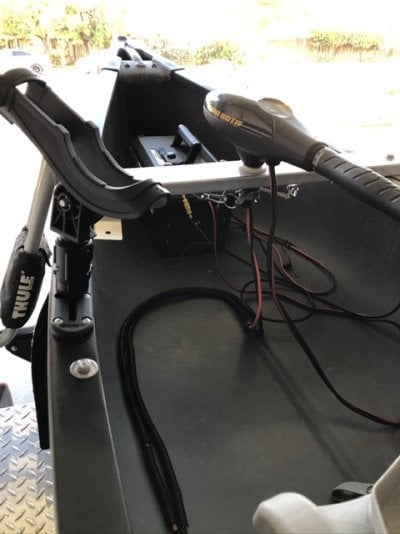
Here are 5 more. I had to purchase an overpriced, fabricated, lever release to engage the motor adjustment. I have this actuated with 2 different hand releases, one on each side. One to engage the lever & the other to raise or lower the motor.
Attachments
-
 B978AB02-7CAF-4705-AA6D-8689B694410A.jpeg83.6 KB · Views: 122
 -
 9FF7ECB8-2074-45F6-A607-3DADF46DCB5E.jpeg85.4 KB · Views: 149
 -
 E54905F1-509F-40A5-B902-F78718B4D039.jpeg110 KB · Views: 149
 -
 4E705D48-4FA2-4689-8539-142F3EEEA0D7.jpeg110.5 KB · Views: 166
 -
 A0298AEC-94ED-41A9-A519-1011276EF625.jpeg81.4 KB · Views: 143

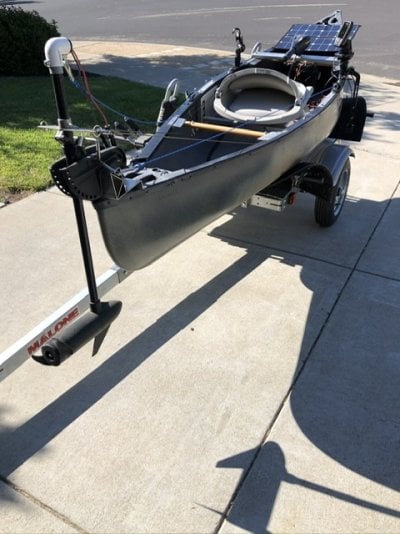
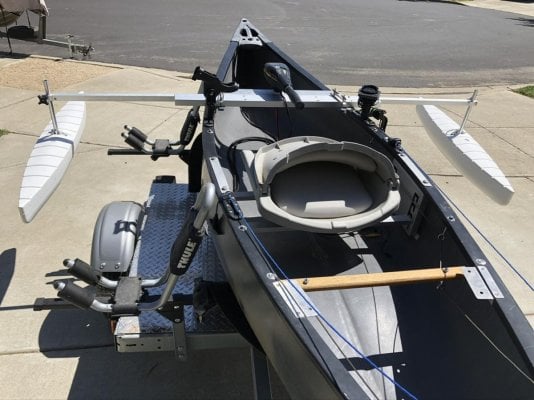
Thanks, it’s been a labor of love, probably 2 years in the making. Being grounded has given me time to nearly finish tweaking it. But also see “shutdown” limits on it’s use. I have outrigger brackets fore & aft. It will either depend on battery & motor use or kayak paddle use behind my wife’s yak. She’ll dance circles around me. I figure to use outriggers for fly casting & larger water, maybe larger fish options. Seat is on a swivel bracket. Obviously not a purist craft. Tap to enlarge.
Attachments
Mark G
Senior Member
FYI, In CA I believe that is now a motor boat and has to be registered. Nice work.
Your rig just keeps getting better, that's a slick way to give max utility and adjustability for the floats. My hat's off to you for your instincts in applying basic hardware solutions to achieve a cost-effective and extremely functional OT canoe brimming with cool bling.
Rico.
Rico.
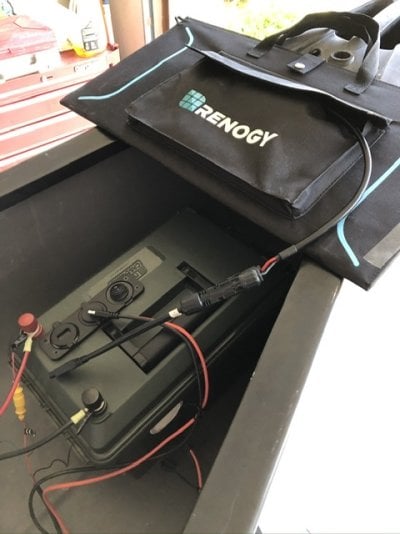
Quick photo. Solution that worked well to organize a bundle, cables & rigging. Adhesive Velcro base in conjunction with a Velcro wrap to secure it in place. I ran an inside 8ft bundle from stern to bow, up & down the side, out of the way. Could not figure out initially how to both secure & remove with ease.
Attachments

smlobx
Lost again
Very nice work!
What kind of “run time” can you get on a fully charged battery?
And do you use the solar panel just to keep the battery charged when you’re not using it or do you use it while you’re on the water?
What kind of “run time” can you get on a fully charged battery?
And do you use the solar panel just to keep the battery charged when you’re not using it or do you use it while you’re on the water?
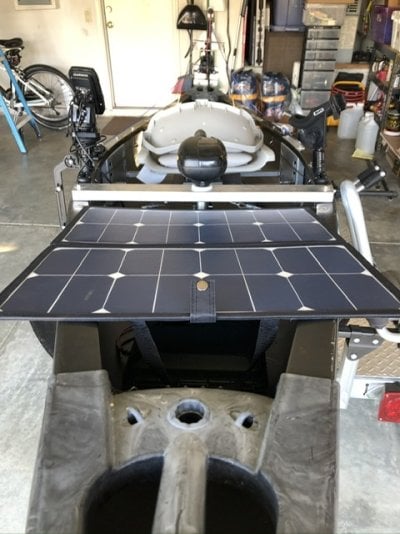
I am just getting out, to really put it to use, this week. So, the whole run time question, it is still unknown. I plan to use the solar panel on the water to keep fully charged at all times ") , well in a perfect world. Depends on the Sun, how far afield I go, the size of the lake, how much I troll vs cast. I would hope also to charge back at camp. I am excited to find out. I’ll try to report about it next weekend. Thanks for the interest.
, well in a perfect world. Depends on the Sun, how far afield I go, the size of the lake, how much I troll vs cast. I would hope also to charge back at camp. I am excited to find out. I’ll try to report about it next weekend. Thanks for the interest.
, well in a perfect world. Depends on the Sun, how far afield I go, the size of the lake, how much I troll vs cast. I would hope also to charge back at camp. I am excited to find out. I’ll try to report about it next weekend. Thanks for the interest.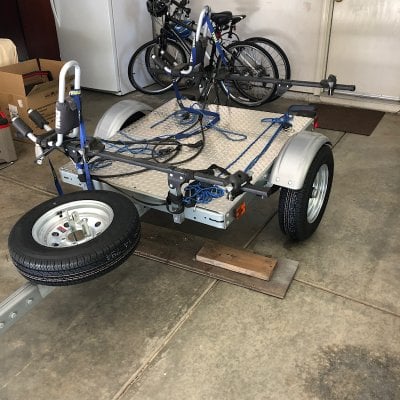
I am Incredibly lucky to have a metal fabricator buddy. Now with taller frame posts, there is added room underneath, I get to tie down some gear. I got a very large duffle & will use 1 or 2 milk crates. He previously made the diamond plate deck.
After my first trial run, which ended in partial failure (part of the learning curve), it became obvious I had to lower the motor shaft, by raising the pinned point, to have the prop completed submerged. I normally could have done a trial run at a local reservoir, but, due to COVID-19, they have all been closed. I did not have a drill with me for any alteration. Dumb, as my initial set pin height, was just a guesstimate. I have not made it out again ... life, multiple Gkid sitting’s, extreme heat, bad AQI, now horrible AQI ... hopefully can make it somewhere in October?
After my first trial run, which ended in partial failure (part of the learning curve), it became obvious I had to lower the motor shaft, by raising the pinned point, to have the prop completed submerged. I normally could have done a trial run at a local reservoir, but, due to COVID-19, they have all been closed. I did not have a drill with me for any alteration. Dumb, as my initial set pin height, was just a guesstimate. I have not made it out again ... life, multiple Gkid sitting’s, extreme heat, bad AQI, now horrible AQI ... hopefully can make it somewhere in October?