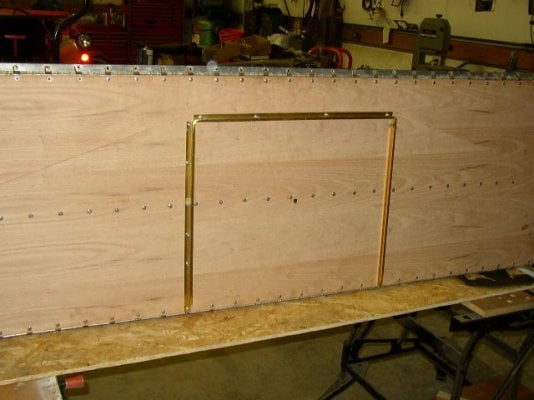
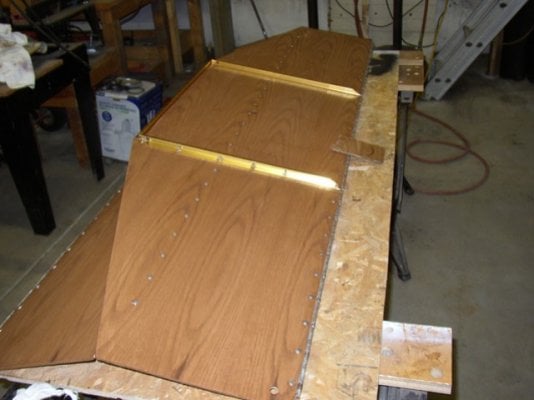
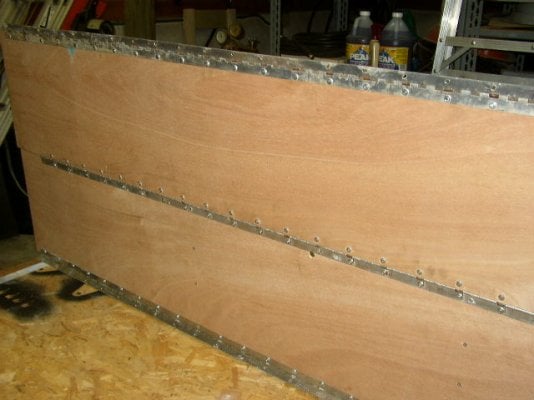
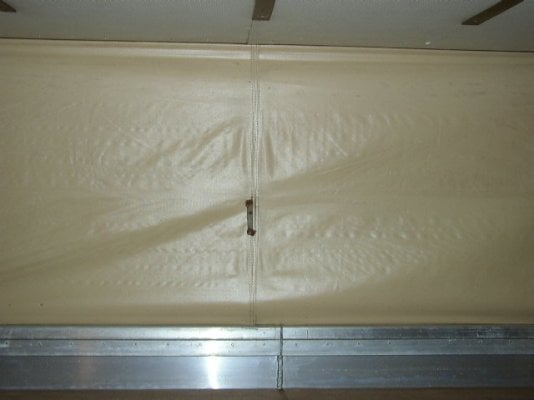
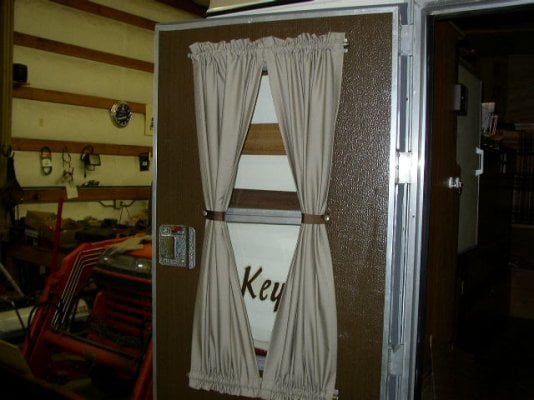
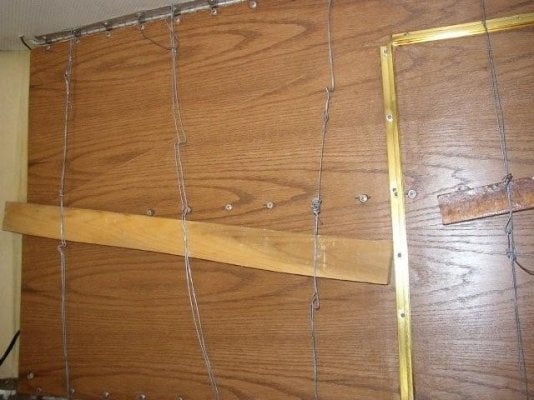
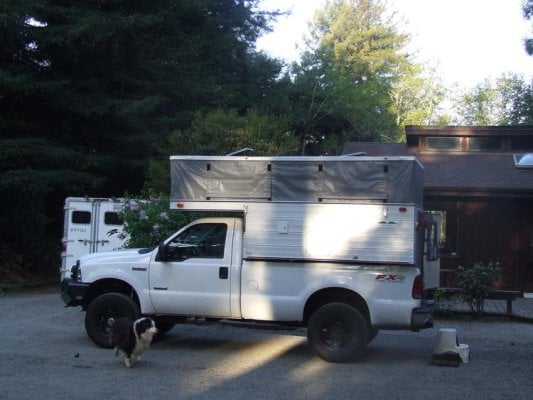
front support

BenG

Senior Member
Joined
Aug 28, 2007
Messages
148
Location
wa state
Well I'm at the no return point:rolleyes: removed the front lift support for the camper to rebuilt it into new one, so far the worst part been drilling out rivets,(need to get some better drill bits that dont dull after couple rivets:mad: ) the paneling on top had most of the rivets pulled out of it so I was afraid it would fail all together at the worst time, better to fix it now. took some pics after I got it out for you to look at will post more as I get going on this, will need to do some cleaning of the canvas behind it, and couple little holes to patch in canvas, on the bright side rest of camper is in good shape and getting better, wife made new curtains for it today too.
 

Attachments

  • 002.JPG
    002.JPG
    64 KB · Views: 867
  • 003.JPG
    003.JPG
    64.3 KB · Views: 885
  • 005.JPG
    005.JPG
    66 KB · Views: 851
  • 007.JPG
    007.JPG
    69.2 KB · Views: 859
  • 010.JPG
    010.JPG
    66.1 KB · Views: 851
Panel

Looks good so far. One point, when you put the new panel back in place, try to get it back in exactly the same position as it was. If you move the placement to the front or back on the roof or side to side at all, it will not work properly.
 
Ok here is a update. Went into town and tried to locate the same style paneling as what the support had no luck, could not find same thickness original was 6 mm thick paneling could find thiner thicker so settle on the thicker 1/4 inch, hope it works ok when I get it into camper didnt seem to be problem looking at it, got the wood all cut and reasembled, and stained one side, wife did some major cleaning of the canvas, we did use the 303 its a great product used cleaner first then the protector. ok here are couple of pics of the project. OH think the fun part is going to be that top hinge when I put it back in, its got alot of tension on it anyone have any ideas???
 

Attachments

  • 002.JPG
    002.JPG
    64 KB · Views: 733
  • 003.JPG
    003.JPG
    64.3 KB · Views: 710
  • 004.JPG
    004.JPG
    51.7 KB · Views: 713
  • 005.JPG
    005.JPG
    66 KB · Views: 697
here is pic of it stained
 

Attachments

  • 007.JPG
    007.JPG
    69.2 KB · Views: 680
wow, nice work on the canvas! it looks brand new! oh, the pop up mechanism looks great too...thanks for your detailed post and keep us informed on how things go. one question, is the cleaner a seperate product than the protectant? i only use the protectant on the outside since thats the only real area that get hit with the uv...are some of you guys using it on the inside as well?
 
Yes we picked up the cleaner, and a protector, it works great. got to give credit to wife she worked hard to clean up canvas on inside, it was worse inside than out. looks good now:D
 
repair

Usually you only have to put the protectant on the outside. The inside is not exposed to the elements like the outside. Looks like the cleaner worked wonders though. Will have to try some of that ourselves to see how it works on the outside of some of the older ones.

On the top hinge if it has some tension and is hard to twist around, one idea would be to get about 3 people with ice picks in there to twist it for you as you put it on. Have to be careful not to slip though and rip the head liner.

Other than that, the way we would normally do it is to have a tool made that is a small channel that fits over about 3' of the hinge with a handle attached to it that allows you to twist the hinge into place.

Another idea is a bunch of vice grips attached and enough people again to twist it around so that you can put it into place.

Be careful though, enough people up in the front bed at once and you can tip the camper over. Might support the bed are with something before everyone climbs in.
 
well project complete, at least this one :) as for that top hinge thought about the vise grips but cant get that many people together around here without having a party, then no work gets done :p , so like any good country boy you head for the bailing wire and start from there, the pics will show that better, actully worked great put some wood across support, string wire and with little help from wife, and vise grips, start to tighten wire till hinge stays put, just be carefull to work hinge evenly as not to bend things, ended up with couple little bends in hinge but flatten right out once started to rivet it into place. ok here are the pics .
 

Attachments

  • 004.jpg
    004.jpg
    53.2 KB · Views: 778
  • 009.jpg
    009.jpg
    44.1 KB · Views: 778
  • 008.jpg
    008.jpg
    144.4 KB · Views: 712
  • 012.jpg
    012.jpg
    66.1 KB · Views: 683
here are couple more pics
 

Attachments

  • 017.JPG
    017.JPG
    71.6 KB · Views: 552
  • 015.JPG
    015.JPG
    74.3 KB · Views: 605
  • 016.JPG
    016.JPG
    64.3 KB · Views: 573
Great job

Great idea. Once again, the customer comes through with an idea that will work and is simple to do. Have to give you credit for that one.

Great repair job, looks like it work for the years to come. Looking forward to hearing about your travels.

Now you can have that party and listen to everyone going ohhhhh and ahhhhhh, wishing they had a camper.;)
 
congrats and job well done! it would be sweet if atc or 4wc offered that plaid as a throw back option on new campers! great work and can't wait to see some pics of it in action!
 
I don't know how I missed this thread:rolleyes: I am so stoaked that you did this write up as I will be doing this very soon as well.

Have you noticed any issues with using the 1/4" versus the thinner factory size. I had the same problem as you in finding the 6mm stuff. I was also told that there may be some issues with proper funtion if it was thicker...

Looks so good! Nice work.

I once held my transmission/transfercase skid plate inplace for 6 months with bailing wire...I will be borrowing your idea.:D

s.
 
So glad that this thread help out other menbers, this is why I joined this forum trying to learn more,and also help other members if I can. Ok the Stain I used is called "Colonial Pine" its by minwax and is water based, then I used Varethane semi gloss to seal it all up and it was outdoor type, as for the match I think its real close, it could be just a little darker but its close, you always seem to notice your own repair more because you know where they are at:p . As for using the 1/4 inch thick no I do not notice any problems with it,actully seems to work better, my rear support is bowed some I think that wont be the case with the 1/4, when I first open and closed the front there was some funny sound coming from the hinge but I think I was just aligning itself, plus it hadnt been lube in long time so had some spots that where stiff, I did spray it down with penetrating oil when I had it out.I have opened and close the camper about a dozen times now and it works great, front actully fold in nicer too, did replace the little cords that pull in with wider elastic bands.Oh one thing be carefull of the rivets you use, I used 1/8 inch and backed them up with washers front and back,they had to be peened over in back because they where sticking out to much,and could cause interferance problems.
Now will have to give camper a try and see how everything else works.
 
Back
Top Bottom