Stan@FourWheel
Senior Member
TECH TIP / FWC SERVICE BULLETIN:
CAMPER INTERIOR LIGHTS NOT WORKING?
BOTH YOUR POWER ROOF VENT FAN & INTERIOR LIGHTS NOT WORKING ?
Over the past few years FWC has seen a few older campers come in to our service shop and has also had some service calls because the interior ceiling lights and the power roof vent fan (if installed) were no longer working for the particular customer.
It doesn’t happen often very often, but if it does happen to you, it is a pretty easy fix to troubleshoot and repair.
Note: We have since reworked and rerouted the camper-to-roof wires to eliminate the problem for future customers. As campers get older and have more use on them, things can wear out and some items will require normal maintenance. That said, we are always listening to customer feedback and trying to improve the design & build processes with our campers.
To better serve our customers existing customers with older campers, I have put together some sample pictures and some “how to fix” notes below.
I also wanted to thank Lighthawk from WanderTheWest for the request for us to post this information.
Lighthawk’s thread posting is located here …
http://www.wanderthewest.com/forum/topic/8410-broken-solar-wire-redux-2008-hawk/
HOW TO FIX / TROUBLESHOOT:
Turn off any and all power to the camper. Turn off the 12v master kill switch, disconnect the aux. camper battery, and unplug the camper from any shore power (disconnect 120v electricity).
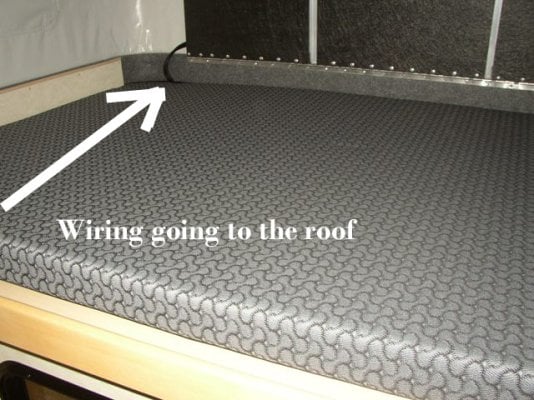
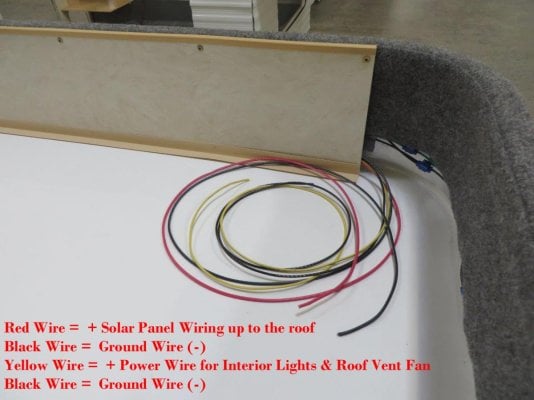
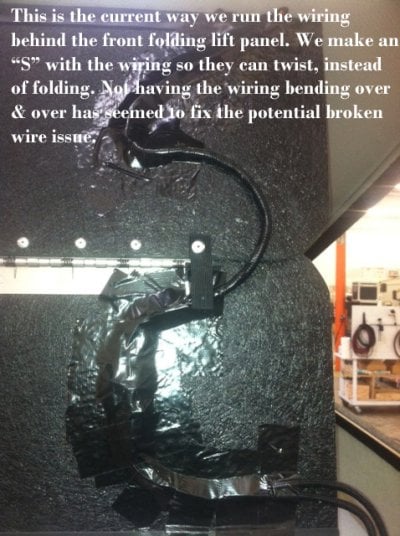
Next, locate the Yellow & Black wires (and also the Red & Black wires if your camper is pre-wired for a solar panel), behind the front folding lift panel. These wires are located on the driver’s side of the camper, up in the cabover bed area, behind the folding wooden panel that allows the camper roof to go up and down.
These wires run from the camper frame (cabover bed area), up behind the folding lift panel, and then up into the roof of the camper. The wires are tucked behind the wooden folding panel and taped to the back of the panel to keep them out of sight.
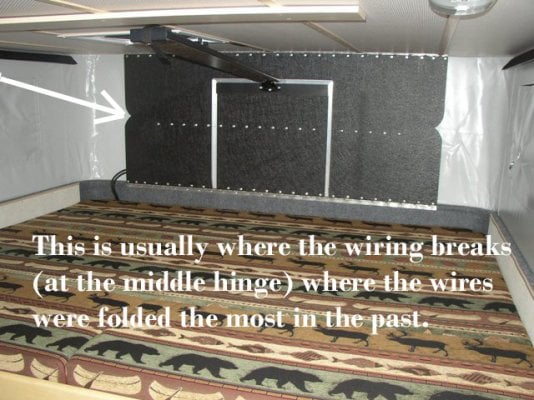
Once you have located the wires behind the front folding lift panel, reach behind the center of the panel and gently pull the tape off, and the pull wires out just far enough so that you can see them and work on them if needed.
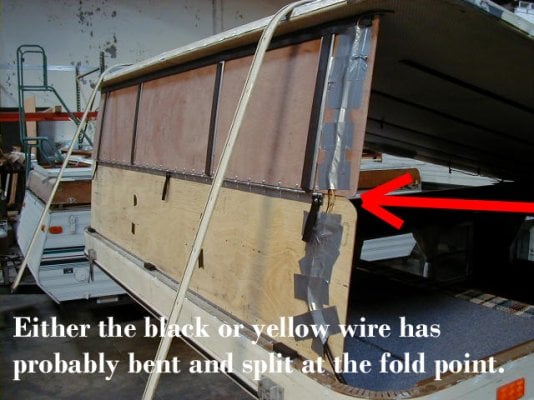
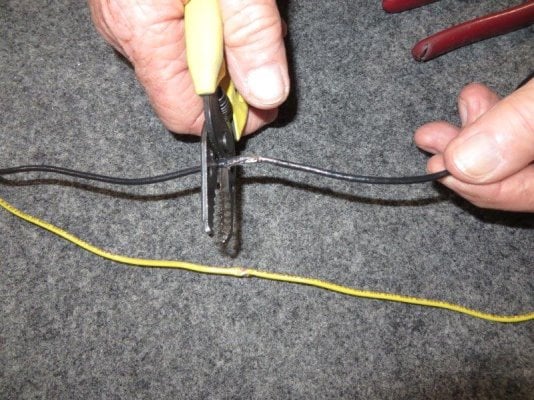
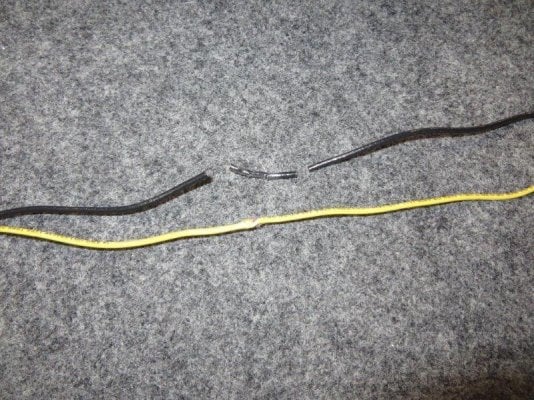
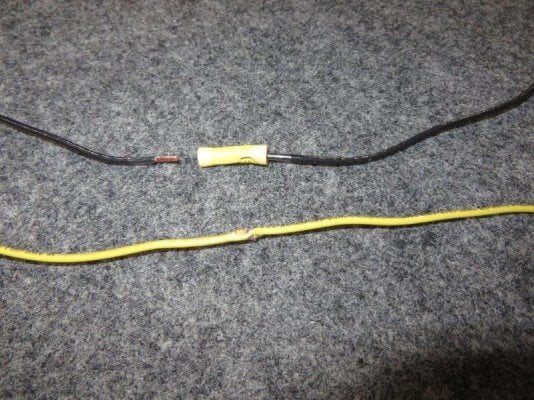
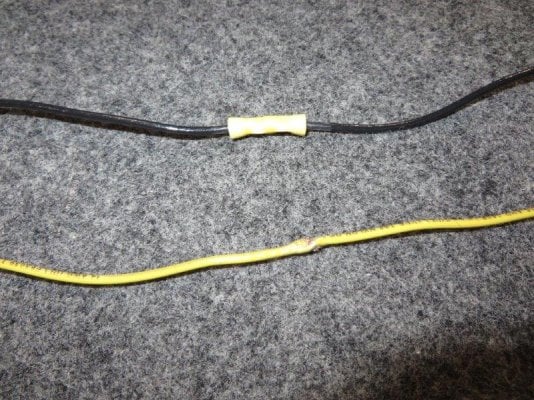
If you notice that the wires are frayed or split, or you can see the bare wiring showing, you will need to cut out the small portion of the wire and reconnect the wires with a butt connector.
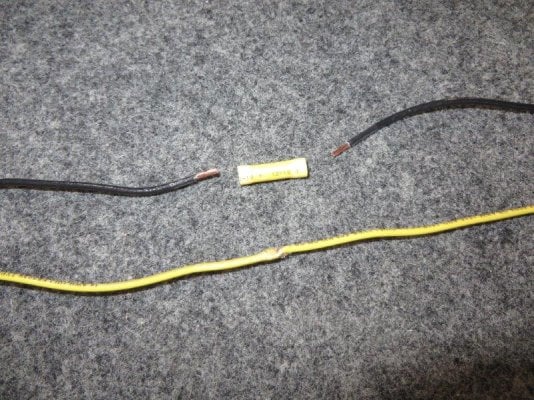
Just snip out a small section of the damaged or frayed wiring, strip back some of the insulation cover with wire strippers, and connect the wire back together with a butt connector.
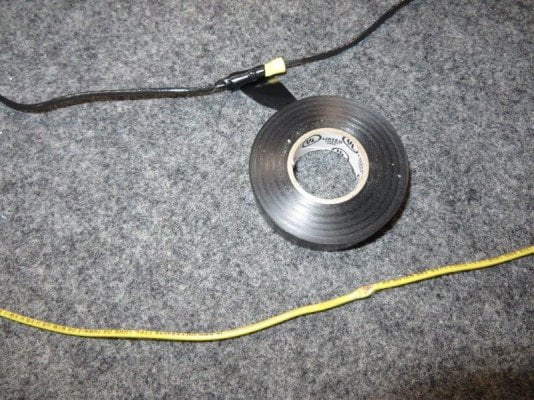
Cover with electrical tape for good measures.
Repeat the steps above as needed for each wire that needs fixing or repair.
Carefully reconnect your aux. camper battery to restore power back to the camper so that you can check to see if your wiring repairs were successful. Note: Remember that the main camper wiring that connects to your 12 volt deep cycle camper battery usually consists of 2 wires . . . a “White” wire and also a “Black” wire. The main camper battery wire that is “White” wire will need to be connected to the (+) positive terminal on the 12v deep cycle camper battery. The main camper battery wire that is “Black” will need to be connected to the (–) negative terminal on the 12v deep cycle camper battery.
Once you have restored 12v power to the camper, go ahead and test your interior ceiling lights, and the power roof vent fan (if equipped). If the lights come on, you should be good to go.
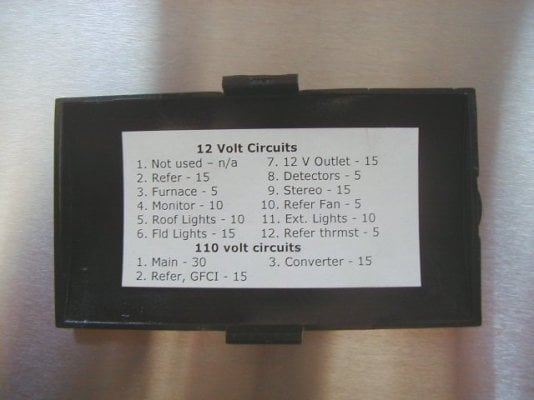
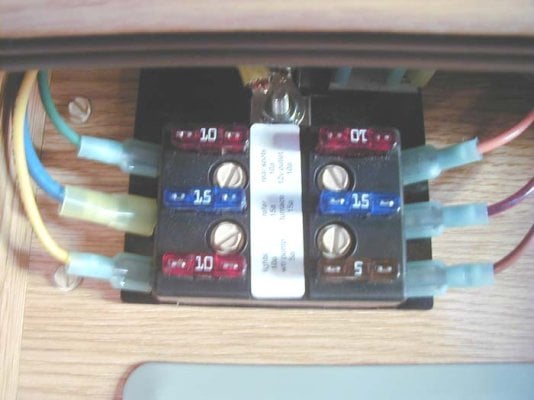
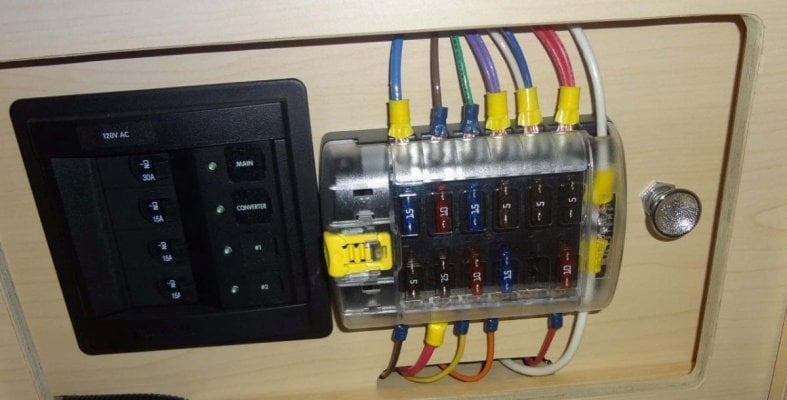
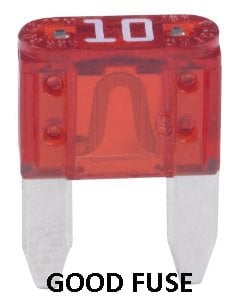
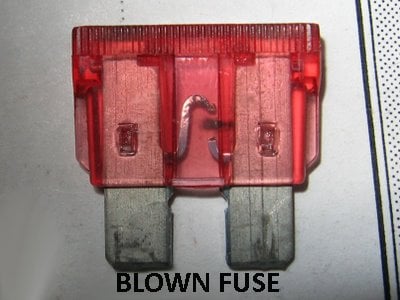
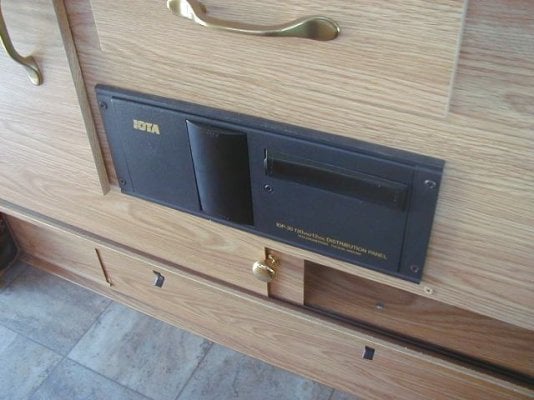
If this does not help or has not fixed the problem, the next step would be to check your 12 volt fuse in the main fuse panel that supplies power to the camper roof. Check the label on the fuse box or check each individual fuse in the fuse block to see if any have blown. If they have blown or “popped”, replace as needed with the same type of fuse, and the same amperage fuse. Do NOT install any new fuses that are rated for a higher amperage then what was originally installed by the FWC factory.
We hope this has been helpful and are here to support you in any way we can.
If you still need further assistance, please call or service department during regular business hours.
FWC SERVICE (800) 242-1442
Thank you.
Stan
.
CAMPER INTERIOR LIGHTS NOT WORKING?
BOTH YOUR POWER ROOF VENT FAN & INTERIOR LIGHTS NOT WORKING ?
Over the past few years FWC has seen a few older campers come in to our service shop and has also had some service calls because the interior ceiling lights and the power roof vent fan (if installed) were no longer working for the particular customer.
It doesn’t happen often very often, but if it does happen to you, it is a pretty easy fix to troubleshoot and repair.
Note: We have since reworked and rerouted the camper-to-roof wires to eliminate the problem for future customers. As campers get older and have more use on them, things can wear out and some items will require normal maintenance. That said, we are always listening to customer feedback and trying to improve the design & build processes with our campers.
To better serve our customers existing customers with older campers, I have put together some sample pictures and some “how to fix” notes below.
I also wanted to thank Lighthawk from WanderTheWest for the request for us to post this information.
Lighthawk’s thread posting is located here …
http://www.wanderthewest.com/forum/topic/8410-broken-solar-wire-redux-2008-hawk/
HOW TO FIX / TROUBLESHOOT:
Turn off any and all power to the camper. Turn off the 12v master kill switch, disconnect the aux. camper battery, and unplug the camper from any shore power (disconnect 120v electricity).
Next, locate the Yellow & Black wires (and also the Red & Black wires if your camper is pre-wired for a solar panel), behind the front folding lift panel. These wires are located on the driver’s side of the camper, up in the cabover bed area, behind the folding wooden panel that allows the camper roof to go up and down.
These wires run from the camper frame (cabover bed area), up behind the folding lift panel, and then up into the roof of the camper. The wires are tucked behind the wooden folding panel and taped to the back of the panel to keep them out of sight.
Once you have located the wires behind the front folding lift panel, reach behind the center of the panel and gently pull the tape off, and the pull wires out just far enough so that you can see them and work on them if needed.
If you notice that the wires are frayed or split, or you can see the bare wiring showing, you will need to cut out the small portion of the wire and reconnect the wires with a butt connector.
Just snip out a small section of the damaged or frayed wiring, strip back some of the insulation cover with wire strippers, and connect the wire back together with a butt connector.
Cover with electrical tape for good measures.
Repeat the steps above as needed for each wire that needs fixing or repair.
Carefully reconnect your aux. camper battery to restore power back to the camper so that you can check to see if your wiring repairs were successful. Note: Remember that the main camper wiring that connects to your 12 volt deep cycle camper battery usually consists of 2 wires . . . a “White” wire and also a “Black” wire. The main camper battery wire that is “White” wire will need to be connected to the (+) positive terminal on the 12v deep cycle camper battery. The main camper battery wire that is “Black” will need to be connected to the (–) negative terminal on the 12v deep cycle camper battery.
Once you have restored 12v power to the camper, go ahead and test your interior ceiling lights, and the power roof vent fan (if equipped). If the lights come on, you should be good to go.
If this does not help or has not fixed the problem, the next step would be to check your 12 volt fuse in the main fuse panel that supplies power to the camper roof. Check the label on the fuse box or check each individual fuse in the fuse block to see if any have blown. If they have blown or “popped”, replace as needed with the same type of fuse, and the same amperage fuse. Do NOT install any new fuses that are rated for a higher amperage then what was originally installed by the FWC factory.
We hope this has been helpful and are here to support you in any way we can.
If you still need further assistance, please call or service department during regular business hours.
FWC SERVICE (800) 242-1442
Thank you.
Stan
.

")