Small roof fan / vent

Glenn

Advanced Member
Joined
Jul 9, 2024
Messages
57
Location
Southern Illinois
Has anyone done a DIY, add of a small 12V roof fan / vent to a topper, small box trailer, or slide in camper that they could recommend?

I am wanting something small for like a 6” hole. I’ve seen options on Google and Amazon but the reviews aren’t very favorable. So I thought I’d ask if anyone has used a product that has performed well and held up.
 
why not use a standard 14" fan like most RV's use?
There’s not much structural integrity to the topper roof and is just a single layer of fiberglass w/ gel coat and didn’t want to cut that large of a hole?‍♂️

realize it has cut outs for the windows but the cubic foot of the space is pretty small. and I would think a 6” flu (fan) would remove the amount of stacked heat near the ceiling that I’m looking to accomplish.
 
I ending up buying this. Upon request West Marine sent me the Marinco full manual to read before buying. I’ve opened it up and inspected it, exactly the size I wanted. With the camping base installed I’m only looking at roughly 176 cubic feet. I’ll post some pictures once I get it installed.

 
I ending up buying this. Upon request West Marine sent me the Marinco full manual to read before buying. I’ve opened it up and inspected it, exactly the size I wanted. With the camping base installed I’m only looking at roughly 176 cubic feet. I’ll post some pictures once I get it installed.

Would love to see photos once it is installed ? It might work in my truck cap.(I have an A.R.E.) I will just need to find someone to install it for me.
 
Would love to see photos once it is installed ? It might work in my truck cap.(I have an A.R.E.) I will just need to find someone to install it for me.
I plan to install it this coming weekend…… I’ll be sure to post pictures?

I’ve been cautious, and keep evaluating where I think I want it to go - once I cut the hole there’s no going back?
 
Last edited:
I plan to install it this coming weekend…… I’ll be sure to post pictures?

I’ve been cautious, and keep evaluating where I think I want it to go - once I cut the hole there’s no going back?
Here’s pictures following the install :

IMG_1677.jpeg


Below: The highest point and I layed it out in the radius where the center and rear support ribs are. Be sure to leave enough room for the outer diameter as the bottom of the vent lays flush with the roof.

IMG_1678.jpeg


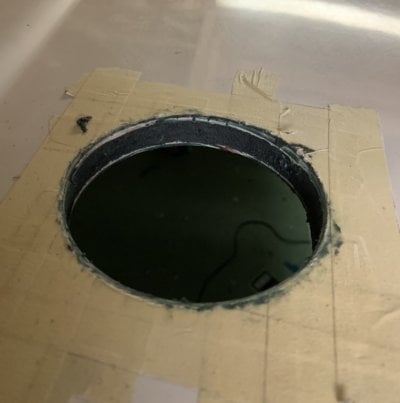
Below; Protect the fiberglass gel coat with masking tape

IMG_1679.jpeg


Below: Heres some of the tools and supplies you will need:

IMG_1680.jpeg


Below: Heres a link to where I ordered my hole saw:


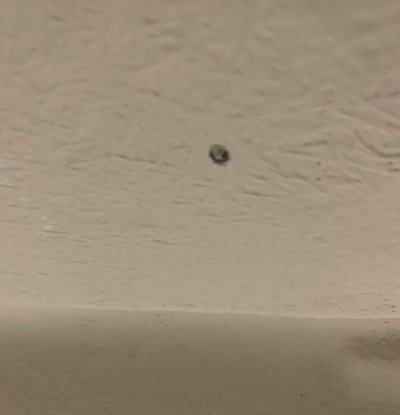
Begin your cut on top just until the teeth start to cut and until the pilot drill comes through the bottom side.

Below: Start a cut from the bottom (inside the shell) until the teeth are through the bottom layer of fiberglass so as not to splinter it when finishing the cut from the top side. (Bottom side shown)

IMG_1682.jpeg


Below: Finish the cut from the top side and plug will fall out.

IMG_1683.jpeg


I filled in the void between fiberglass layers with fiberglass resin. (Not Shown)

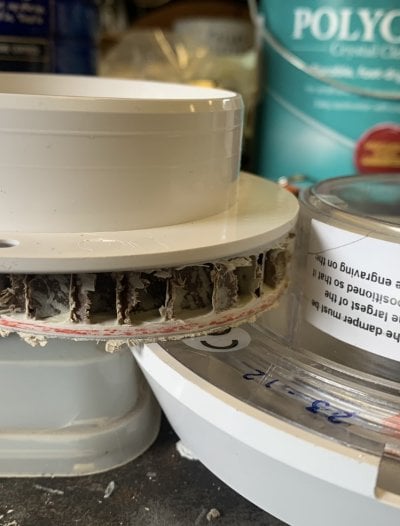
Comparing the thickness of the plug and the trim ring you’ll have a good idea of how the final fit will be


Below: in the Directions it says place the larger drain hole marked “AFT” downhill if on a slope. They don’t tell you it is molded on the plastic (inside and upside down) - it took me a while to find it. I circled it with a hi-light marker.

IMG_1686.jpeg


More pictures to follow on next post
 

Attachments

  • IMG_1685.jpeg
    IMG_1685.jpeg
    177.6 KB · Views: 6
  • IMG_1684.jpeg
    IMG_1684.jpeg
    87.7 KB · Views: 5
  • IMG_1681.jpeg
    IMG_1681.jpeg
    60.5 KB · Views: 4
Last edited:
Below: I cut back the masking tape to sand the surface of the gel coat with 80 weight sandpaper, and cleaned the surface and the plastic vent flange with acetone (per instructions on the 3M 5200 marine adhesive.

IMG_1687.jpeg


IMG_1689.jpeg


Below: Push the trim ring in from underneath - but not all the way flush. For now it’s only a guide to center up and install the vent.

IMG_1688.jpeg


Below: After putting a bedding of 3M 5200 on the bottom flange of the vent I lowered it in place, using the trim ring as a guide. I gave it a couple twists until the sealant was fully seated. (Note- since the top had a very slight angle I went heavy on the sealer to make sure it was bedded with no air gaps.

IMG_1690.jpeg


Below: After letting the 5200 set up a bit I removed the trim ring, put a bedding of 3M 5200 on it and put back in place. I also went back up on top and made sure vent was still pushed down tight. I added some sealant around the trim ring flange to fill in a slight gap. The vent has an inner collar which pulls down to open for venting and pushed up to close. There is also an insect screen that install over the fan blade opening.

IMG_1693.jpeg


Below: From the back of the truck and on the Left side the vent isn’t visible

IMG_1694.jpeg


Below: On the Right of the truck and from across my pole barn the vent is barely visible

IMG_1695.jpeg


Hope this helps with your install if you decide to add one to your topper. One other thing I’m looking at doing is installing a stainless steel vent on the floor of the truck to allow air in allowing the vent to work better in removing heat, especially if I want the screen windows closed and locked for security

Glenn
 
Last edited:
It looks beautiful. Thank you for the amazing instructions. I think that I might be able to try it myself or get one of my older sons to do it for me.(It would be a nice present to mom)
Let us know when you try it out if it helps keep it dryer and cooler in there. I really like the inside of your topper it looks nice and bright.
 
Thank you 😊 I hope you get some help.

I’m right in the middle of my build… I built my own tracks for my LED light bars, and made aluminum diffusers to block the harsh white light and to create a shield from the curtain fabric. I tested them out the other night. The light goes up, bounces of the ceiling and floods the truck bed as I had hoped:

IMG_1568.jpeg


It will look better when I’m done😀
 

New posts - WTW

Back
Top Bottom