1988! FWC fleet

Wild One

Advanced Member
Joined
Jan 9, 2018
Messages
33
Location
Bend Or
Hey everyone,

My name is John and Im new here to the forum. Though Id introduce myself and my current project so as to not look like a lurker:) I purchased this camper at the beginning of last summer and it finally sprung a decent leak that needed attention. After taking a long hard look at the entire camper I began stripping everything off and have decided to do a partial rebuild as well as paint job before the summer hits so my wife and newborn son are ready for the summer adventures.

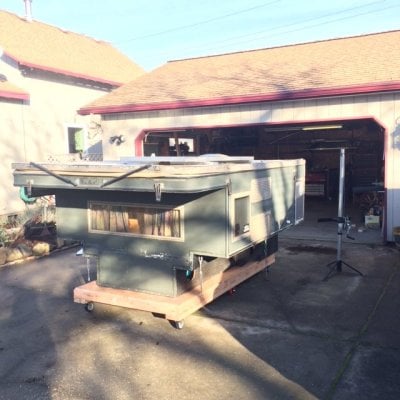
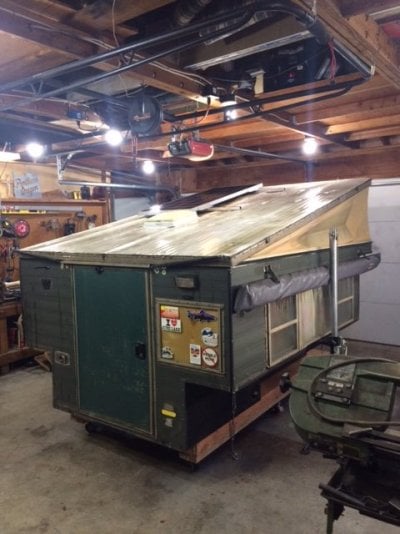
Im actually hoping someone will recognize the camper on here as I purchased it from someone who didn't own it very long and the previous owner before them did most of the existing work from what I understand. So if anyone recognizes it Id love to chat with that owner about the camper. Anyhow, here are some picture and Il post more soon. Currently saving for the new suspension on my 2012 tacoma before re installing the camper but I have a few pics of it here on a cart I made in my shop.
 

Attachments

  • IMG_1803.JPG
    IMG_1803.JPG
    86.9 KB · Views: 212
  • IMG_1802.JPG
    IMG_1802.JPG
    80.5 KB · Views: 217
  • IMG_1804.JPG
    IMG_1804.JPG
    63.6 KB · Views: 218
John, welcome to the group. No idea who had your camper previously, but I am certain someone will respond if they recognize it.

Looks like you were out towards the gorge in the last photo.
 
I believe if I remember someone called it the turtle . Either posted here or on expedition portal .
 
Wandering sagebrush you are close! This is in Maupin Oregon. I spend a lot of time fishing that area. And thanks everyone. Hopefully someone will chime in about the "turtle"!!!

John
 
todgru said:
That looks a lot like my old camper: https://photos.google.com/share/AF1QipO8HNosE2qhfhYWj_jJ9oFaEO7FcWorVXrdrxcPu4aPg8DIBkgIPT98KlzX7iRgHA?key=VEF4cktGZjNwMW5YV1ZaVW0ydmpFZVhiTlFqRTh3

I listed it here: http://www.wanderthewest.com/forum/topic/13158-sold-1988-fwc-fleet-for-sale-portland-or-3000/?hl=1988

I'm in Portland. PM me if you have any q's or want to meet up. I would be more than happy to let you know what I know about it. I did do a lot of work to it.
Well holy ****. This is awesome and I will in fact be messaging you. I have a few questions and I'm sure you could help. I've done a few things to it as well and much more to come in the next few months. Thanks so much for the reply!

John
 
Welcome Wild One to the group. Nice camper I think I remember it for sale.
That's pretty cool that another member noticed your post and responded.
This is such a great site.
Frank
 
That is sweet you connected with one of your campers previous owners. This will be a fun project to watch. Glad you made a thread for it!
 
Welcome to the forum John, you’re among friends.

Excited to see what you do with your camper, and as stated earlier, pics are a great way for others to follow along.

Please reach out if there’s anything we can do to help you out!

Lots of luck!

Poky
 
IMG_1855.JPGIMG_1854.JPGWell Ive had a little time to work on the roof of the camper recently. My plan is to work from the top down and finish with the interior modifications I have planned. Ive essentially stripped the roof of the vent, old crossbars and solar panel, and all of the edge sealant around the roof trim line. This has proven to be quite the task but Ive found some really helpful ways of speeding things up and making life easier. The plan is to re seal the roof vent and redo the wiring for the solar into a junction box instead of the blob of sealant that just covered the wiring exiting the roof. Then I will do a thorough cleaning job before applying paint then lastly the roof edge trim. Im worried about whatever I use for the roof edge trim not being paintable (which is what was there and UGLY) so I wanna do that part last. Then I will install the new crossbars after paint followed by re installing the solar.

I didn't realize how ugly this thing was until I started getting into this process. Its allowed me to examine the camper more than ever and I am really excited to get her back to looking nice again. I have no idea why my photos are being inserted sideways but I will try to figure that out for the next set I upload.


John
 
<snip>


I have no idea why my photos are being inserted sideways but I will try to figure that out for the next set I upload.
John

------


John-

This 'Why Your Photos Don't Always Appear Correctly Rotated' article may explain what's happening.... at least that's the concept.

If I can believe the Exif data I see in a downloaded copy of your left photo, you took it with an iPhone 5S rotated 90 degrees counter-clockwise from 'Normal'. (I say 'if I can believe' because I'm not absolutely sure the exif data wasn't somehow changed from what it was in the original photo)

You could presumably avoid the problem by taking photos in a Normal camera orientation.... the old-school approach to fixing this problem.

However, it would probably be better to figure out what you have to do on your particular software platform and upload process to deal with the fact that orientation data isn't being handled properly when you upload the photo.

If you happen to be working from a Mac platform and uploading via Wander The West's Attach Files function, I can help....

(click to enlarge)

rooftest2.jpg


(I used Preview on my MacOS Sierra system to look at the Exif orientation data (with the Inspector), edit the photo a bit, then do a 'Save As' to make a new copy of the photo. After attaching the new photo to my reply, I used More Reply Options | Preview Post to check that it looked upright before posting.)

Also- If I remember correctly, some WtW members are able to get photos in the correct orientation by uploading to the Gallery. I've not tried that.

PS- once you figure out how to get the photos upright and have your process down, it's also easy to go back and edit your previous post(s), i.e., to delete the old photos and add the new ones.

.


.
 
Well after a busy day I managed to get the roof a little closer to finished. I installed the ceiling vent and the solar junction box Im using prior to painting. It took a pretty decent amount of time to scrub the roof and allow it to dry but I lucked out and had some some here today that helped a lot. Im still awaiting the roofing caulk/sealant I'm gonna use to come in the mail, so the holes you still see will be dealt with then as well. Tomorrow I need to decide on what color and which paint Il use on the roof edge strip. This is something I don't wanna paint but unfortunately as some point one of previous owners painted it with some sandy textured rustoleum stuff that is proving to be a pain in the ass to remove so I may end up re coating with the same paint in a darker color.

Ive sorta decided to just work from the roof down so the next project will be to re attach the headliner and button up some wiring in the ceiling. Then most likely Il move onto the abundance of exterior projects including a good chunk of dry rot Ive located under the loft bed area over the cab. Anyhow, Still having trouble with pictures but Il have some up here soon. IMG_1877.JPGIMG_1871.JPGIMG_1875.JPGIMG_1876.JPG
 
A few more photos of the roof paint and the new racks installed. Still waiting on some sealant in the mail but hopefully the roof will be totally done by tomorrow. IMG_1887.JPGIMG_1886.JPGIMG_1889.JPGIMG_1881.JPGIMG_1880.JPG
 
Back
Top Bottom