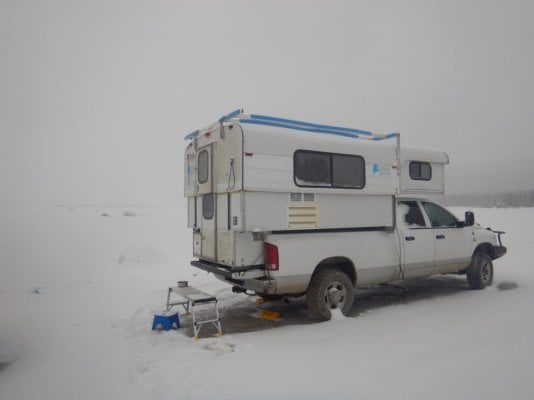
96 10' cab over

I would vote for a dismounted AK to be in the lowered position. Other than getting it supported properly and tarped against the elements and perhaps a 100 watt light bulb in there turned on 24/7 to help out keeping it dry as possible...maybe removing the cushions to a warmer storage place (garage?). I would suggest you wrap them in something like an old sheet or something to keep them from being dust and moisture collectors. That will avoid that spring time musty, stale odor in the camper. I would prop the fridge door open to keep the seal robust and remove maybe your things like dishtowels, bedding, etc. that would also attract moisture.

Disconnect the propane tank and consider draining the water tank which you will refill and service in spring, that should do it.

Aside from insuring mice don't get into the camper via some worn out Pirelli seals, you should be OK. Mothballs and mousetraps are optional depending on where you live.
 
Thank you Every one for all the great info! I didn't visit in a while since the camper was parked and waiting for spring to come by... Still waiting, -10c this morning but we did use the camera las weekend for an over night....

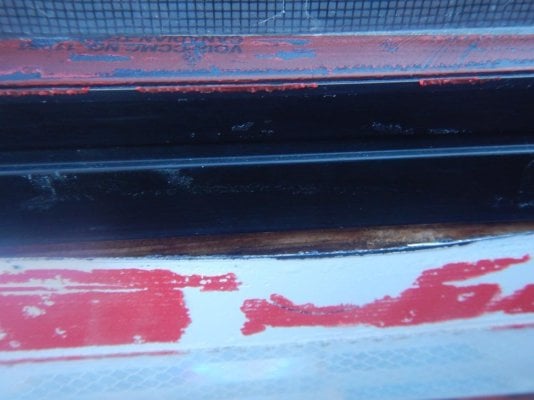
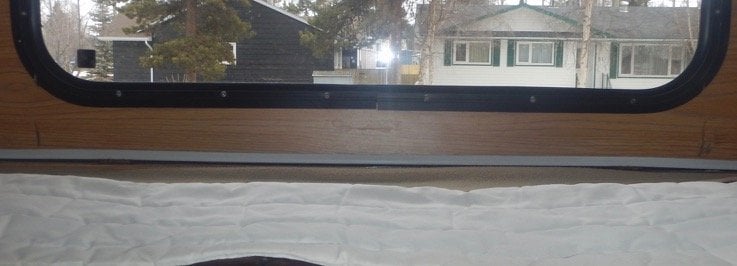
Anyway, as winter came along, I found a few other problem with our "mint" condition Alaska, the skin is popping out from being the window frame/flange I need to fix that.... Brian said it is probably due to wood frame swelling..... But didn't elaborate on how to fix it!! in the picture below is the worst spot, all of this wasn't visible when I went to buy that camper.... So maybe our great deal wasn't that great of a deal lol.

An other thing I noticed, is when I fold the bunk walls down and lower the unit, the tin sides on the side panels rubs it way into the front panel paneling... And I didn't notice that either when I took possession of the camper in the fall.... So I don't know if I'm doing something wrong...

Cheers
 

Attachments

  • DSCN7892.jpg
    DSCN7892.jpg
    50.3 KB · Views: 82
  • DSCN7841.jpg
    DSCN7841.jpg
    92.7 KB · Views: 89
Not sure if I understood your last comment about the tin sides rubbing up in the top bunk...but, my Alaskan (1976) has Pirelli seals on all three fold-down panels. I keep a folded up blanket or pad up there between the side panels so that the top panel rests on it somewhat to relieve as much of the pressure the front panel puts on the side panel Pirelli seals as possible. As long as you have enough clearance so that the front panel does not hit the roof when the top is lowered, you are good to go.
 
As Packrat says the bed thickness is limited in Alaskans as the side folders have to fold below horizontal to allow room for the front folder to sit on the side folders without rubbing on the roof interior. On my 14 CO I ended up with wear marks on the ceiling because I had bedding under the side panels. Hope this helps, hard to tell what is going on from the picture.
 
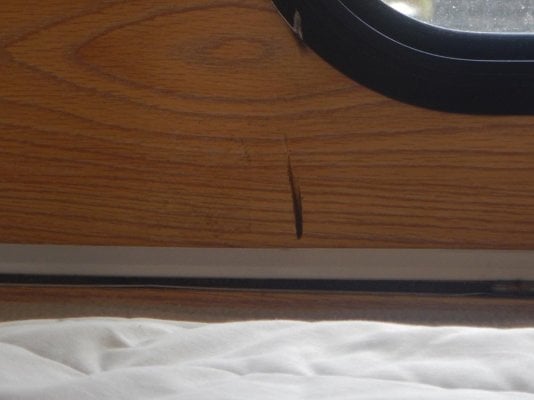
So here are a few pictures of the "rub" spot on the front "panel" cause by the side panels in the lowered position.

The mattress seem to be the right thickness. Everything seem to lay flat on the mattress, but right beside the round foam filled seal, there is "sharp" tin protruding from the side panels and that is what rub on the front panel! I think I found a solution... I'll report back after I try my idea...
 

Attachments

  • DSCN8048.jpg
    DSCN8048.jpg
    72.9 KB · Views: 71
  • DSCN8049.jpg
    DSCN8049.jpg
    49 KB · Views: 90
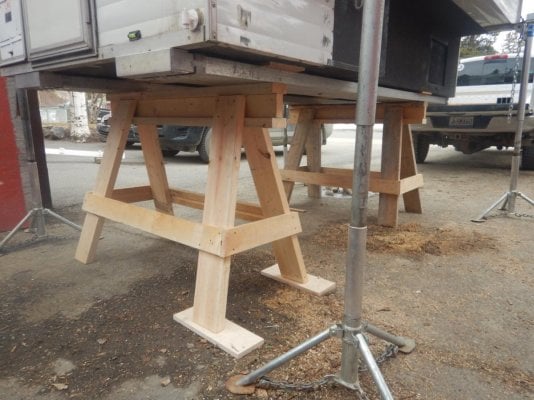
Made some heavy duty saw horses to replace the stack of skids that I used before! They work fantastic!
 

Attachments

  • DSCN8047.jpg
    DSCN8047.jpg
    145.2 KB · Views: 110
From what I can see in that photo, the sawhorses are supporting two metal box-type spacers running fore and aft under the camper. This is the worst way to try to solve the problem with raising an Alaskan so it clears the bed rails. You MUST, let me repeat myself again, you MUST support the PERIMETER as well as the entire floor or you will be a BOW in it that pulls the lower section apart as you indicated yours has.

Here is what I did and I think you can see that it is designed to SPREAD OUT the support of a 1500 lb camper evenly.
1) get a 8' x 4' x 5/8" piece of plywood. (sealing it with an oil-based paint is suggested)
2) make a frame to support it out of 2" x 6" that has a section on BOTH sides as well as front and rear.
3) attach it to the plywood at the edges
4) add 2 or 3 more cross-braces inside that framework.
5) set the camper squarely on that platform once it is in the truck.

Since I am of the opinion that the SPLAY in the rear panel that makes the door not close right was caused by traveling on those metal "spacers" which spread the rear lower panels, you may now need to add a shim to either side of the rear panel by slipping it in from the outside to under the rear edge of the camper, on top of the plywood. Use two jacks on the rear corners to raise the rear until you see that splay minimized (as evidenced by the alignment of the lower door to the door frame improved.)

Set the camper down and recheck the splay...if you need more, simply raise the rear again and push the shims in further. Recheck the door to frame again and when it looks OK, cut off ends of the shims.

Now as to the gash in what I think is the front panel being caused by the metal frame of one of the side panels in the upper bunk...if you or the OP replaced the mattress and it is TOO THICK, then the side panels can't fold down far enough and when you lower the front down onto them, they chafe. If you can't see the hinges for the front panels when they are up and you are in the camper because the mattress is too think, then you found the cause of that. You can't leave all the bedding/sleeping bags, etc. up in there because of this way the front sections are designed. I think your photo may indicate that the panels can't fold down enough to avoid scratching the front panel....leave a pillow between the side panels to support the front panel.
 
PackRat said:
From what I can see in that photo, the sawhorses are supporting two metal box-type spacers running fore and aft under the camper. This is the worst way to try to solve the problem with raising an Alaskan so it clears the bed rails. You MUST, let me repeat myself again, you MUST support the PERIMETER as well as the entire floor or you will be a BOW in it that pulls the lower section apart as you indicated yours has.

Here is what I did and I think you can see that it is designed to SPREAD OUT the support of a 1500 lb camper evenly.
1) get a 8' x 4' x 5/8" piece of plywood. (sealing it with an oil-based paint is suggested)
2) make a frame to support it out of 2" x 6" that has a section on BOTH sides as well as front and rear.
3) attach it to the plywood at the edges
4) add 2 or 3 more cross-braces inside that framework.
5) set the camper squarely on that platform once it is in the truck.

Since I am of the opinion that the SPLAY in the rear panel that makes the door not close right was caused by traveling on those metal "spacers" which spread the rear lower panels, you may now need to add a shim to either side of the rear panel by slipping it in from the outside to under the rear edge of the camper, on top of the plywood. Use two jacks on the rear corners to raise the rear until you see that splay minimized (as evidenced by the alignment of the lower door to the door frame improved.)

Set the camper down and recheck the splay...if you need more, simply raise the rear again and push the shims in further. Recheck the door to frame again and when it looks OK, cut off ends of the shims.

Now as to the gash in what I think is the front panel being caused by the metal frame of one of the side panels in the upper bunk...if you or the OP replaced the mattress and it is TOO THICK, then the side panels can't fold down far enough and when you lower the front down onto them, they chafe. If you can't see the hinges for the front panels when they are up and you are in the camper because the mattress is too think, then you found the cause of that. You can't leave all the bedding/sleeping bags, etc. up in there because of this way the front sections are designed. I think your photo may indicate that the panels can't fold down enough to avoid scratching the front panel....leave a pillow between the side panels to support the front panel.
Thank you for the reply and all the good suggestions, I really appreciate it! Regarding the sawhorse and the supports, the camper never traveled one those and this is temporary and only for the sawhorses until I have the frame made for it. When I bought the camper, 3 length of 2x3 tubing were fasten to the bottom of the camper length wise, I took these off and I'm having these 3 length of tubing connected together with cross section( think Ladder here) there will be 8 1x3 cross section in between the 3 10 feet section this will make for a great support for the entire bottom of the camper.
 

New posts

Try RV LIFE Pro Free for 7 Days

  • New Ad-Free experience on this RV LIFE Community.
  • Plan the best RV Safe travel with RV LIFE Trip Wizard.
  • Navigate with our RV Safe GPS mobile app.
  • and much more...
Try RV Life Pro Today
Back
Top Bottom