a new alaskan on the market

you missed one a couple months ago...real nice one on it's original truck...barn find....in North Carolina...keep your eye out..they do come up back there
 
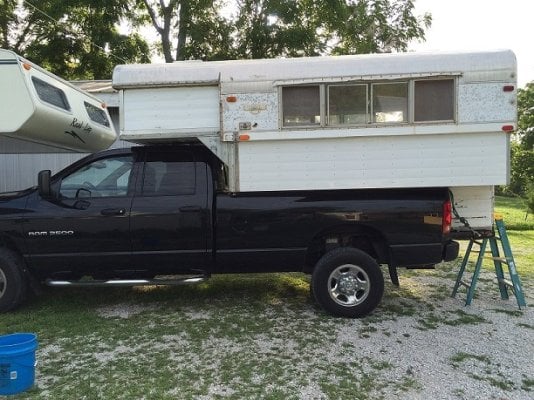
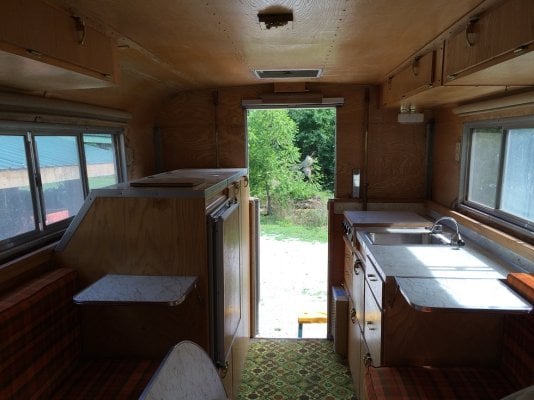
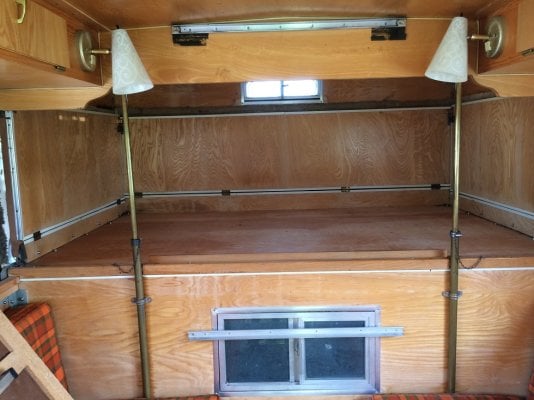
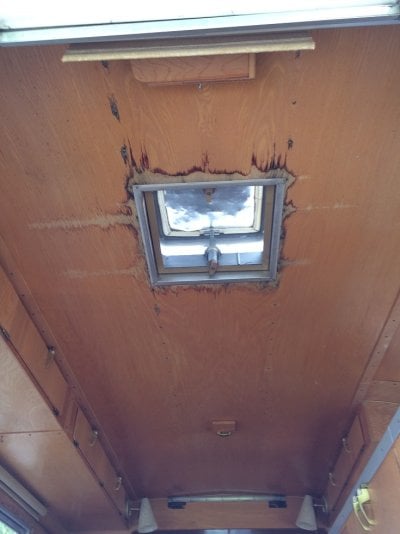
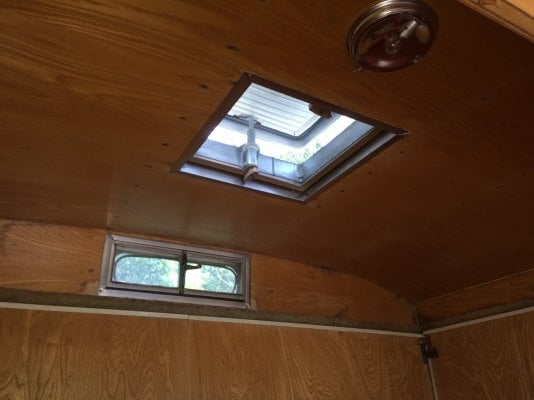
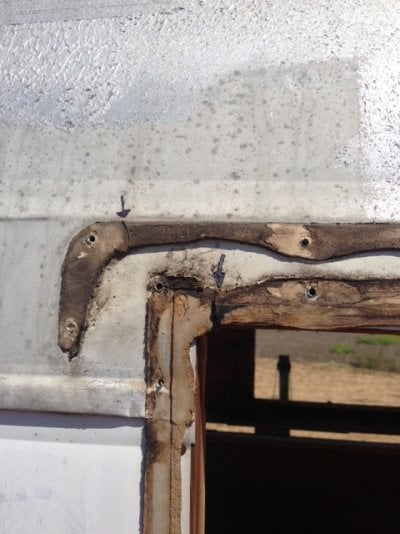
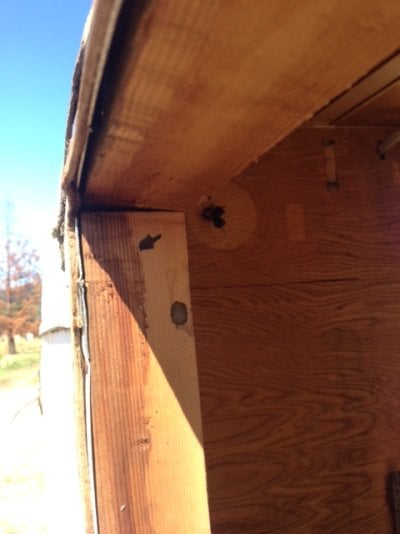
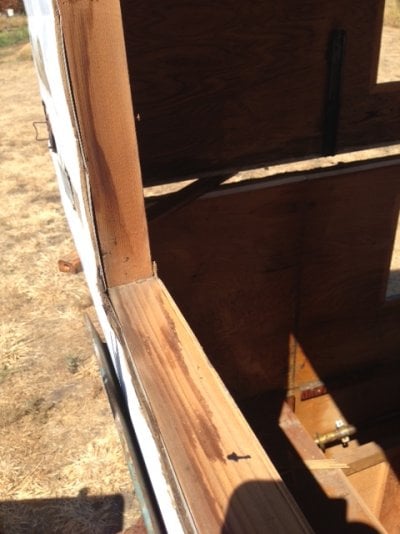
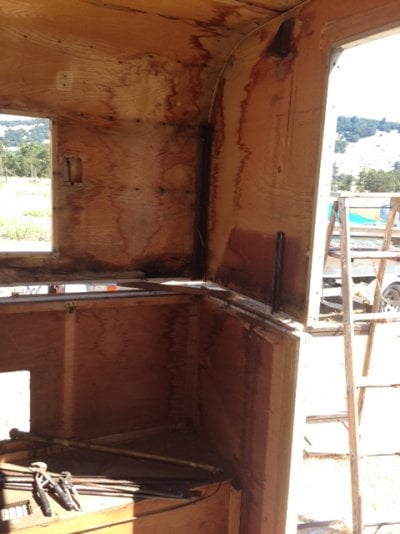
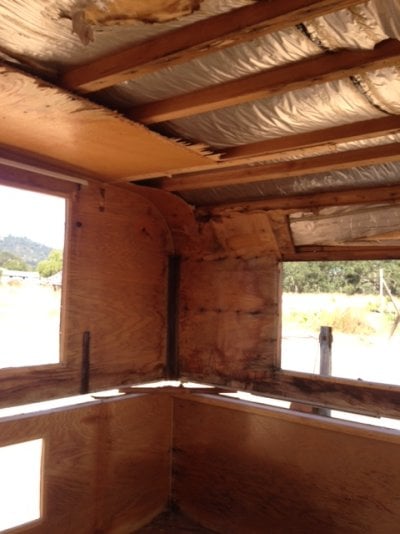
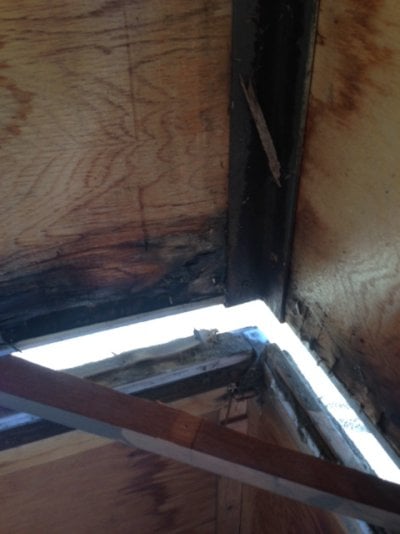
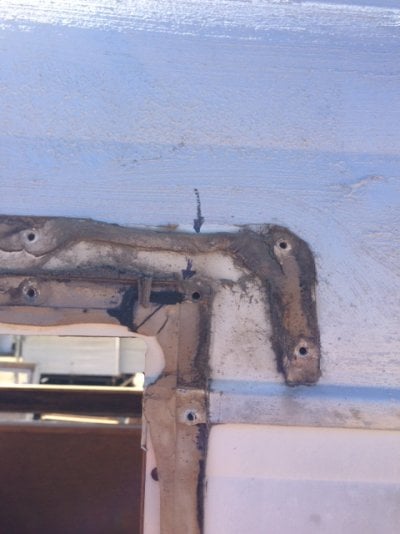
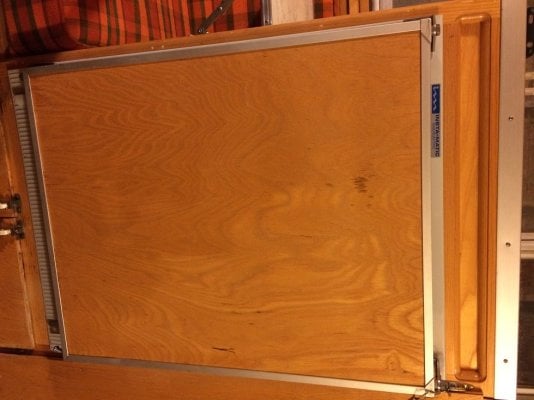
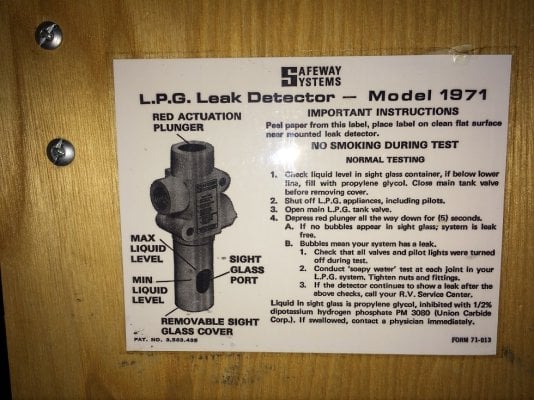
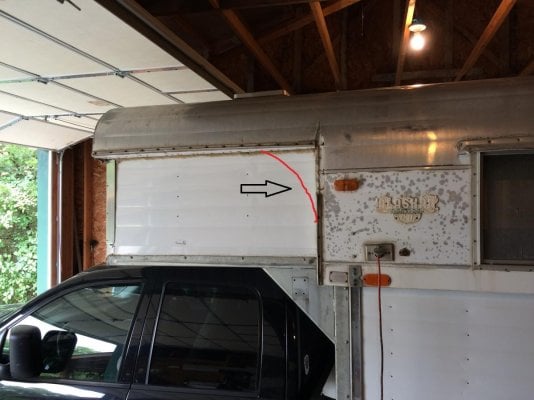
No longer on the market but now sitting on my truck! Hi I am new to this forum and have been following and learning for some time. I have owned a couple of truck campers through the years and still have a real-lite 1999 camper we still enjoy and use often. I finally pulled the trigger on this camper as it was close enough to my home in Missouri. After 1200 miles and some scary camper jack moments loading I finally own an Alaskan Camper. The first day home I cleaned and photographed inside and out and removed the old seals, added some hydraulic fluid and was able to raise and lower the top several times. I cleaned the tracks and of course found some issues with doughty wood on the top part. It has quite a bit of hail damage but overall I am happy with it. A new top skin is in the plans. The lower portion of the camper is in very good shape with no soft or rotten wood that I can find so far. The top portion will need rebuilt as it had water intrusion around the windows, the back vent and the front portion of the CO. Here are some pics.


Clear Skies

Pawpaw
 

Attachments

  • IMG_3578B.jpg
    IMG_3578B.jpg
    271.5 KB · Views: 198
  • IMG_3654B.jpg
    IMG_3654B.jpg
    156.6 KB · Views: 182
Can't find a S/N however the manufacturing label shows Ft Lupton
 

Attachments

  • IMG_3587A.jpg
    IMG_3587A.jpg
    229.9 KB · Views: 115
if that was the one in Pueblo...you got a nice interior!!

hail damage is no more than a pebble finish...get in rain proof and have fun

Welcome to the herd :D

find yourself 4 reico titan or atwood tripod jacks and forget about loading anxiety.....
 
Hi Rusty, yes this is the one from Pueblo. I did not see any holes from the hail I believe the leaks are from poor maintenance and the sealants around the vents degrading. I already am looking for jacks and will definitely add them to all four corners. This was my first experience with two camper jacks. Although they were in good shape and fairly new I will be selling them soon!

I have not yet tested the appliances but everything looks well taken care of. Here are some pics of the interior:
 

Attachments

  • IMG_3627A.jpg
    IMG_3627A.jpg
    246.5 KB · Views: 257
  • IMG_3662A.jpg
    IMG_3662A.jpg
    225.4 KB · Views: 245
Here is a pic of the staining around the back vent and a pic of the front vent which looks good.
 

Attachments

  • IMG_3659A.jpg
    IMG_3659A.jpg
    183.4 KB · Views: 173
  • IMG_3623A.jpg
    IMG_3623A.jpg
    166.5 KB · Views: 174
OK....you've got one of the nicest interiors I've seen....here's the deal...

Original window and vent seal were done with linseed oil putty strips...they dry out and crack...that's why you'll see staining around the windows and vents....Pull the windows off...clean off the linseed oil putty...use a heat gun, it'll soften the putty......and replace it with butyl glazing tape....a 1/2x1/8" tape will do (available at any glass shop)....do the same for all the eyebrows....you'll have the thing sealed up for the winter...protect that ash interior....it's a jewel

you can use glazing beads as an alternate...I would install 2 lines of beading and remove the excess that smooges out.

Congrats....I wish my interior looked like that

After looking at your vent and the front...you'll want to do those forward and rear gutter seals too....they tend to pull away from the camper. be careful with the aluminum guttering....they don't make it anymore and Alaskan doesn't use it anymore...consider replacing the vent....Hail damage....looks like a shotgun.... :eek:
 
Rusty,
I think it helped that this one probably stayed in a dry climate its whole life. Pueblo gets 12 inches of rain annually. I can't prove it was in a dry climate its entire life but the owner said he purchased it in Pueblo from the original owner. What is your best guess on the date of build?
 
check the plate up by the 120v inlet...but the fact that it has an ash rim around the top of the bottom half puts it in the 70-72 range...73 they started installing beige plastic in it's place.....I'm replacing some of that plastic right now on my 1973 CO

You're entirely correct about the location...the best ones come out of the southwest...hot and dry

Your's got very little use...the inside of the doors was the first wood finish to show age...it typically wrinkled the finish off then greyed the Ash plywood...yours still has the finish on it...the door didn't get opened that much....lucky duck

also...the cross brace going into the cabover section got relieved not much after they came out...if you look at the newer cabovers the CO section has about a 6-8" relief on it...much easier to access the CO section....yours is straight across, mine is the same...I'll be talking to Brian this next week about how to deal with that...for better access...If the solid core plywood is strong enough we can just cut the section out with a jigsaw and line it with solid stock
 
a few reasons for the butyl tape
arrows in the first photo are of cracks in the dried caulking...photos in the next few are the stain track along the window frame
These are of a 1958 I'm salvaging right now
 

Attachments

  • corner1a.JPG
    corner1a.JPG
    131.7 KB · Views: 140
  • corner2a.JPG
    corner2a.JPG
    86.9 KB · Views: 139
  • corner3a.JPG
    corner3a.JPG
    114.8 KB · Views: 141
  • corner4a.JPG
    corner4a.JPG
    108.1 KB · Views: 148
mas...the arrows indicate where water penetrated the caulking
 

Attachments

  • corner5a.JPG
    corner5a.JPG
    105.9 KB · Views: 126
  • corner6a.JPG
    corner6a.JPG
    87.9 KB · Views: 129
  • corner7a.JPG
    corner7a.JPG
    111.2 KB · Views: 130
Rusty....Thanks the pics and info are very helpful. I spent some time this weekend cleaning and testing the appliances. To my surprise the instamatic 2-way fridge works on both 110v and propane. The stove top works and I was able to test the 110v circuit for the interior lights and duplex outlets. So far so good. Here are some pics of the fridge working. The fridge was manufactured in Japan by Howa Sangyo Co.
 

Attachments

  • IMG_3664A.jpg
    IMG_3664A.jpg
    113.1 KB · Views: 116
  • IMG_3667C.jpg
    IMG_3667C.jpg
    45 KB · Views: 122
  • IMG_3702B.jpg
    IMG_3702B.jpg
    107 KB · Views: 123
I also tested the propane catalytic heater and again works like a charm. I have read up on the danger of these heaters and their depletion of oxygen. I plan not to use this one. If I do go with a catalytic heater I will get a new one with venting to the outside and O2 shutoff. Another clue to the date of this camper was on an inside cabinet. Safeway Systems LPG leak detector placard was found on the inside cabinet of the sink. The detector is no long on the camper but the clue to the date is the form number on the bottom right of the placard. 71-013. Many manufacturers put dates on their forms and I believe this one denotes 1971. I think the model # 1971 could be a coincidence.
 

Attachments

  • IMG_3688D.jpg
    IMG_3688D.jpg
    332.6 KB · Views: 103
some people just live right....HaHa....1971 is about right...

remember...you've just brought a 1971 camper from a very dry and arid location to a wet and humid location.....even if you replace only the sealant under the eyebrows over the windows before you take on the aluminum top project....it will give you some protection from the weather....

I would expect the linseed oil putty to have dried out completely and cracked in several locations.....all of the caulking is the same kind

if you can't store it under cover for the winter and don't get to the top project....at least tarp it....the interior on that camper is special ;)
 
It has been in the dry since arriving in Missouri and will stay inside until completely resealed and leak proof. We have on average 33 inches of rain per year, not a great environment for RV's sitting outside.

I have a question on the CO section. I have yet to find a picture of a CO that does not have a curved knee brace (for lack of better term) where I have highlighted in the picture below. Were the first CO's made by Alaskan void of the knee brace?
 

Attachments

  • IMG_3690A.jpg
    IMG_3690A.jpg
    113.3 KB · Views: 177
I knew something was missing......I've never seen one like that either...

maybe a tweak from a local builder...I know there was a shop in Colorado
 
there's something else about that picture...the guide is on the side...as installed on the newer Alaskans...mine is a 73 and the guide is on the front of the section, just behind the curved portion.....

the bolting of the guide and supporting hardware is problematic to the design of mine...larger holes (1/4") penetrating the siding adjacent to the rain gutter (with no sealant)....

probably one of the reasons that section is the focus of a good number of repairs.
 
Back
Top Bottom