Alaskan camper - Connecting top and bottom wiring ideas

PNWalaskanCamper

New Member
Joined
Apr 6, 2023
Messages
8
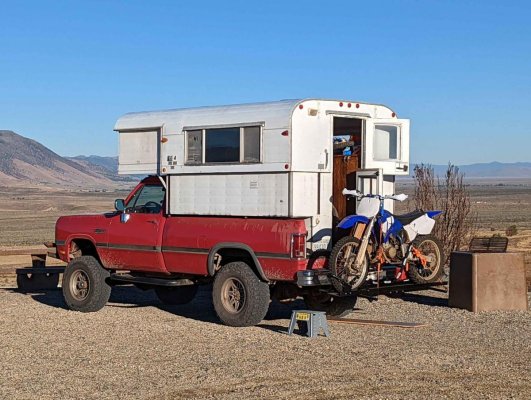
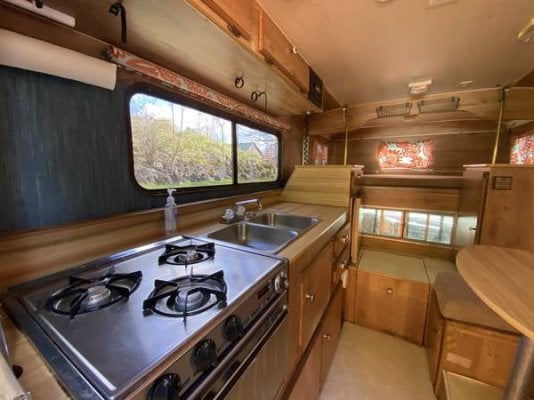
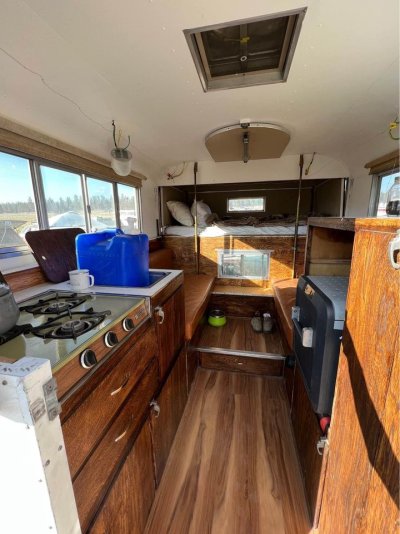
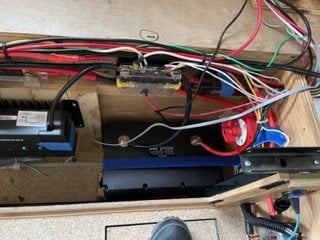
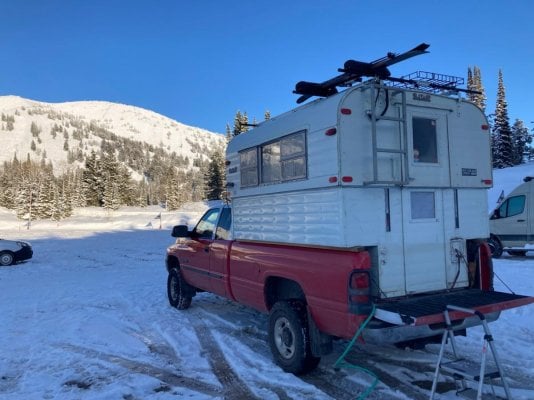
I got a '73 Alaskan CO last fall, and I am doing some work to prepare it for this summer camping. Currently, it has been setup with a battery and isolator that charges it from the truck under one of the benches, so all the wiring is in the lower half, no power going to the top.
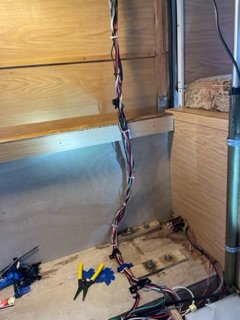
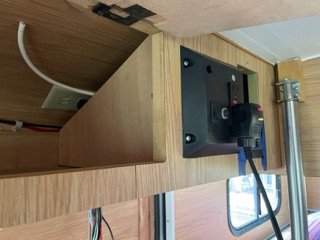
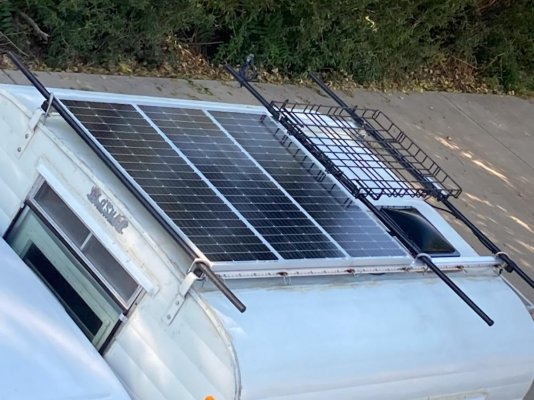
I would like to add some solar panels to the top, and the biggest planning obstacle I have run into is how to neatly run wires from the top to the bottom half without it looking like a mess. Does anyone have pictures of their setup, or suggestions?

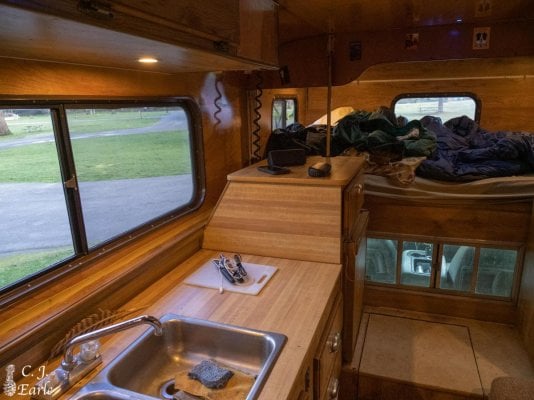
Before I was considering solar, one idea I had was using coiled, spring like wire, like the type you used to see on cigarette lighter car chargers and things like that, to bring power from the bottom to the top half for the lights and vent fan, but once I decided to do solar, I realized I was going to need much thicker wires than those could handle.

How are people who have added solar to their roofs bringing power to the bottom half, but still allowing for the movement between the two, and not having a big bundle of wires getting in the way of things?

Any ideas or pictures would be extremely helpful, thanks!
 

Attachments

  • PXL_20220923_150926431smal2l.jpg
    PXL_20220923_150926431smal2l.jpg
    191.2 KB · Views: 62
Nice looking rig! As for wires, is there not already a bundle going up for the ceiling lights/fan? I recall seeing pictures of newer Alaskans that appear to have one. The solar panels don't need wires thicker than 10AWG, and only two of those, so you should be able to include those in the existing bundle, or not? If I was rewiring the ceiling, I'd include separate fused power wires (16g) for the lights and the fans. A single ground wire (12g) would work. Overall, that would not make for a very thick bundle.

I hope that helps.
 
On these older models (as far as I know) there wasn't any electrical connection between the bottom and the top. Both AC and DC (from the vehicle) ports were on the outside, drivers side, into the upper portion, so I guess it would be a dangling plug that you would connect to the vehicle, or shore power.

I haven't seen any newer ones in person, and not many pictures either, although I think I found a picture of what looks like a coiled wire connector from a somewhat newer one, which is one option I had been considering. I guess I just don't know much about what the "correct" way to do this would be, and I am concerned about premature wire wear, or snagging on something in the camper and ripping it out, or pinching when the top lowers if I do it wrong.
 

Attachments

  • AK1.jpeg
    AK1.jpeg
    39.3 KB · Views: 76
Here a photo of the interior of mine. the previous owner had done some renovations, and it looks like they had run new wires under the ceiling, but they aren't connected to any fixtures, and the wires don't have any connection to the bottom, where the actual battery setup is.
 

Attachments

  • 291421573_7987886507949545_4432953228166184518_n.jpg
    291421573_7987886507949545_4432953228166184518_n.jpg
    113.4 KB · Views: 69
My son helped me put in a new Lithium ion battery, new inverter, charger, solar, dc to dc MPPT charge controller. He started it and I am almost done, just need to install the solar panel. In the upper area is the shore power plug in and battery charger that works from shore power. Everything else is in the lower area under the seat.
 

Attachments

  • 25F2DA1C-930B-451C-A28A-4B03268A9C88.jpeg
    25F2DA1C-930B-451C-A28A-4B03268A9C88.jpeg
    29 KB · Views: 82
  • E1C969C9-CE0D-4270-B0B4-DB744B8C16C3.jpeg
    E1C969C9-CE0D-4270-B0B4-DB744B8C16C3.jpeg
    33.4 KB · Views: 71
  • 28403FD2-0F1A-4CCC-826C-3669E4A6C512.jpeg
    28403FD2-0F1A-4CCC-826C-3669E4A6C512.jpeg
    27.1 KB · Views: 80
  • FACEFBCE-A781-4E4B-AF29-FCADDF5D4D13.jpeg
    FACEFBCE-A781-4E4B-AF29-FCADDF5D4D13.jpeg
    37.3 KB · Views: 78
  • EAD73730-F4F5-422C-8AD2-B233A9A83765.jpeg
    EAD73730-F4F5-422C-8AD2-B233A9A83765.jpeg
    25.3 KB · Views: 75
That looks like a great setup, I'm researching different MPPT charge controllers right now, but definitely thinking about getting that Renogy one.

Do you know how you are going to attach the solar panels to the roof? That seems to be a bit of an issue for lots of Alaskans, since the roof is so thin. I've been thinking about gluing and screwing an aluminum T track to the roof, making sure to screw into the wood beams, then mounting the solar panels to the track. This way I can move the panels around a bit, or remove easily if I need to, and don't have to make as many holes in the roof.

I watched this video that gave me the idea, https://youtu.be/uvMYv7afUWM?t=1014
but he is using much heavier duty metal track than I would use, I would use wood working aluminum T track, like this:
 

Attachments

  • t-track_01.jpg
    t-track_01.jpg
    13.7 KB · Views: 36
I’m going to something like that. I will post pictures when it’s installed! I bought all my renogy stuff from eBay. They have an eBay store for returns and refurbished items. I saved a lot of money that way.
 
PNWAC, I am in the middle of undoing and redoing the PO's electrical system on a 2000's era 10' CO. To give you some ideas, PO was carrying kayaks in addition to a 200W solar panel so built a heavy-duty rack.
full


The top to bottom in that era of camper is via a bundle of cables wrapped in a cloth (velcroed) sleeve that has plenty of room to add more wires. This image is off the web... (mine is similar).

full


Entry of solar panel wire to top half is via the cable entry gland. Here is a pic of mine...

full


The MPPT, Shunt, battery and most of the messy wiring is all under the driver side bench similar to Cowgirl's, that I am in the process of cleaning up.
 
My 1990 Alaskan has a black spiral cord connecting the upper to the lower shell, as shown in the photo. It also had an external jack due to the rather bizarre system of taking shore power into the lower shell, routing it to a power center in the upper shell, and then back down through 12V in the spiral cord. Spiral extension cords of similar design are on Amazon; you'll probably want 3 conductors with one hot, one ground, and one truck power for your running lights.

Regarding wire sizes, this wire gauge calculator is useful. I used it when I rewired my Alaskan.
https://www.wirebarn.com/Wire-Calculator-_ep_41.html
 

Attachments

  • 2022.03.03-163755.jpg
    2022.03.03-163755.jpg
    142.7 KB · Views: 67
Dr.Science, that spiral wire is exactly what I was thinking about doing, thanks. I think I am going to do one 18AWG spiral in that same corner to power lights, fans, etc in the ceiling, then by the door near the back I will have a 10AWG spiral bringing the solar power down from the roof to the batteries.

OregonOzzy, wow, that is a very sturdy looking rack! Thanks for the ideas, I will definitely be getting some sort of wire "gland" like that one to bring the wires inside the camper.
 
I ran a bundle of wires from the top to bottom half by drilling a hole in the corner of the bottom of the cabinet above the stove top, and in the corner of the stove countertop. Used expandable branded wire wrap. 8awg wires come down from the solar panels and 10awg wires (+/-) go back up from the battery to the new upper fuse panel for the porch light, ceiling fan, water pump switch, and ceiling lights. Routed wires behind kitchen cabinets and around under floor cabinet (under kitchen table) to the right side cabinet where my 100ah lithium battery and Renogy controller-DC/DC charger are located.
My three 100w solar panels are bolted to 1.5” mill finish square aluminum tubing, which is bolted to the original Alaskan canoe rack brackets. This rack has proved to be sturdy, versatile, and secure. I would not glue solar panels to my roof.
Also deleted the original porch light and mounted a gland there to run wires up and into the upper cabinet. The new porch light is a 40 LED unit, which is visible to distant galaxies, and is mounted to the rear of the roof rack.
 

Attachments

  • 7B519182-BB7A-44F8-8851-4A34A815B726.jpeg
    7B519182-BB7A-44F8-8851-4A34A815B726.jpeg
    143.9 KB · Views: 88
  • FC1EA006-23E3-47C1-8F80-162DADA07051.jpeg
    FC1EA006-23E3-47C1-8F80-162DADA07051.jpeg
    132.8 KB · Views: 91
Cowgirl in Mt said:
I’m going to something like that. I will post pictures when it’s installed! I bought all my renogy stuff from eBay. They have an eBay store for returns and refurbished items. I saved a lot of money that way.
Yes, they do, because their products fail and get warrantied and returned. I have had bad luck with Renogy.

I had a expensive DC/DC converter fail in the worst imaginable way, draining my starting batteries, stranding my pickup, less than 6 months after purchase. I will add that I have had good luck with their solar panels. For electronics, I stick with Victron now if possible.

I notice you have a 1000W inverter, what are you planning on running with that much AC power? Hope you have a big bank of batteries. I use a big inverter like that for a water heater, but I have 280ah of LiFePO4, and even then I don't like watching my capacity go down that quick and would rather charge on the road via alternator.

Anyway, love the Alaskan, and its always nice to get some power from the sun!

On to the OP question, how about 2 "conduits" like PVC or ABS pipes or even some sort of square channel, that could overlap/envelop each other. One fastened to the top, one to the bottom and the wires would live inside. Sort of like the old radio and TV antennas that were retractable.
 
New post, since I have done this in an actual Alaskan now.

I deemed the 120vac "shore power" setup worthless for my application so I simply plugged a 3 prong pigtail that is connected to my house battery, through a fuse, into the outlet that was located above my fridge cabinet. Effectively back-feeding 12V into the existing upper camper wiring and fixtures.

The pigtail is connected to 12v DC from my house battery, and now all the existing plugs and light fixtures in the upper half of the camper are 12V as well. Breaker box was removed and its just a junction for the wiring in the wooden box on the ceiling now. I was also able to fish a wire from the ceiling box over to the roof vent space so I could install a 10 speed intake/exhaust fan. (After I replaced the rotten wood surrounding the OG vent)

Drawback is that you have to unplug the pig tail from the outlet it to lower the top half, so you wont have top half power in the lowered position. Also, the prongs of your pigtail are live, so cover them with something when you unplug, or you will short them out on the metal venting above the fridge (Learned this the hard way).

One other thing, I changed the outside plug to an outlet. This way, no one is going to try and plug 120VAC into the 12V system, and now I have a convenient spot to run 12V things on the outside of the camper as well.

House battery resides in the huge void behind the DC fridge, along with 1500W inverter for water heater, a DC-DC charge relay, and 2 AC battery chargers. Outside vent is plugged with foil backed foam insulation. New shore power plug is on the back of the camper and connects to battery chargers only.
 
Back
Top Bottom