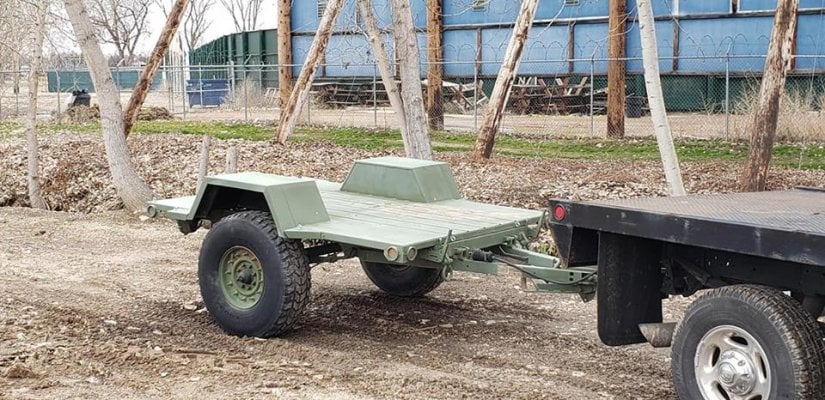
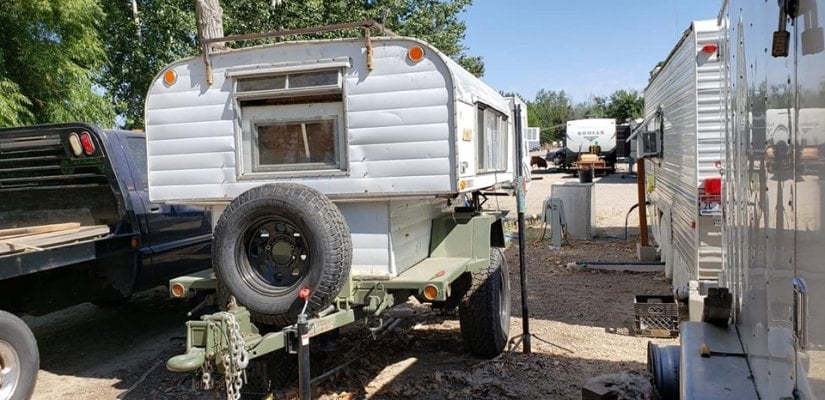
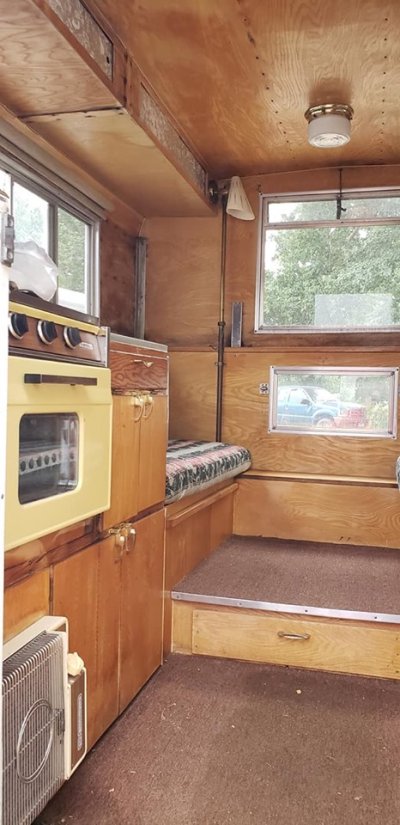
I bought 1968 Alaskan NCO and was going to put it on the back of my PU truck. But changed my mind and decided to put it on a trailer. Looked at many utility trailers but they all seemed to be a bit on the wimpy side so I started looking for a 1 ton military generator trailer. Reason being that I bought an 1984 Dodge Ramcharger and want to be able to drop the camper and go explore.
You are using an out of date browser. It may not display this or other websites correctly.
You should upgrade or use an alternative browser.
You should upgrade or use an alternative browser.
Alaskan expedition trailer
- Thread starter Harold
- Start date
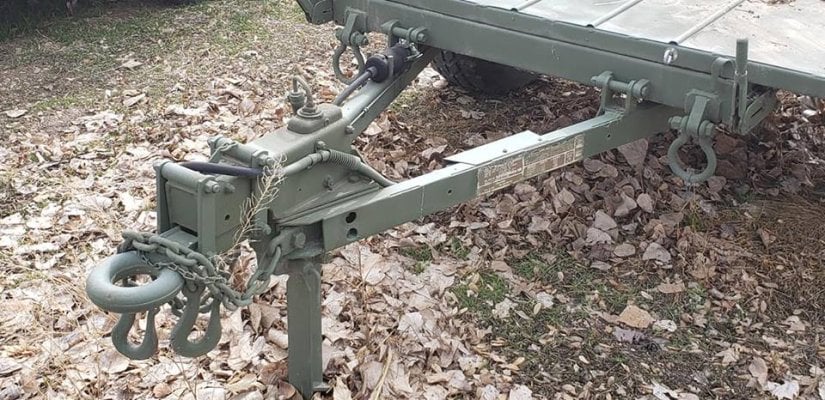
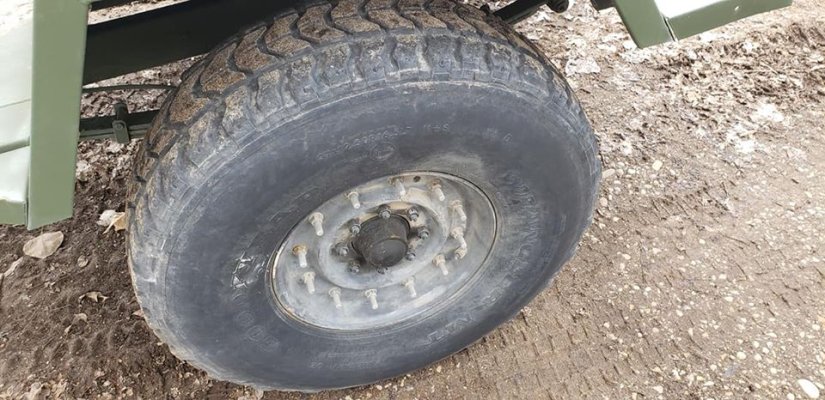
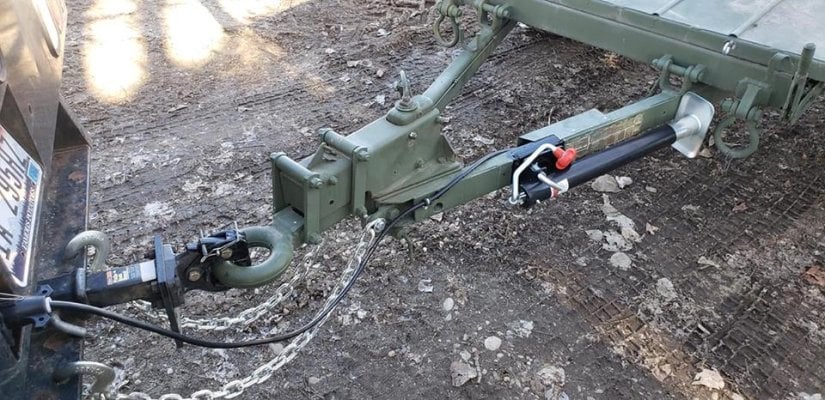
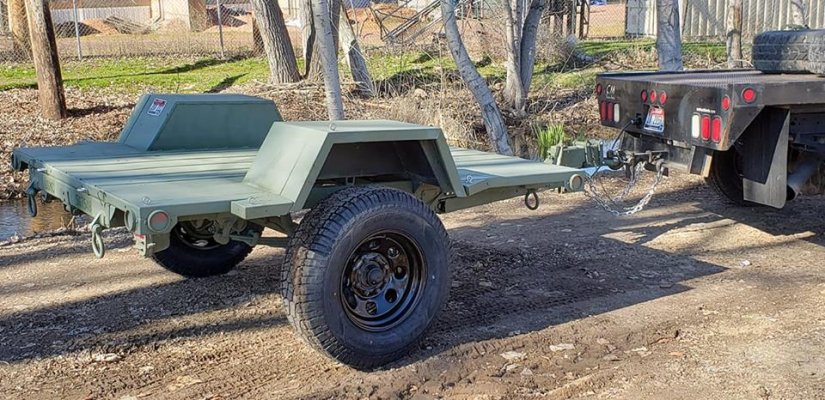
Did the 12 volt conversion to the wiring. Had them install a swivel tongue jack also along with longer safety chains. Trailer came equipped with surge brakes so I had them check to see if the system was still operable and to my surprise it was. Last thing was the axle bearing that were in good shape but very dry so had them cleaned and repacked. Stopped by the tire shop and ordered three new 17X9 steel wheels as those 37" Humvee tires are crazy expensive to replace. Going with a 10 ply 33X70R-17 all terrain truck tire.
Attachments
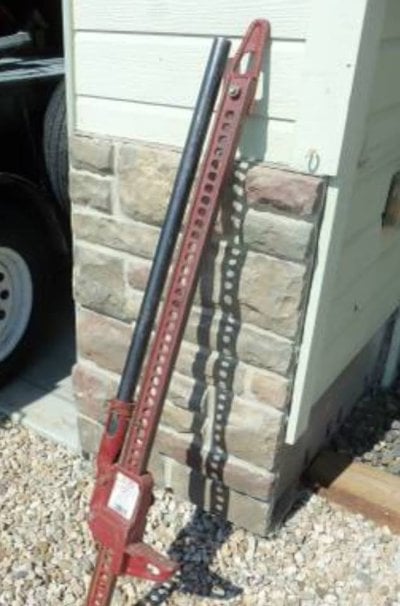
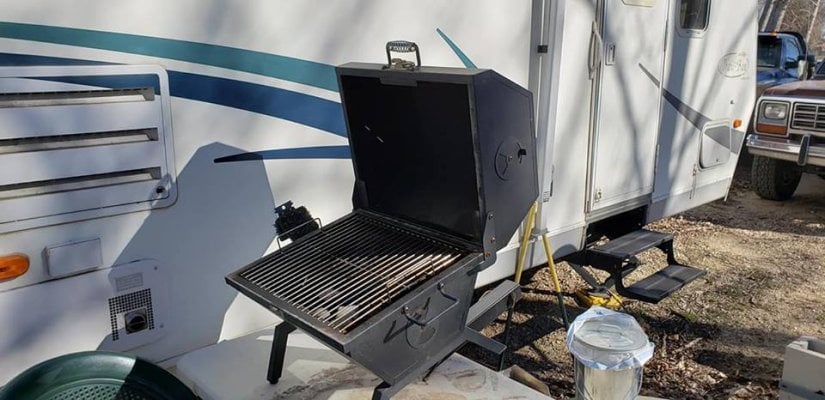
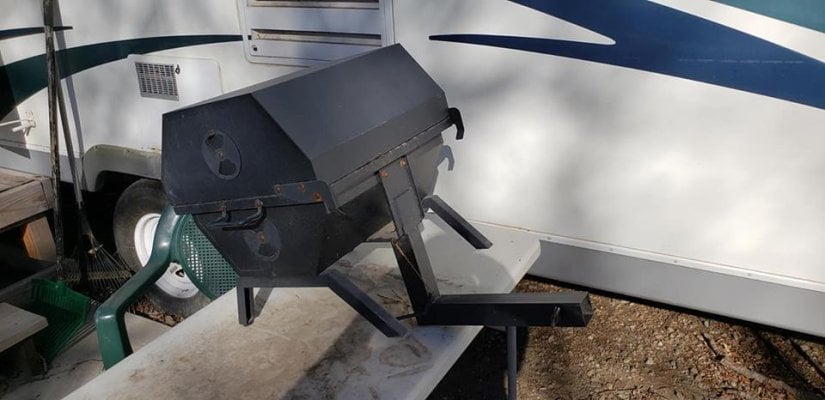
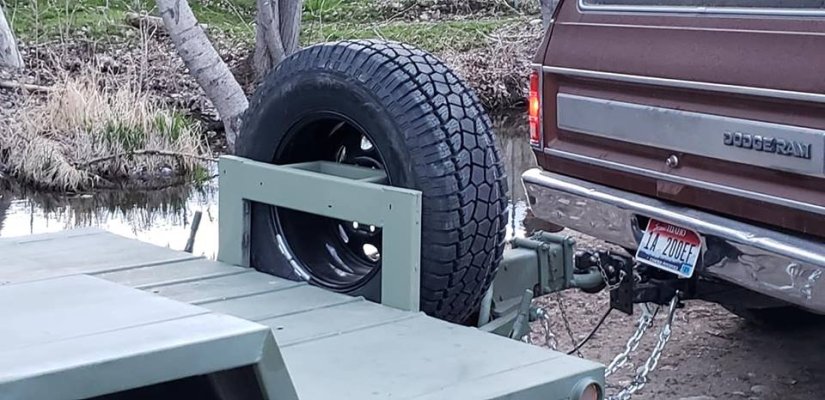
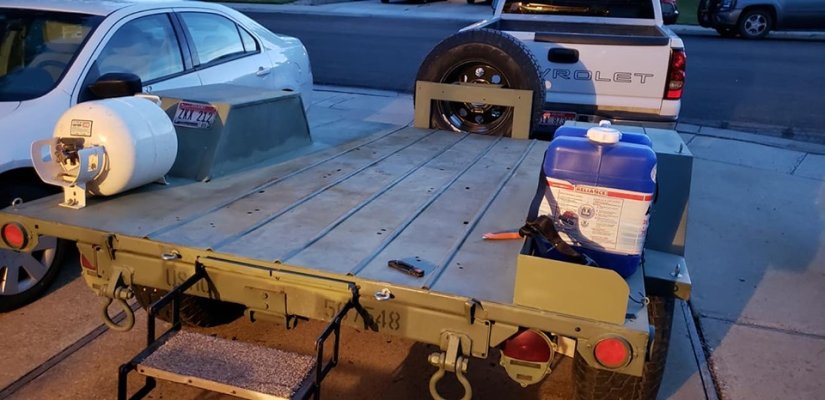
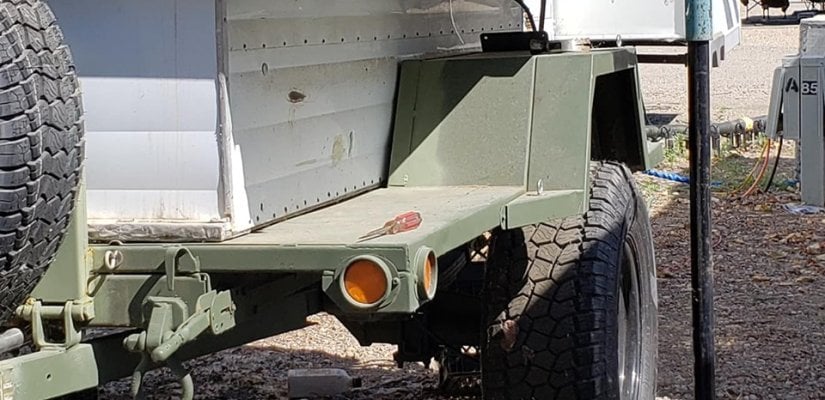
Trailer is over at the welders having a spare tire carrier fabricated. Found a nice secondhand 48" Hi Lift jack in Craigslist for $35 and also my neighbor gave me a receiver mount BBQ grill. Going to mount it on the passenger rear side of the trailer on a swing arm of some type. Definitely going to have be built stout as it will be at the rear of the trailer. Got the new tires and wheels for the trailer. Like the look over the 37" Run flats that came with it. Best part is I recouped some dollars by selling them off to Humvee enthusiast.
Attachments
huskyrunnr
Advanced Member
- Joined
- Dec 30, 2012
- Messages
- 71
Looks like it will be a very nice platform for the Alaskan.
Will you have to widen the gap between the wheel wells? I had to do that with my M101-A1.
Someday I will lose the Budd wheels and heavy axle on mine.
Will you have to widen the gap between the wheel wells? I had to do that with my M101-A1.
Someday I will lose the Budd wheels and heavy axle on mine.
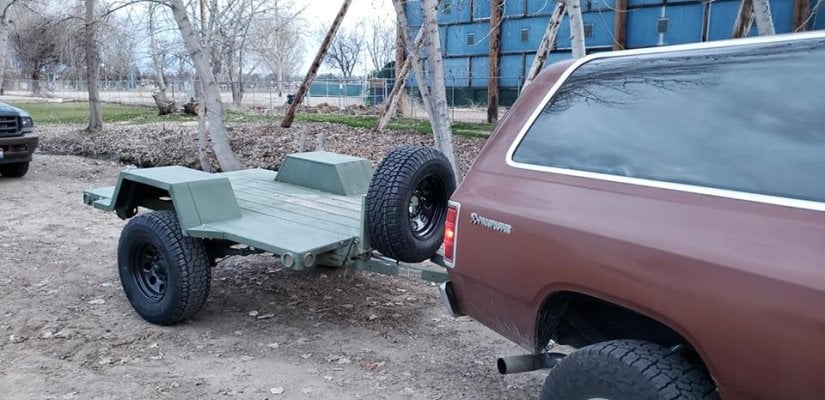
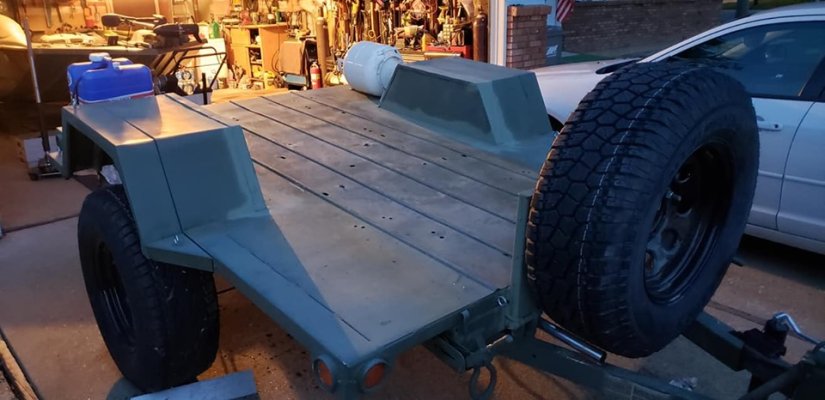
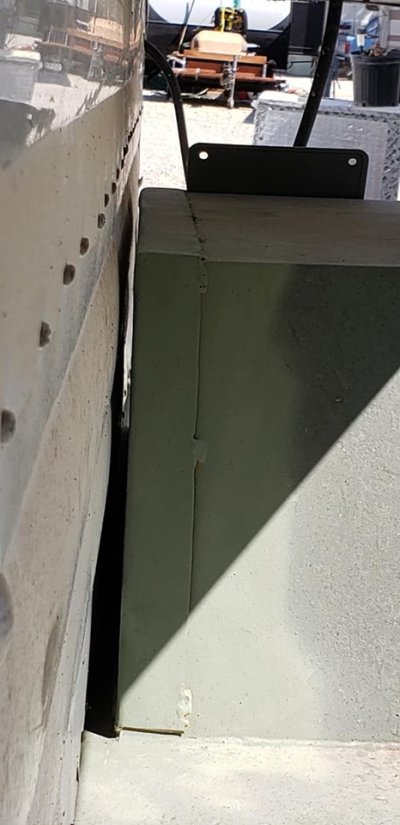
Ran into a little snag. Space between the fenders on the trailer is 45 inches. The width of my camper is 48 inches, fudge. No worries though going to take 2 inches total out of both inboard trailer fenders so that will give an inch to spare on clearance. If it was easy everybody would do it.
The spare tire rack I had built is very stout.
The spare tire rack I had built is very stout.
Attachments
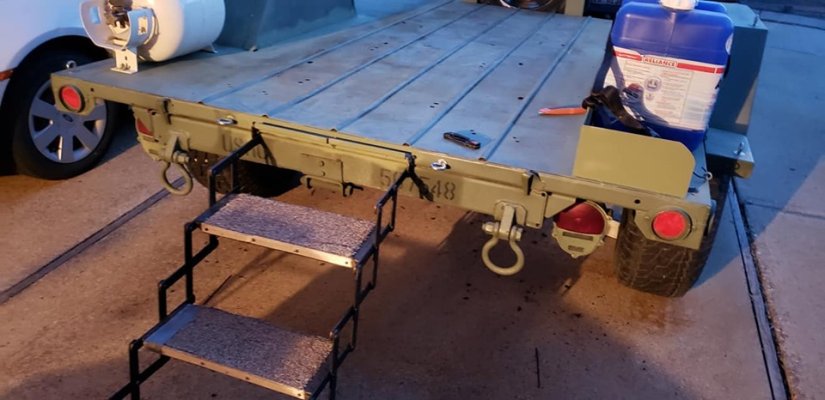
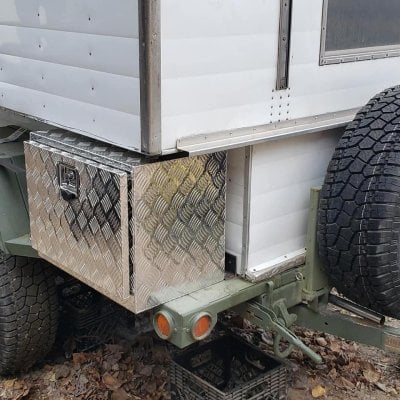
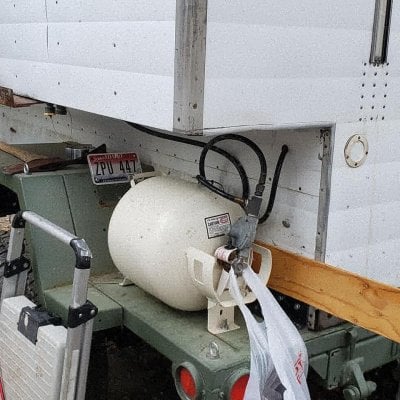
Got most of the trailer modification done. Took two and half inches out of each inner fender so to widen the deck so the Alaskan camper will fit between the fenders.Welded brackets to hold the horizontal propane tank and a place for two 7 gallon water jugs. Have on order a aluminum lock box that will be fitted ahead of the right fender for tool storage and a pair of telescoping stabilizer jacks for the rear of the trailer.Also brackets to for my folding steps on the rear of the trailer.Tow vehicle has undergone a re manufactured engine replacing the 318 with a 360. Doing my best to get this finished before the end of July as I am to meet up with family near Bridgeport, CA. for a camping trip.
Attachments
Bigfoot Dave
Senior Member
- Joined
- Apr 11, 2015
- Messages
- 131
If I remember right you can get different size orfices that go where the brake line leaves the surge unit. These adjust for the load size and sensitivity of the surge brakes. Have a great weekend, Bigfoot Dave
PackRat
Senior Member
You mentioned the trailer bouncing around going down the highway and you hoped the Alaskan plus gear would mellow that out. I am not familiar with that trailer but if it does not have shock absorbers it might still continue to bounce around on uneven roads. You have modified the trailer pretty well, have you considered adding shocks if it does not have them or replacing them with a pair designed for the weight of the trailer plus the Alaskan plus your gear?
By the way, securing the Alaskan to the trailer can be done many ways but all put some strain on the plywood at some point. Using a trailer with no shocks on it would be like removing the shocks from your truck and driving around with the Alaskan in it....not recommended at all!
What about using some angle iron bolted to the deck with the vertical angle towards the camper? Adding some kind of some rubber snubber before you secure the angle iron to the side so some slight cushion is provided when the rig hits uneven, rutted, washouts. Then you can add the turnbuckles to keep it from bouncing out of the angle iron. Put some slats crossways to keep water off the bottom of the camper and a couple ways for water to drain from the angle iron frame and you would be good to go.
The rig looks pretty cool.... I'd consider permanently mounting a couple levels so you can check that BEFORE you disconnect the truck. Having a jack on all four corners then lets you fine tune the rig to LEVEL....Alaskans are very particular about being dead flat level to avoid binding the tracks when the top is being raised/lowered. It also makes your bunk dead flat also so you aren't trying to sleep on a slope...
Yesterday morning myself and a couple other guys loaded the Alaskan on the trailer. In one of the pictures you can see it was a tight fit.
Bigfoot Dave
Behind the lunette is a small heavy duty shock that controls the pressure to the master cylinder. If that shock is worn out it will cause the surge brakes to over brake causing the problem I had. I found out what the problem was by joining a military trailer group on Facebook and asking questions. I bought and replaced that shock and now the trailer brakes smoothly.
PackRat
I read all that you said and agree with all of it. I am going to use 2x3 angle on either side of the fenders to secure the camper to the trailer deck. Originally Alaskans were bolted through the floor and the truck bed. I may also do that just for an extra precaution. The trailer has leaf springs and shock absorbers from factory.
And for the landing legs I will have two out back for now but will add a couple up front at a later date.
Attachments
ntsqd
Custom User Title
Use a stout enough landing jack and you really only need one up front. Easier to level, too.
CougarCouple
Senior Member
Looking good Harold.
Russ
Russ
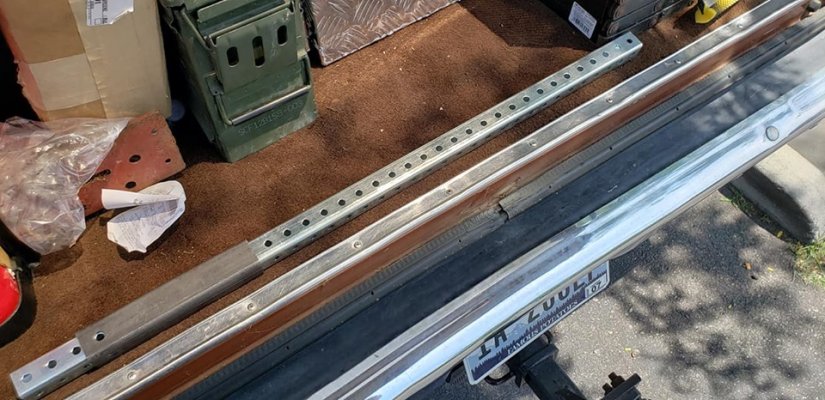
About two months ago I was looking for telescoping landing legs for the back of the trailer. I seen these on Amazon and thought they would be perfect. Knucklehead me didn't read the entire listing and when they arrived is all I can say is they are for a low deck cargo trailer. In total about two feet long. I thought about sending them back but the return postage would be about as much as I paid. So yesterday I was over at Home depot and seen that punched square tubing that fits through the weld on sleeve for the other landing gear. Going to cut the landing pads off the short ones and weld to the longer ones. In all my mistake cost me an extra $36 and change for the longer legs.
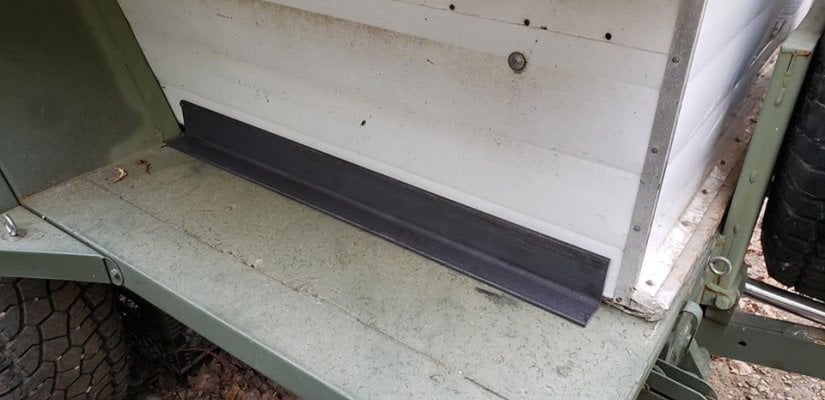
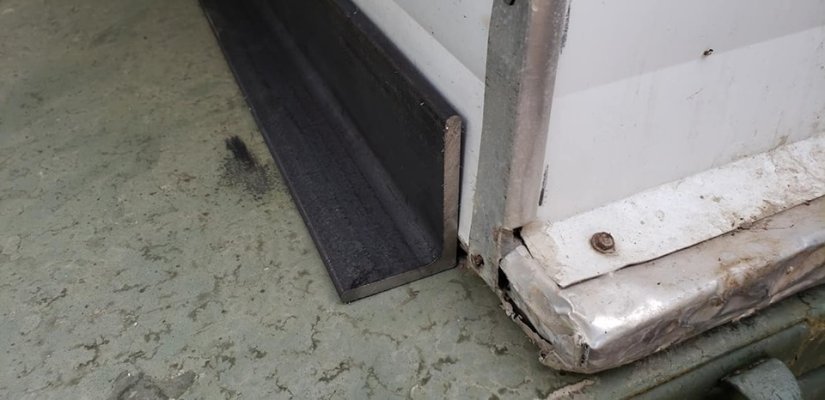
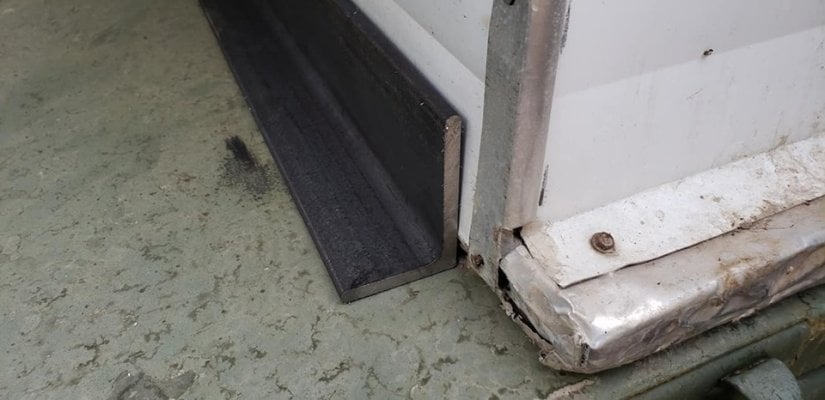
Today I bought the steel angle iron for the camper hold downs. 2x3 and a quarter inch thick is some what overkill but better safe than sorry. All the bolts will be grade 5 or 8 with nylock nuts and large area washer inside.
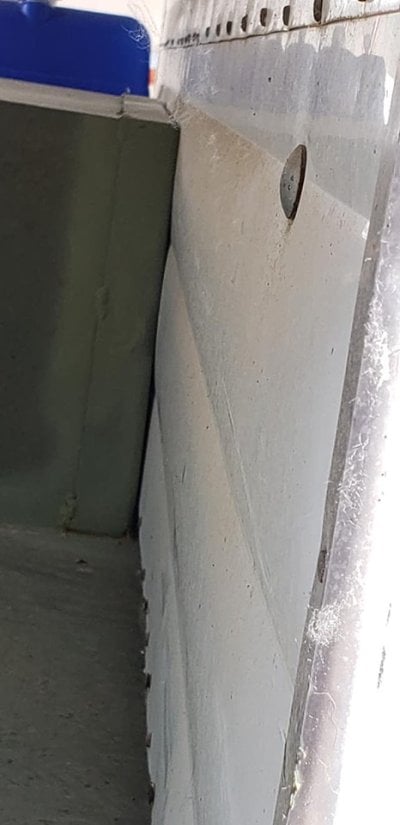
And I have one little issue that has me puzzled. When the camper was sitting on the milk crates both doors opened and closed perfectly. Now that the camper is on the trailer the bottom door is catching on the bottom left corner and won't close. All I can think of is the camper isn't setting level on the trailers deck or could be twisting. Need to lift the camper and see if there is something beneath that is causing my problem.
Today I bought the steel angle iron for the camper hold downs. 2x3 and a quarter inch thick is some what overkill but better safe than sorry. All the bolts will be grade 5 or 8 with nylock nuts and large area washer inside.
And I have one little issue that has me puzzled. When the camper was sitting on the milk crates both doors opened and closed perfectly. Now that the camper is on the trailer the bottom door is catching on the bottom left corner and won't close. All I can think of is the camper isn't setting level on the trailers deck or could be twisting. Need to lift the camper and see if there is something beneath that is causing my problem.
Attachments
PackRat
Senior Member
With the door closed, look at the edge of the door and the edge of the door frame....there should be the same amount of the door frame exposed at the top and bottom.
Too much exposed at the top of the door and the upper section will bind on the slides making it difficult to raise and a real bear to lower evenly...but that appears to not be your problem unless your door is hanging on the frame or has been rehung out of position of something...check that first!
I think you are onto the issue with an uneven trailer bed, one that is slightly bowed DOWN in the middle.
Next, get a long straight edge to sit on the trailer deck and compare that to sitting it on the angled steel across the rear of the camper to see what is out of whack.
You should post some photos of the door/door frame and the straight edge on the trailer deck
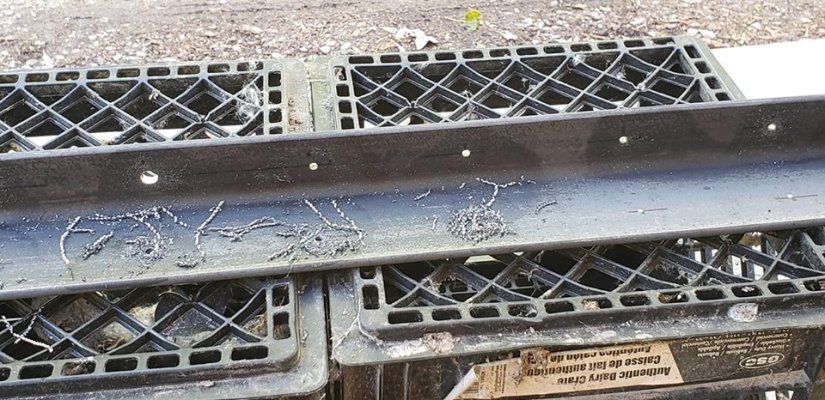
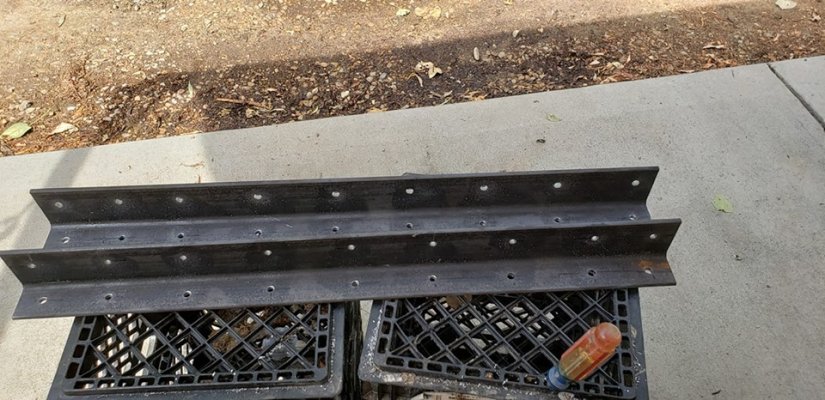
I will tell you I sure miss my drill press. Drilling all these holes with a 3/8 corded hand drill is son of a gun. Had to step away for a few and let the drill cool down. Got one of four angles done this morning and hope to get one more done before it gets to hot out.
Finished two of the four angle camper attachment angles.
Finished two of the four angle camper attachment angles.
Attachments
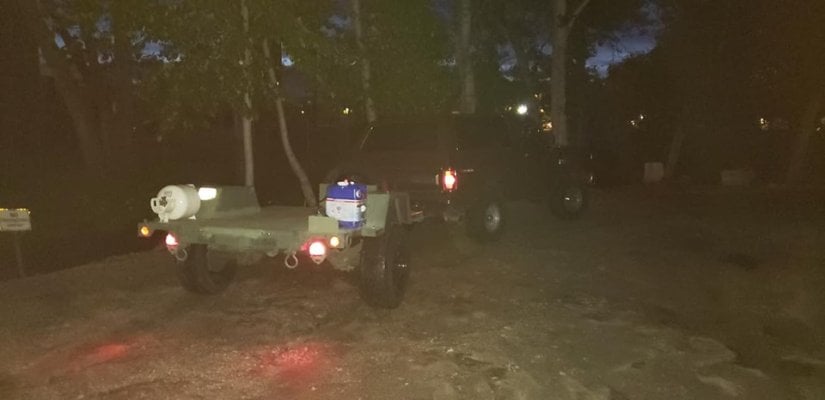
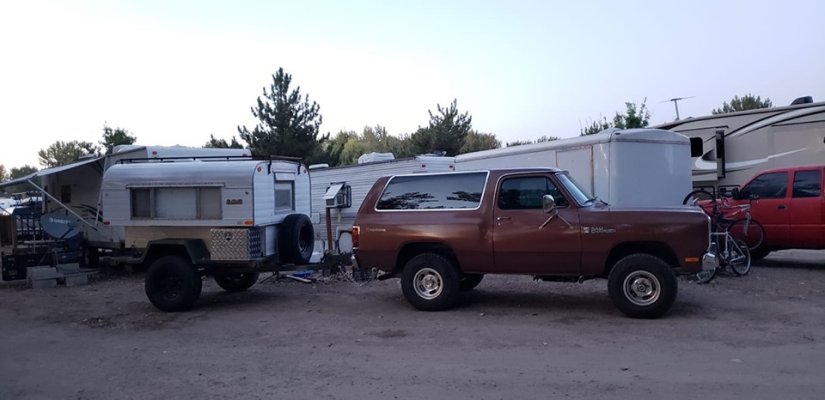
The M116A3 camper trailer conversion is complete. Thank you everyone for your suggestions and comments. Heading out at the end of July for Bridgeport CA for a family camp out.
Attachments
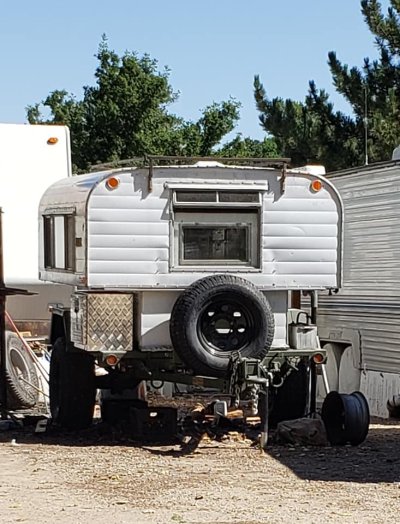
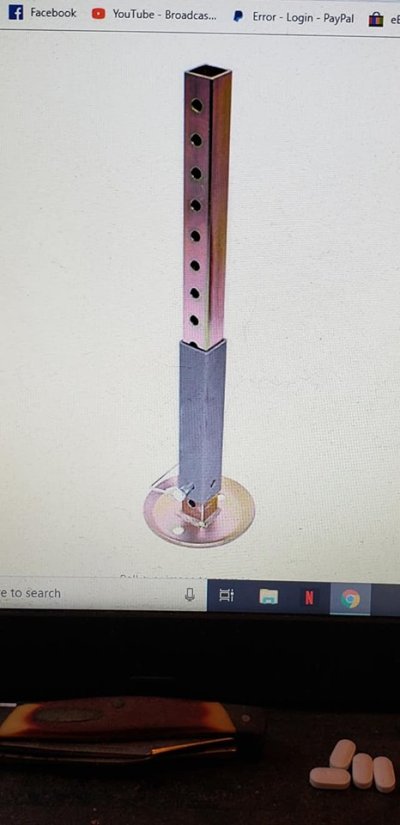
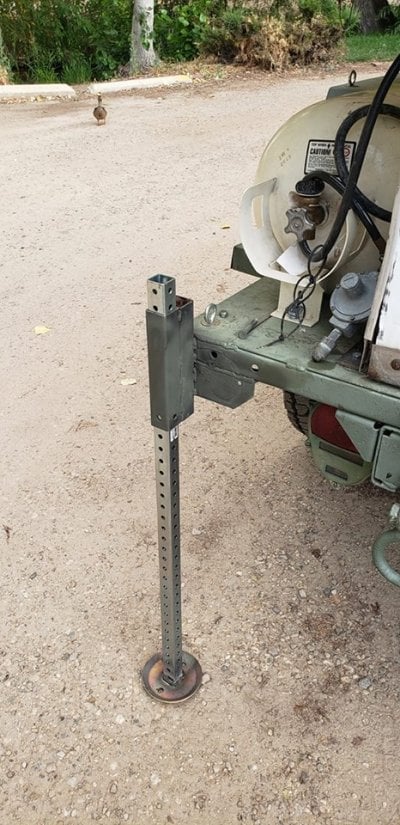
Last night I had the telescoping landing legs welded to the back of the trailer. Front to back leveling will be done by the tongue jack and side to side leveling by the two rear stabilizers. Needs to be level for the propane refrigerator to work correctly.
Attachments

kimosawboy
Advanced Member
- Joined
- Dec 5, 2016
- Messages
- 44
I get the front to back levelling but how do the two rear stabilizers work, I do not see any way to adjust.
I use a highlift jack to adjust height then place the keeper pin in accordingly.kimosawboy said:I get the front to back levelling but how do the two rear stabilizers work, I do not see any way to adjust.
Similar threads
- wyo george
- Alaskan Camper Discussions
- Replies: 4
- Views: 901
- IntoTheStorm
- Gear Exchange
- Replies: 1
- Views: 369
- Bos_Trok
- Alaskan Camper Discussions
- Replies: 10
- Views: 1K
- Sagefemme
- Four Wheel Camper Discussions
- Replies: 53
- Views: 2K