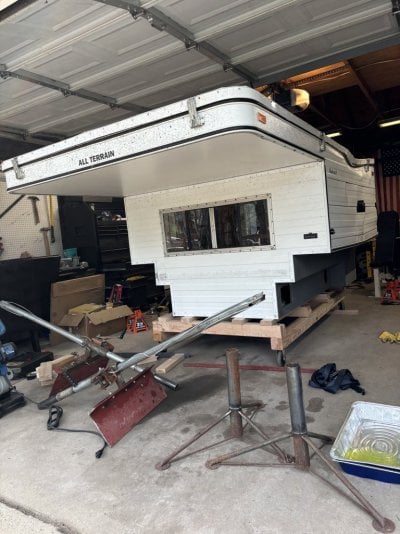
I recently picked up this ATC Bobcat that had a tree fall on one side of it. I’ll be updating this thread as I go through the process of fixing it. The driver side front/bed part of the camper is slightly bent up, and I’m not sure how to fix that. The best plan I’ve been able to come up with is drilling a hook or u bolt into the wood and using a winch to bend it back into shape while it’s still on the truck. Anyone have a better idea? I need to bend it down around 2 inches.
You are using an out of date browser. It may not display this or other websites correctly.
You should upgrade or use an alternative browser.
You should upgrade or use an alternative browser.
Fixing/upgrading tree damaged ATC Bobcat
- Thread starter enzob
- Start date
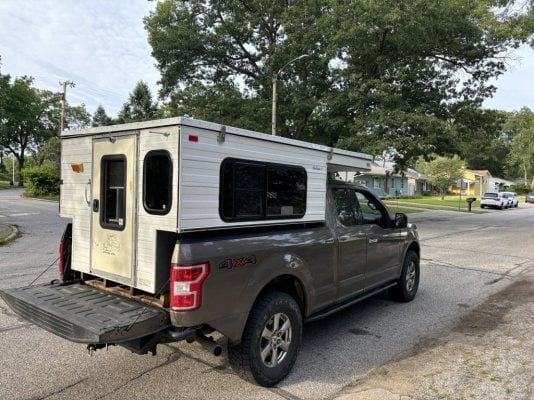
I hate to see that happen to a sweet little Bobcat. IMO, you have some issues with broken frames, and that trying to straighten the cabover may make things worse. You might consider removing the aluminum siding on the front and driver side to see what’s going on. I would look at build threads to get an idea of how the frame is built. ski3pin’s 2013 Bobcat build should have some construction photos that would help.I recently picked up this ATC Bobcat that had a tree fall on one side of it. I’ll be updating this thread as I go through the process of fixing it. The driver side front/bed part of the camper is slightly bent up, and I’m not sure how to fix that. The best plan I’ve been able to come up with is drilling a hook or u bolt into the wood and using a winch to bend it back into shape while it’s still on the truck. Anyone have a better idea? I need to bend it down around 2 inches.
Please document your repair for posterity and future use by others.
pods8
Contributors
That was the one in IL right? Congrats. I'm not clear what is bent on the cabover, can you clarify? In general I would assume you're stripping off the roofing and driver siding down to the frame to repair/replace the aluminum framing that is bent up?
On the bent question, are you saying the driverside frame rail is lifted up some? If so I wouldn't mess with that at all until you've fixed the lower side framing. When the tree fell it bent that down and 'shortened it a tad which flexed the cabover up if I'm understanding correctly. Once you've corrected that framing it might settle down into place.
On the bent question, are you saying the driverside frame rail is lifted up some? If so I wouldn't mess with that at all until you've fixed the lower side framing. When the tree fell it bent that down and 'shortened it a tad which flexed the cabover up if I'm understanding correctly. Once you've corrected that framing it might settle down into place.
Last edited:
Definitely will document it. I bought it like this so it was bad luck for the previous guy but I got it for a good priceI hate to see that happen to a sweet little Bobcat. IMO, you have some issues with broken frames, and that trying to straighten the cabover may make things worse. You might consider removing the aluminum siding on the front and driver side to see what’s going on. I would look at build threads to get an idea of how the frame is built. ski3pin’s 2013 Bobcat build should have some construction photos that would help.
Please document your repair for posterity and future use by others.
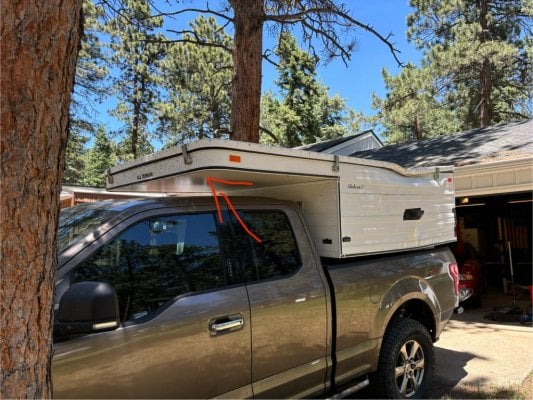
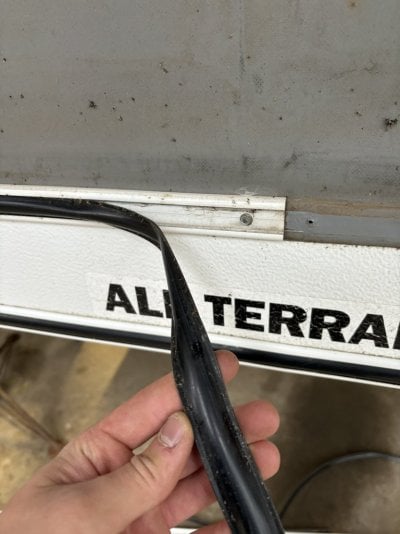
Yes it was the IL one. The red arrows in the picture point to it. The entire drivers side cabover part is slightly bent up, like 2 inches. Towards the back where the tree hit I plan to strip it down, but the cab over is in great shape except for being slightly bent up, essentially acted like a lever when the tree hit towards the back.That was the one in IL right? Congrats. I'm not clear what is bent on the cabover, can you clarify? In general I would assume you're stripping off the roofing and passenger siding down to the frame to repair/replace the aluminum framing that is bent up?
rubberlegs
back country campers
I don't know if you can straighten out the frame where the tree hit it, but that might straighten out the cabover section. Maybe if you cut that section, the cabover would drop back down the 2". Just conjecture!
Look at the first photo of the driver's side in post #1. The inward bending of the C channel at the point of impact is what moved the cabover upward. If possible, I'd cut the bent piece of C channel out and replace rearward to the back wall. I don't know enough about welding on what kind of joint to weld in and reinforce the C channel forward of the impact area.
What I call the C channel is the top piece of the frame that is bent around to form the cabover.


What I call the C channel is the top piece of the frame that is bent around to form the cabover.
Last edited:
pods8
Contributors
Part of it would depend on what structural shapes he's using. I would personally want some overlap joints and not just a butt weld against the cut portion, but the front of the cabover the C channel is just butt welded (but its also braced well by the floor of the cabover). Aluminum welds flexing back and forth can break over time, the more rigid the splice the better imho.Look at the first photo of the driver's side in post #1. The inward bending of the C channel at the point of impact is what moved the cabover upward. If possible, I'd cut the bent piece of C channel out and replace rearward to the back wall. I don't know enough about welding on what kind of joint to weld in and reinforce the C channel forward of the impact area.
Thanks for the pics and info. Hopefully going to start taking it apart tomorrowLook at the first photo of the driver's side in post #1. The inward bending of the C channel at the point of impact is what moved the cabover upward. If possible, I'd cut the bent piece of C channel out and replace rearward to the back wall. I don't know enough about welding on what kind of joint to weld in and reinforce the C channel forward of the impact area.
What I call the C channel is the top piece of the frame that is bent around to form the cabover.
I would totally strip it down and investigate the damage before getting too far into renovations. That is structural damage, not just cosmetic.
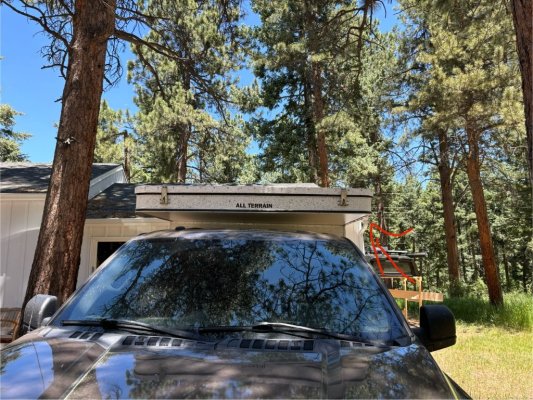
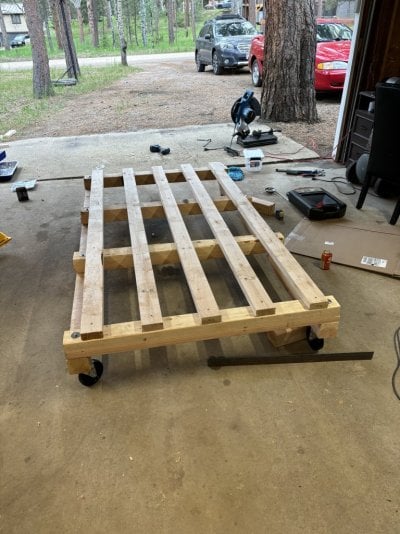
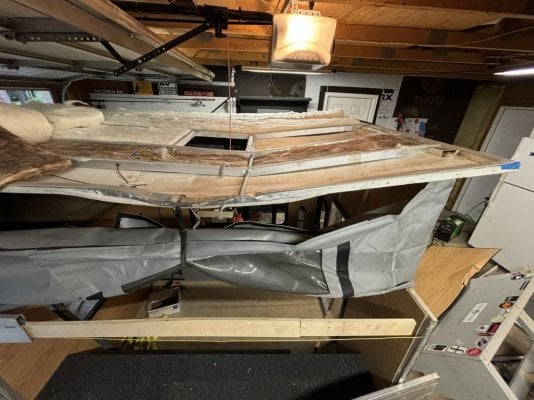
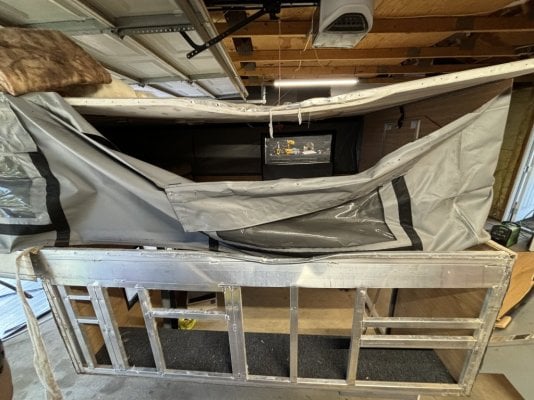
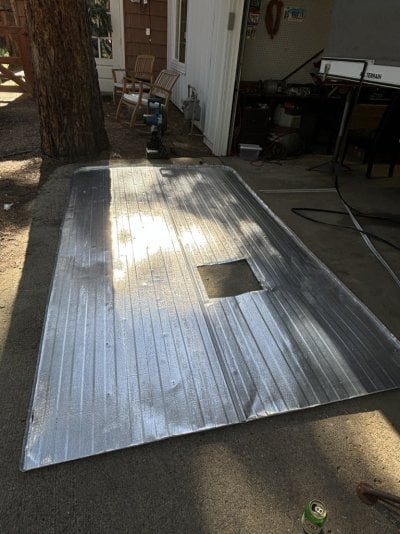
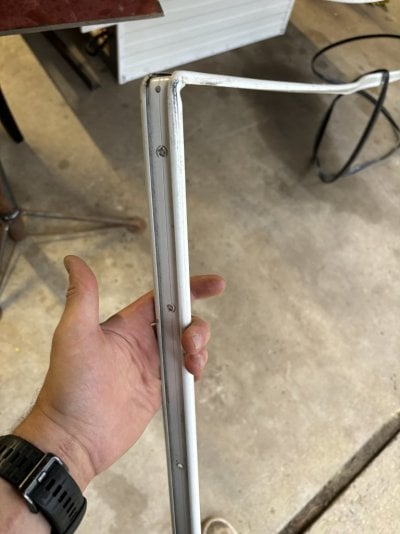
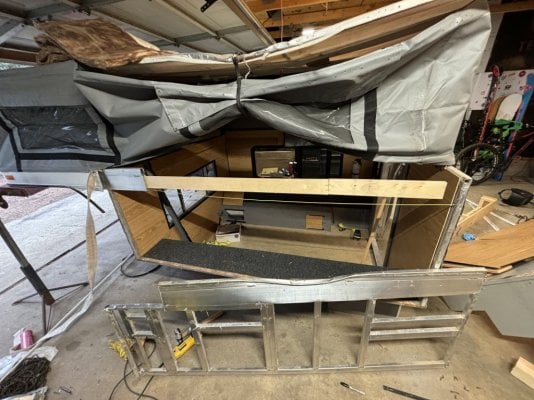
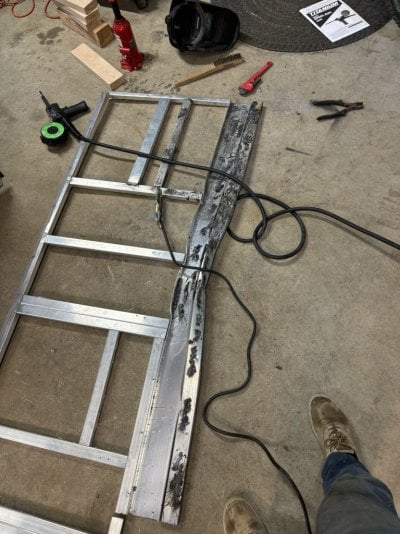
Day 2 went well and a lot was accomplished. I got the camper apart and was able to see what needed replaced, and learned that they really love staples over at ATC! I decided that I will be redoing the floor pack and both widening and making it taller to fit my full size truck better. Plus being 6’1”, the extra headroom will be nice. Luckily I was able to bang the roof back into shape and won’t have to replace that. I went and got aluminum to replace the bent parts, but decided to go with 1/8” thick rather than the 1/16” thick OEM stuff. It’s extremely tough to MIG weld the thin aluminum and 1/8” is way easier, and it should only add a few pounds. I called the folks at ATC and they were really great people and offered to send me the replacement headliner for just the cost of shipping - mine was water damaged. Does anyone know what the tracks that are bolted to the edges of the camper and flat pieces that are bolted to the roof are called or where I can get some, as well the rubber that fits in the tracks? See pics 1-3. Also, should I reuse the white and brown insulation or change over to something else, I will mostly be using the camper for skiing. Thanks for all the comments!

Attachments
wow, you are braver than I. The rubber stuff and all the bits you might need should be available through ATC. If not, the rubber stuff is here: https://www.amazon.ca/gp/product/B003YJHYT4/ref=ppx_yo_dt_b_search_asin_title?ie=UTF8&psc=1
(note that is a canadian link)
(note that is a canadian link)
Haha not sure I consider myself brave, as a young guy a new ATC isn’t in the budget thanks for the link.wow, you are braver than I. The rubber stuff and all the bits you might need should be available through ATC. If not, the rubber stuff is here: https://www.amazon.ca/gp/product/B003YJHYT4/ref=ppx_yo_dt_b_search_asin_title?ie=UTF8&psc=1
(note that is a canadian link)
pods8
Contributors
How far are you from Denver? “The metal company” has the tracks that aren’t the roof lip along with siding.
That roof lip is a custom extrusion that ATC and FWC have. I previously talked to Phoenix campers and they have a similar but different extrusion and I need to circle around with them about that. I don’t know other sources offhand.
That roof lip is a custom extrusion that ATC and FWC have. I previously talked to Phoenix campers and they have a similar but different extrusion and I need to circle around with them about that. I don’t know other sources offhand.
About 20 minutes! I spoke to the folks at the metal company and was planing to get my siding there. Good to know they have the tracks, I hadn’t asked about that. For the roof lip worst case I will use a piece of flat aluminum. Thanks for the info.How far are you from Denver? “The metal company” has the tracks that aren’t the roof lip along with siding.
That roof lip is a custom extrusion that ATC and FWC have. I previously talked to Phoenix campers and they have a similar but different extrusion and I need to circle around with them about that. I don’t know other sources offhand.
pods8
Contributors
The pages from the TMC catalogue with trim options are below, flat insert trim is what is around the top of the lower body perimeter. Insert lip trim is used in other places I believe along with cap trim. Sorry I'm going off memory some as I don't have an assembled camper in front of me.
The photo below has the FWC trim type on the right, the image on the left is what Pheonix had when I talked to them previously, that was a bit ago and I need to follow up with them for my build/rebuild. I'm tig welding on mine so I've been using 1/16". I'm planning to use XPS, pink or blue typically, (not white EPS) foam in the walls of mine because its more of a moisture barrier than EPS is. I haven't decided for sure what I'll use in my roof yet. Custom build - 1982 grandby ghost


The photo below has the FWC trim type on the right, the image on the left is what Pheonix had when I talked to them previously, that was a bit ago and I need to follow up with them for my build/rebuild. I'm tig welding on mine so I've been using 1/16". I'm planning to use XPS, pink or blue typically, (not white EPS) foam in the walls of mine because its more of a moisture barrier than EPS is. I haven't decided for sure what I'll use in my roof yet. Custom build - 1982 grandby ghost
Project is coming along. Got the frame all welded up and the floor pack off. Anyone know where I can find the two types of plastic trim they used on the inside, as well as the wood on the inside? It seems like some sort of wallpaper. Also looking for the thin strips that run along the roof. Thanks for the help from everyone so far


Similar threads
- SigSanDiego
- Four Wheel Camper Discussions
- Replies: 4
- Views: 581
Latest posts
-
 Front Suspension Damage - This needs To Be Fixed
- Latest: rubberlegs
-
-

-

-

-
-
-
