Foot operated water pump install

buckland

Senior Member
Joined
Jul 26, 2011
Messages
3,095
Location
New England
Howdy. 2011 Eagle. I have replaced my countertop and eliminated the sink. Moved the stove top to where sink was so that I can use the stove top when the bed is still pulled out...(make coffee while the Mrs. sleeps in).
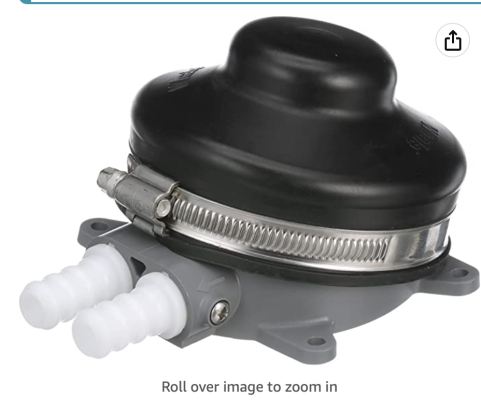
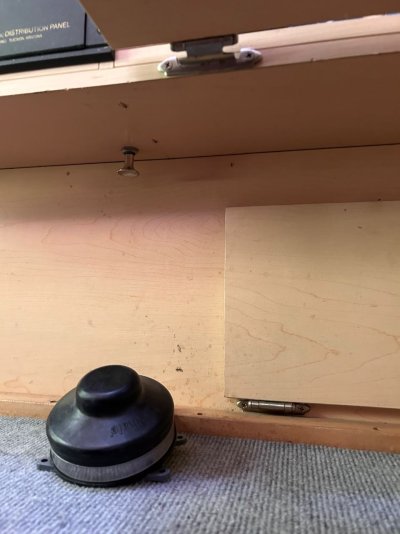
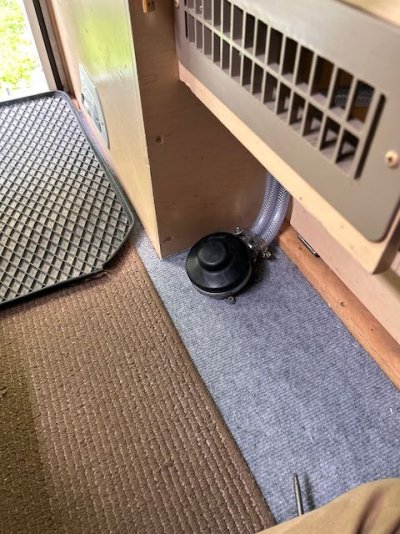
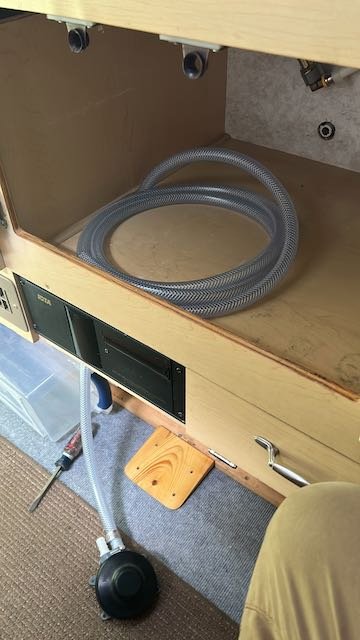
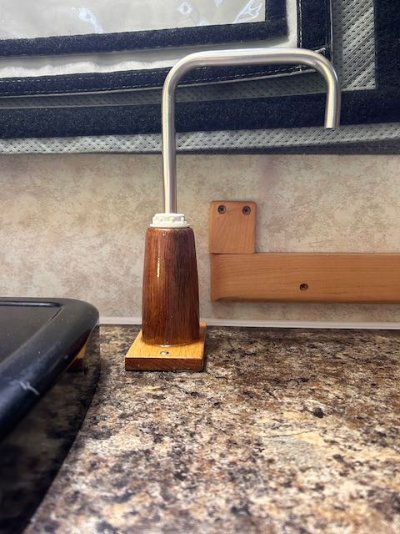
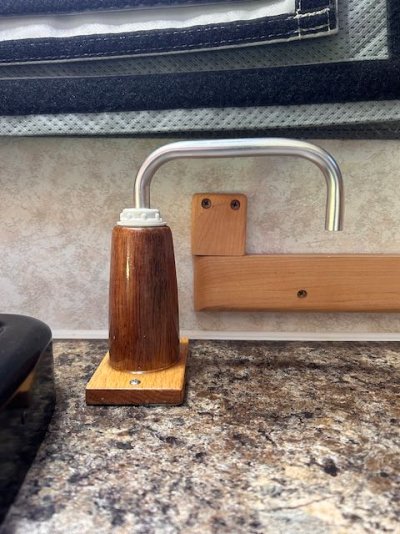
When I removed the sink I kept the water hand pump though we use the outside drain spigot mostly. The countertop hand pump does 'leak' water on the counter which irritates me... I've tried a few pumps and it seems endemic to the model.
My brother was a marine mechanic and suggested a floor foot pump, with the spigot on sink top is sealed and thus not leaky.
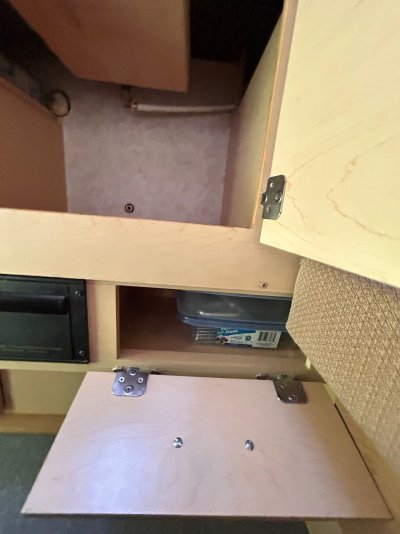
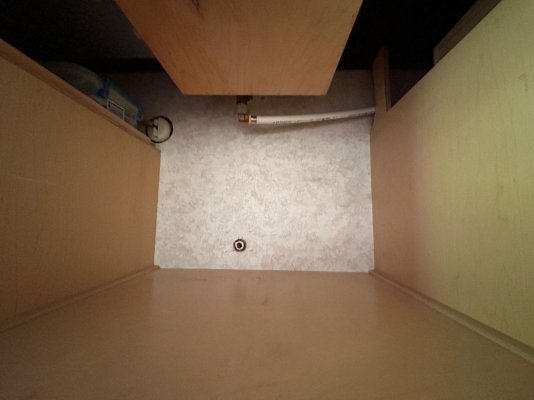
Question: I have bought all hardware to complete task but was wondering if anyone else has installed one and if they could offer advice or pointers. Otherwise I'll just wing it. Always good to seek advice from those who have experience!
TIA
 
I have an electric pump and I put a foot switch on the floor. Placement of the foot pump/switch is something to spend a little time thinking about. You don't want it too far out where you will step on it accidentally, and not too close to the cabinet so that it is hard to get the tip of your shoe on it. My cabinets overhang a little so it is tucked under the overhang and in a corner. I use my left foot to operate it. A foot pump/switch is the way to go for sure.
 
Thanks, I bought the Whale (marine) smaller unit and it will fill in that corner under the cabinet overhang beneath the heater. Positioning the hoses and routing them in the least obtrusive way is the goal so as to maintain the storage space.
 

Attachments

  • Screenshot 2023-06-05 at 8.09.02 AM.png
    Screenshot 2023-06-05 at 8.09.02 AM.png
    452.9 KB · Views: 26
Foot pumps ROCK ! ( and roll) while freeing your hands to hold on.

We have used a one burner Sea Swing stove in our camper for years....ask your brother.

But Buckland ? Do you have Rhythm ?

DG
 
That is what we have in our ATC Cougar - although we do have a sink and just need to tap the spigot to get the last bit of water out of it before traveling. Not a bit deal. Easy to empty of water for winter storage too.
 
I am now in the process, by lying on the floor of the camper, coming up with various routing scenarios for the two flex pipe. Trying to use the least amount of hose as possible as well as keeping it inside where it is warm on those cold trips. One scenario I had and was excited about then persuaded myself out might not be fortuitous was to mount the pump peddle on the outside of the TP door... when open (flap down) it would work great, then fold up into the bed. That would be the best for out of the way logic but I was concerned it might freeze being exposed instead of being inside on cold nights.
So the next idea was to snake the flex pipes through two holes through the cabinet floor beneath where the sink was. (attached see cabinet photos. Just thought I'd post this and see if anyone had routed the flex pipes before and had a slick idea.
 

Attachments

  • IMG_9736.jpeg
    IMG_9736.jpeg
    104.4 KB · Views: 28
  • IMG_9735.jpeg
    IMG_9735.jpeg
    75.4 KB · Views: 30
  • IMG_9732.jpeg
    IMG_9732.jpeg
    96.9 KB · Views: 31
The install is completed and for anyone who has an interest in doing this I'll post here some shots and thoughts. Anytime one cuts drills or alters the FWC it is stressful. I've done it a hundred times but it still is lurking in the background...don't mess up your rig! Then again nothing ventured nothing gained. I replace the hand pump three times thinking it was malfunctioning as it leaked at the top and the counter always got a small puddle. My brother who is a marine mechanic and my nephew who is a captain of a boat in AK both suggested the only way to go is the foot pump. I resisted as everyone knows floor space is precious and locking out an area just did not feel tight. I got over it and went ahead. I realized after removing the hand pump and purchasing the the faucet for the foot pump that it needed to have made for it a casing of some type. One could use a piece of copper/stainless pipe or whatnot but I like wood. Used an old hat rack center column reshaped and bored out. West Systems epoxy coated after a base layer of linseed oil/naphtha. The base has a thin layer of butyl tape to shield it from counter moisture.

Scary to bore holes,( 1" forstner bit) but the best place was through the below counter cabinet on the left edge entering the space beside the heater which is open to the kick space on the floor. That side closest to the back (by the propane tank box in an Eagle). This allowed no real loss of cabinet space as the tupperware boxes had 1" of space along the cabinet wall so all present arrangement could go back in. I finished up last night and will fill water tank today and test it. One note: I previously put in a new countertop so that I could move stove to where sink was and eliminate the sink for more counter top space. We use a tupperware tub when needed as a sink. ( I never liked the sink drain ).
 

Attachments

  • 70889624963__AA76EE7C-F7D6-4AE1-ADA0-893A4D79A58A.jpeg
    70889624963__AA76EE7C-F7D6-4AE1-ADA0-893A4D79A58A.jpeg
    80.4 KB · Views: 40
  • CB757FDB-E680-47CA-BD4A-6FB7FBAB5FD2.jpeg
    CB757FDB-E680-47CA-BD4A-6FB7FBAB5FD2.jpeg
    39.7 KB · Views: 40
  • IMG_9862.jpeg
    IMG_9862.jpeg
    67.6 KB · Views: 44
  • IMG_9861.jpeg
    IMG_9861.jpeg
    71.2 KB · Views: 38
Thanks! I filled the water tank and lo and behold no leaks..
It works… with the caveat… the water in the spigot after the last pump takes a moment to drain. If one moves the container away, the counter still gets wet! I can live with it. Time to cross it off the list and move on!
 

Latest posts

Back
Top Bottom