Four Wheel Blazer Pop-up, Finally found one

CougarCouple said:
Thanks for the trip reports sir. I would like to take the trail out to the dunes sometime. That time of year with the change looks killer. Maybe I can get the wife to go with.

Russ
You're welcome as I'm happy to share my fun with the folks here. Medano pass is relatively easy trail that most stock 4wd trucks can do without any issue. You just need to air down for the sand. The nice thing about the sand is it keeps the masses out. On the east side of the pass it looks like they took a small bulldozer to the trail and graded it to the point it feels paved so it's very easy now.

Being a National park brings crowds in the spring for the runoff and to see Medano Creek actually flowing at the base of the dunes and in the fall for the leaves changing.

Just outside the actual park boundary there are multiple primitive campsites with bear lockers (it is bear country) that are away from the masses down within the park.
 
Zoomad,
I just returned from Colorado and missed seeing the Fall colors in the Rockies.
I had heard the dry weather along the front range this year really affected the aspens and other trees color change this year, so thanks for the great video.
 
EDR said:
Zoomad,
I just returned from Colorado and missed seeing the Fall colors in the Rockies.
I had heard the dry weather along the front range this year really affected the aspens and other trees color change this year, so thanks for the great video.
Thanks EDR. It's been a weird fall around here. A couple of cold nights and an early snow fall seemed to kill the color change on most of the trees, not just the aspens. Lucky for us, Medano didn't disappoint. It's much further south than most of the high country outside of Denver or Colorado Springs so it tends to stay warmer later. We saw high 60's and wind on the pass and up into the 80's down by the dunes.

I finished up on another video from our fun out in Moab at Blazer Bash. It's covering the Flat Iron Mesa trail up to the point I snapped the axle shaft. It can be heard quite clearly in the video. I did manage to hang one front wheel in the air on a climb up and a rear tire off the ground on a decent down a multi-step cliff. Fun stuff.

https://youtu.be/ZYbuKLvkMiQ
 
New member, great thread and info. Recently picked this one up.
 

Attachments

  • img3211-1570726655187.jpg
    img3211-1570726655187.jpg
    8.1 KB · Views: 100
regdelp said:
New member, great thread and info. Recently picked this one up.
That one looks pretty solid. I remember seeing a yellow 81 or 82 K5 with a fwc on Craigslist out of Wyoming earlier this year. Total barn find, with barn mice inside. It was really dirty but looked really complete. Like dirty enough it needed a bleach bath to kill all the hanta virus from the mice.
 
That's the one. No mistaking it. Not many low mileage Yellow K5's with one of these campers on it. I went back through my saved pics from the craigslist ad and can say that is the one. Right down to the full hubcaps and bug deflector.

49102236918_0429db0ae2_b.jpg


49102236898_bc86ef56b3_b.jpg


49102940062_cbb77e05f6_b.jpg


49102747676_3f91a7e56e_z.jpg


49102747621_5a90df2111_b.jpg


49102747671_3f0c958a30_z.jpg
 
Yep, that’s her. Thanks for the added pics. Full restoration is the goal so I may hit you up for technical advice as I move along. If that’s ok.
 

Attachments

  • 21891A62-5645-44F4-8051-ACD27950A0CD.jpeg
    21891A62-5645-44F4-8051-ACD27950A0CD.jpeg
    138.2 KB · Views: 73
Well it looks like it cleaned up really well so far. Did you buy it that way or like it was in the pics I found?

Good score. If I can help in anyway, just let me know.
 
Yea I got it at the Mecum auction in Las Vegas as a “no reserve”. It was cleaned up already. It needs some work but overall it’s in good shape. Once I get the shell off I’ll know more of what I’m getting into. Thanks again, I’ll be in contact if I hit a snag (I’m sure I will)
 
Yeah it looks like somebody gave you a pretty good head start. The cushions in the camper got recovered in vinyl and they pulled the carpet from the front wall of the camper too. Plus a hell of a scrub.
 
It's been a while for any updates. But the weather is getting better and I had the entire weekend off. I had a productive day with the truck. Nothing major mechanical but more arts and crafts. I did go out with my buddy Bill and tried out our radios on the GMRS bands. We took off west past the local reservoir and spread out quite a ways without any loss of signal. I took off into the open space area that leads out to where the river starts filling the lake. The trail winds around and drops into little creek crossings and back up again. Bill stayed by the highway and I kept going further down the trail to check our range. We were able to stay connected 2 1/2 miles with the difference in elevation and no line of sight at all. Plus Bill rang Larry on his phone over in Pueblo West about 8-10 miles as the crow flies from us and he got on his Baofeng and we were able to talk clearly to him as well. I just need to get lined up with a local club to take my test soon.

On the arts and crafts side I went ahead and lined the lower bench with some outdoor type carpet. I got a 6'x8' section at Lowes and with my son's help we chopped it up to fit. A can of spray adhesive and a few staples later and we've got an upholstered bench. We won't be going into the upholstery business anytime soon, but it's good enough for who it's for.


49636805398_6d7fb5824f_b.jpg


49637329626_2818ab7d53_b.jpg


49637602662_8ba2039ed0_b.jpg
 
Mighty Dodge Ram said:
Looking good Rob. Are you and Bill running different antennas for the GMRS rather than the small magnetic jobs included with the radios?
Yeah I'm running something different since I went with a HAM radio over the Midlands.
49606197358_29e0ae7388_b.jpg


49606197523_b739b68887_b.jpg


Bill and Larry are using the "ghost" antenna Midland sells like this one:
MXTA25-3db-Gain-antenna.jpg


Don has his reservations on how the short antennas work, but based on Bill and my testing last weekend it works. We had solid communication even when we lost line of sight due to the terrain. Ideally the best setup would be dead center on the roof for the best propagation of the radio waves in all directions, but I can't do that with the camper and Bill's RTT is going to still block to the rear. Larry, Ty and Don all have the same issue because of their campers too. Don's antenna is on his front bumper/brush guard and Larry's is going to be in a similar spot to mine. Ty don't have much choice but on a hood/fender type bracket or on his front bumper. So nobody is going to have ideal antenna locations in our group.

2.5 miles on the terrain was about 2 miles better than we could have got with our CB's on a good day with the antenna's dialed in with low SWR readings. I'm calling it a win. It's still way better than what we've had in past years on other trips.
 
Finally got around to getting a nagging issue corrected. Those that have followed along may remember the front lift panel on my camper was wasted due to a previous water leak from the roof. It took out the particle board in the cab-over and front wall at the same time, so nothing was spared from the damage.

My attempts to rebuild the factory style lift panels failed since I didn't find the super slim rivets they used on the original assembly. Figured that out after drilling out 300 stinking rivets out of the original hinges.

So after reading many on this forum that had figured a better way to build a mousetrap with EMT conduit over the stock style panels. Tim Morrissey's video on it really sealed the deal for me. He was not the originator (though thanks are owed to that guy too, just don't know who it was) but the video really takes the concept into reality by seeing it assembled.

I'd had some 1/2" conduit bent up for quite some time now but never really got off my tail to get it done, always finding something more pressing to get done. I'm at a stage where short of going into the full blown rebuild mode for the 8.1/5-speed change I don't have much left to do but refine and maintain. So this last weekend I popped the top up and braced it for the removal of the temporary lift panel I had installed 2+ years ago. It was time. So I dug out the conduit and got to work. I didn't get into documenting with a lot of pics as I was on a roll and those that came before me really did a better job at it, both in construction and documenting.

One big difference being on a Blazer camper vs other early FWC campers is the length of the cab-over section. Mine is a full 4 feet and my arms aren't long enough to reach to push the conduit into the final upright position. So I reused the original handle from the factory lift panel. Currently it's just zip tied to the lower bar, but it's long enough to push it into the upright position while standing at the front of the camper. While the top is up the handle sits in an extra conduit clamp I trimmed to let it rest in that will further lock the top in the upright position without having to reach and put a pin between the upper and lower legs.

It's not perfect and could be better since the lower bar isn't quire parallel to the upper bar. Probably due to the legs getting cut at different lengths per side. But it works quite well and is a damn sight better than single panel I had to wedge into place while pushing up on the top with my melon.

49688737951_33f1cf27f3_b.jpg


I'll redo it and build one for the rear when I replace the canvas and increase the height a few inches over what I have now.

Thanks again to those that paved the way on this mod for sure. Much better than the original for sure.
 
Zoomad,

I have no idea why it has taken me this long to discover your build. My build "81 Grandby on 91 Jeep YJ" is very similar to your build because our campers are mounted to the body siderails and have no wood floor pack. One of the elements I am concerned about in my build is weight. My target design GVWR is 5640. I noticed in your post #216 reference to a friends Blazer/camper grossing at 8000. Have you weighed yours? I noticed in post #21 your laminated 5/8 and 1/2 plywood for your overhead bed floor and in post #40 it looks like your cabinet framing is 3/4 plywood with 3/4 Oak facing and Oak doors. Also the lower locker/daybed is made of 3/4. As I get ready to build my cabinets I am thinking of ways to use only 1/2. I assume that you have had on problems with the cabinets, so I also assume you have no way of estimating if 1/2 would have been adequate in many places?

I look forward to reviewing your entire post, not only the build, but also your Colorado travels since I'm in Colorado also.

Boonie
 
Boonie said:
Zoomad,

I have no idea why it has taken me this long to discover your build. My build "81 Grandby on 91 Jeep YJ" is very similar to your build because our campers are mounted to the body siderails and have no wood floor pack. One of the elements I am concerned about in my build is weight. My target design GVWR is 5640. I noticed in your post #216 reference to a friends Blazer/camper grossing at 8000. Have you weighed yours? I noticed in post #21 your laminated 5/8 and 1/2 plywood for your overhead bed floor and in post #40 it looks like your cabinet framing is 3/4 plywood with 3/4 Oak facing and Oak doors. Also the lower locker/daybed is made of 3/4. As I get ready to build my cabinets I am thinking of ways to use only 1/2. I assume that you have had on problems with the cabinets, so I also assume you have no way of estimating if 1/2 would have been adequate in many places?

I look forward to reviewing your entire post, not only the build, but also your Colorado travels since I'm in Colorado also.

Boonie
Hey Boonie. Been following your build too as it's so different and unique. I've been enjoying your progress and glad to see you are back at it too!

Let me get into your questions. Weight is most certainly a factor but I wasn't hyper critical about shaving weight out of it, but more of finding new locations to put stuff to get the weight as low as possible to keep my center of gravity as close to stock as possible. Part of that savings was deleting the stock 3-way fridge (also because it sucks for what I do off road compared to a 12v compressor fridge). That got the fridge out of the side cabinet and down to the floor, without a major loss in floor space. I also deleted the stock water storage tank, because it also lived inside the cabinet above the bed rails. The stock two burner stove also got the axe due to it's height off of the floor and I didn't plan on cooking inside due to the small space and stinking up the entire interior. I do store my camp stove up there, but it's pretty lightweight and lacks the plumbing the old system did.

We got a little carried away with the construction side with the 3/4" plywood in the cabinet construction. We went that way for all out rigidity knowing I won't be only running down pavement and graded dirt roads. The stock pressed board construction with staples would not have survived long term with where I've taken the camper already. The doubling up of layers on the cab-over floor was more about supporting me than anything else. I'm a big dude so I didn't want the cab-over floor deflecting onto the roof of the cab when I'm catching Z's in the upper bunk. That's one area I sacrificed for strength over weight savings. So far that's paid off with zero contact between the two.

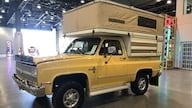
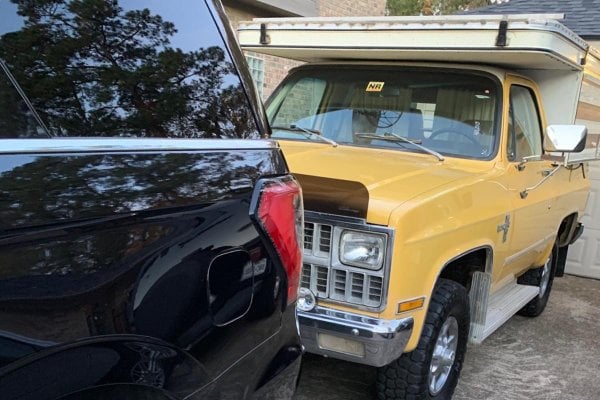
The blue camper I referenced at the 8,000 pound mark is my buddy's K10 pickup with a Phoenix camper. His gets called a Blazer camper more often than not so it's a pretty easy mistake to make. But that's where a big difference in weight comes in. Besides running a Big Block engine (all iron), one ton axles and winches on both ends, his being a pickup adds the fully contained cab and separate pickup box. His body weighs in more than mine (stock vs stock that is). Then the camper itself is fully contained with a floor pack and front wall. The Phoenix camper also has 10 gallons of onboard storage plus a hot water heater. He's a nut carrying more than he needs to, but he's like me on wanting to be over-prepared on long trips. So there's a few things that will naturally make his setup heavier than mine is. He's running an 8.1L big block that came from a class a motorhome with a 22,000 pound GVW so he's got more than enough power to pull the combo around with.

I've weighed mine prior to taking my first long trip with it in 2018. At the time I had a monster snowmaster fridge my co-pilot bought for the trip. I was 90% loaded for the trip and it came in around 6,300 pounds with me sitting inside. With my co-pilot onboard and the rest of his gear we were probably over 6,500 pounds going down the road. With my modifications to the suspension for the lift and off-roadability the camper's weight isn't too far off from what it was without it, but loaded to the gills for a week long trip. My goals of keeping the weight low so far has worked. The CG is a little higher than stock, but it's handled some wicked trails with steep inclines and declines that would surprise many. The spooky part is off-camber situations or side hills. But that's the nature of a heavy truck on large tires lifted 4" over stock. It's handling on the road isn't too far from what it was prior to the camper except for the more barn like aerodynamic qualities catching the wind. I've made an emergency lane change when a crazy chick in a BMW almost killed us on the 2018 desert trip where my buddy in the blue K10 swore he saw the left rear off the ground when I swerved to avoid her. But it stayed put and got us to the side of the highway safely. Both the on and off road ability I think really comes from my efforts to keep the weight low, suspension setup and Bilstein shocks.

In your build since you don't have the luxury of working on a heavier chassis like mine, using 1/2" plywood in construction shouldn't be a major loss in strength over the thicker stuff. I'd think about the cab-over floor still being fairly heavy due to load that you'll have up there. Where my factory particle board cab over floor wasn't swelled due to water damage it was 1" thick. That's thick but with no support in the center, I would not trust it to hold my weight. Due to the laminated construction of plywood I was confident it wouldn't bow at the thickness we ended up with. We were right on that.

Keep this in mind, GVWR is important to look at for the vehicle capacity. K5's usually only had 6,100 pound GVWR and I'm positive I blew past it. But that rating is based on stock 1/2 ton axles and stock springs, neither of which I have on mine anymore. So given the weight increase you are likely to have I'd also look at beefing up the suspension to handle the extra weight. I'm not sure you are going to be going silly off road nearly as much as I like to, so that may play in deciding between higher capacity springs that also lift the Jeep or adding something like air bags on the rear axle to supplement the stock spring rate without a lift. You may not want to make those changes to the suspension until the camper is finalized and you can get an actual value of weight vs what you think it may weigh.

Keeping weight in check and down low is a balancing act for sure. But a little extra effort planning now will give better results later when the vehicle out being driven.

Being in Colorado really gives me a great area to explore close to home in the mountains for sure. We'll have to get together when I'm up in Denver once the pandemic business gets under control.
 
I have done two builds now using 1/2" plywood. Baltic Birch is really nice, super strong for the size. Even the 1/2 maple I used for this build is way stronger than regular 3/4".
 
Back
Top Bottom