Grandby Resto-Mod on M101A3

Cerdahl, I did think about welding the supports back in. At first I thought that was the only option. However, I saw a build (trying to remember where) that used the technique of L brackets and I think that coupled with screwed panels to lock the supports in, the brackets will be plenty strong. Two things drove that decision. One, I don't have the capability to weld aluminum so I would have to transport the camper frame somewhere. Not a deal breaker but definitely a lot of work. Second, I think that with the camper mounted on the flatbed trailer, it won't be subjected to the twisting forces that it would be if captive in a flexing truck bed. I don't have proof of my theories, but I'm committed to the L bracket fix so I will keep you posted! Thanks for the question and compliments.

SLO, thanks for the encouragement! Your build was an inspiration. I'm not sure that I have the patience to tackle a repaint! Your camper looks sweet. If I'm perfectly honest I didn't think I was getting in this deep on the outset of the project... but here I am :p

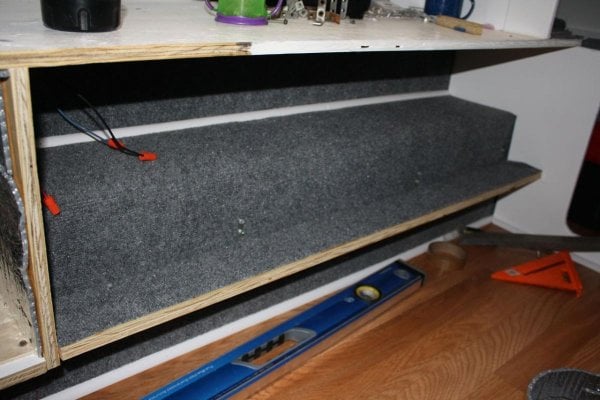
I got the bed platform in yesterday. I will create a bed space for my daughter directly below the overhang. The extended area on the left of the bed overhang will be enclosed to further support the bed and to house electrical panel etc.
IMG_2985.jpg
 
Well.... the trailer is finally acquired from Dallas. New axle is in, 6x5.5 rims are on...starting to see the light at the end of the tunnel. One thing that I did find out is that the chassis is an M116A2. Also, I was wrong in that the full up trailer is an M101A2. Oh well, not going to impact me for my purposes, but the more accurate title for this thread would be "Grandby resto-mod on M116A2" since I plan to remove the box and bolt directly to the frame. I ordered the axle from Redneck Trailer Supply and my sister picked it up at their Arlington, TX location. Those folks are great BTW. Really patient on the phone and made sure I got exactly what I wanted. I was originally going to source a 3500lb axle, but after talking with Jack at Redneck, I ended up going with a 6000lb axle. The reasons for this was that the spring perch to hub face dimension (to match the track width of the Tacoma and keep the spring location of the trailer) was too great for the axle specs and would require the axle to be de-rated. It was an option to simply spec a 3" axle tube for the 3500lb axle (3500lb axle is 2 3/8"). However, that drove the price up significantly. So, Jack suggested having a 6000lb axle built as that would be only marginally more expensive that 3500lb, would come with the 3" axle tube and 12" as opposed to 10" brakes. The 6k axle would also have to be de-reated but would only be de-rated to 4200lbs as opposed to approx 2k lbs. I didn't get the exact spec on 3500lb de-rating but I anticipate the loaded weight of the trailer and camper to be close to 2k lbs so I didn't want to lose the capacity margin. I spec'd a 6k alxle with zerked spindles, 66" hub face to hub face, 43"spring perch centers and electric brakes. I think that if I had to do it over I would get the parking brake option to be able to retain the hand brakes on the trailer. The trailer hubs are lug-centric and I thought about narrowing the axle so that I could put adapter spacers in, but I opted to not. Also, the 43" spring perch dimension was not quite wide enough. I had to grind out the hole that the centering pin of the axle pack goes in. I would go with 43 3/8" next time.

Obviously from the pictures I need to work on the height of the hitch/truck so that the trailer sits level when towing. I will lose the lunette/surge brake setup which will gain me about 4 inches and go to a rise pintle set up that should get me another 3 or so. Dakar springs should get me level from there.

Here's some pics. Sorry they aren't the greatest. I was on a whirlwind weekend trip with a 2 year old. Not exactly the kind of trip that lends itself to careful photography. Sorry, no good pic of the new axle.

Old axle.
IMG_1271.jpg

Somewhere in west Texas.
IMG_1277.jpg

Travel Buddy
IMG_1282.jpg
 
We went camping over Christmas, as is our custom, and my wife mentioned how nice it would be to have the camper. Re-inspired, and freed from the fetters of school (temporarily) I was able to make some progress over the holiday break. I got the bed off the trailer, the camper on the trailer (not secured yet), new door from ATC installed, furnace back in, more trim reinstalled, window seals replaced, and indoor/outdoor carpet installed in the bed area and on the sides of the floor pack. I put the carpet over Reflectix for a little extra insulation.

I also decided that I didn't like the waste of space created by having the floor pack still in pickup bed configuration so I built storage boxes on the sides and put a new side panel on. I will still need to cut out for the doors; I plan to use small marine hatches. I still need to cut out for fenders as well.

I'm hoping to have this thing on the road by spring... but man, is this turning into a big project!

El Malpais
El Malpais.jpg

New door
Camper.jpg

Storage boxes
Storage.jpg

Reflectix on floorpack
Reflectix_FloorPack.jpg
 
Thanks for all the encouragement and kind comments. I made a little more progress...

1/2" insulation on the floor.
Insulation on Floor.jpg

El cheapo laminate.
New Floor.jpg

Bed platform for the kiddo with storage underneath.
Maddy's Bed:Storage.jpg
Platform Open.jpg
 
I also added reflectix around the furnace compartment. I plan to put the fridge directly above the furnace so that I can use the louvers in the old propane access door for ventilation. Hopefully the reflectix helps keep the heat away from the fridge.
Reflectix in furnace.jpg
furnace.jpg
 
Thanks for the encouragement! I need it, but I am getting ever closer to completion!

Added some storage to below the cabinets.
attachment=18035:Cabinet Storage.jpg]

IMG_3231.jpg

IMG_3245.jpg

I cut out for the sink and stove as well. Still need to find a piece of laminate to finish the countertop.
IMG_3246.jpg

I still have a bunch of stuff to do on the inside to get it functional, but the list is dwindling. I have the headliner and the metal for the roof, just need to get that installed. Then, that leaves me with finishing the lift panels and installing the new canvas...needless to say, I am not looking forward to that. I'm tempted to throw in the towel on the lift panels and give Marty a call for some new ones... we'll see.
 

Attachments

  • Cabinet Storage.jpg
    Cabinet Storage.jpg
    107.6 KB · Views: 198
Back
Top Bottom