Is there wood behind the siding?

Sam,

There is no wood between the aluminum frame and the siding. The siding is stapled directly to the framework. If you want a photo let me know, I have mine completely stripped inside.

Rick
 
Some pictures would be great! I noticed in another post with pictures of the Hella light install that it looks like there is wood behind the aluminum. Do they do this on the newer campers or am I just seeing the picture wrong.

Thanks,
Sam
 
Sam,

Here are the photos. Keep in mind that there is fiberglass insulation between the inside paneling and outside siding. Hope these helps.

Rick
 

Attachments

  • a.jpg
    a.jpg
    60.1 KB · Views: 567
  • b.jpg
    b.jpg
    171.5 KB · Views: 630
  • c.jpg
    c.jpg
    187.6 KB · Views: 609
  • d.jpg
    d.jpg
    185.9 KB · Views: 595
Rick: great pictures thanks. What kind of project are you doing?

Jim: Obviously what I saw was the interior, I guess I was not thinking how thin the walls actualy are.

Thanks guys.
 
Rick,

Wow, never seen pics like that of the inside of the camper. That is cool. Do you have any others that show how the wiring is done? I posted elsewhere wondering about how the stock, factory wiring is done.

I see the wires going up the the front roof support with split loom...This is what I assume goes up to the roof for lights and fan.

I am looking at adding outside lights and would love to know where stock wiring is and try to use it if already there.

Any other pics would be appreciated as well!

Dave
 
I believe, and ben and marty can set me straight if I'm wrong, that the wiring for options like the side light, floodlights etc, is not added unless you actually order them.
 
Sam,

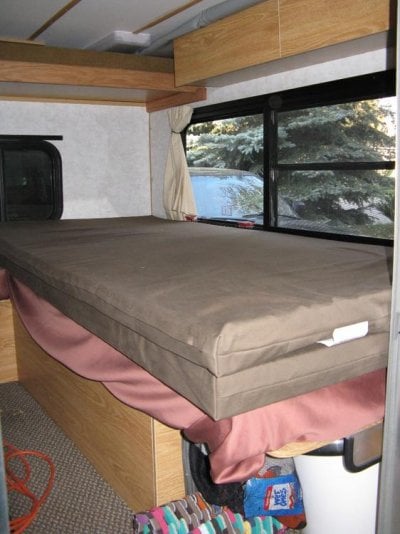
When I bought this camper used, every wall was damaged. The cabinets where banged up and missing some of the veneer. It was a dirty mess plus
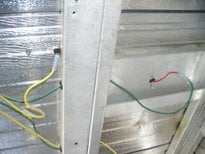
I had a lot of water damage up front at the overhang. I don't know if you can see it from the first photo but the white laminate on the bed board is actually delaminated and pulling back. All the wood up front was wet rotted and you could use a screwdriver and scrape out the wood almost as if a terminte was there. If you look at the white board that runs front to back just below the side liner in the first photo you can see that it stops short of the overhang. That board ran all the way to the front and was so wet that when you pressed on it with your finger, water would seep out. I had to cut it out. Everything was covered with mold and most people have a problem with mold but my wife is very allergic. I had no choice but to remove the interior.

While I'm into it, since the camper was originally designed for a Ford Superduty and it sits 3" higher than most campers, I'm going to add an extension to the bottom of the overhang to drop the bed board down about
4". This will decrease the gap between the overhang and the truck cab which is now at 7 1/2". This will allow me to use a thicker mattress, cut down on the amount of wind that hits the camper between the truck and camper, and I think (hope actually) that it will look better. Right now it looks as if my truck is parked under a cliff.

Davinski,

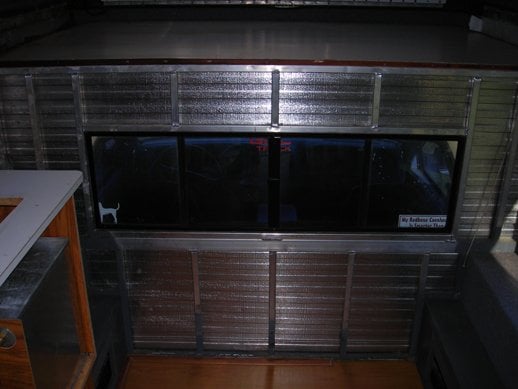
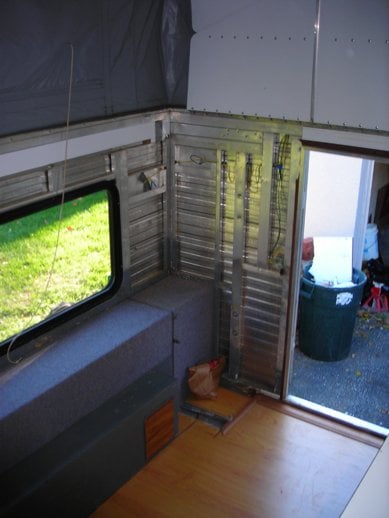
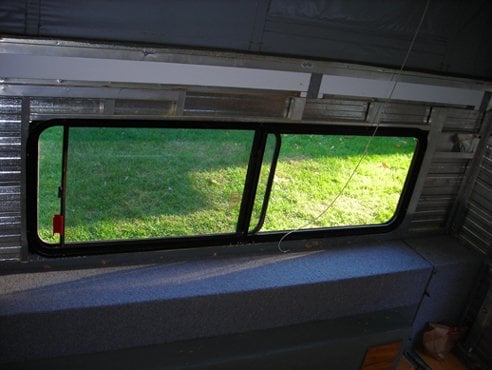
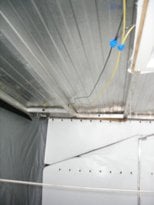
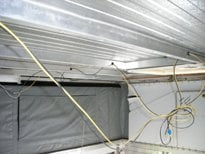
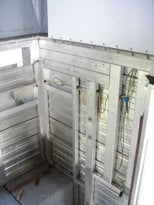
All the wire is run from the panel on the driver's side and runs front to back on that wall. The wiring that you see running foward wraps around the front and is run up to the ceiling behind the front roof folding support. It connects the lights and fan. The wiring that you see to the left of the rear door is for the rear mounted and under awning lights. The camper originally had the rear spots but not the awning light but it is wired for it. The wire terminates behind the mounting plate, an wire access hole is already drilled and the wire is taped in a loop with a wire connector already in place ready to go. If you could find the right spot, I assume yours is the same. You'd have to ask Ben or Marty about this but I would assume (yes I know what assume means from bitter experience!) that all the campers are wired for every "in the wall" options. It saves time when building them (the guys don't have to figure what wiring goes in this specific camper over the next one), doesn't cost much more in labor or supplies, and if the new owner changes his/her mind about what option they want after building is started, there's less time tearing down the interior to install a spot light.

I'll try to post more photos tonight when I get home of the wiring.

Hope this helps!

Rick

PS: Anyone needing a furnace or fridge let me know. I'm not reinstalling mine. I've never tried them to know if they still work but the previous owner said they did. If your interested, I'll see if I can't hook them up to see. All it will cost you is packing and shipping. I also am removing the propane, and water fill doors, so they're up for grabs too.
 
Great photos. I know no one wants unsolicited advised but KEEP YOUR FURNACE, they cost at least $400 at JC Whitney (I think), or sell it on Craig's list, if you ever want heat your furnace is probably much better and probably safer than any catalytic unit.

I bet you will end up with a great camper that you will be able to enjoy for yrs and projects like yours can be fun to do. I like your idea with the bed depth extension.
 
Davinski,

Here are your photos. The yellow wire runs to the interior lights, ceiling fan, and outdoor yellow lights. The green wire runs to the spotlights. The black wire is bonded to the frame and used as a ground. In one of the photos you can see the under awning light which is pigtailed but not installed. Hope these help.

Rick

From top to bottom, left to right: Driver's Side Facing Rearward, Driver's Side Closeup, Driver's Side Front Corner to Roof Wiring, Mid Ceiling Facing Rearward, Passenger's Side Facing Rearward (under awning pigtail on left)
 

Attachments

  • Driver's Rear.jpg
    Driver's Rear.jpg
    57.2 KB · Views: 422
  • Driver's Rear Closeup.jpg
    Driver's Rear Closeup.jpg
    55.4 KB · Views: 420
  • Front Driver's Corner Roof.jpg
    Front Driver's Corner Roof.jpg
    46.1 KB · Views: 426
  • Mid Ceiling Looking Back.jpg
    Mid Ceiling Looking Back.jpg
    55.1 KB · Views: 398
  • Passenger's Rear.jpg
    Passenger's Rear.jpg
    52.1 KB · Views: 441
Wow, those are great!!!

I've never seen photos of the camper like that before. I guess I should visit the factory. Anyhow, anychance I could get those emailed to me so I could look at bigger versions?

Thanks

davinski (at) earthlink.net
 
I wish I knew for sure I had the wiring for the side light there. I'd have measure it and then drill a hole and fish it out. But I'd sure hate put a hole in the siding and not have any wiring there. Looking at the interior siding, I'm not gonna mess with that just to put a light on the side.
 
side light

The wire shoud be there for a side light. If the camper is a 2001 or before we can tell you where the wire is. If it older than a 2001 I have no idea if the new owner kept up the same wiring of the campers or not.
 
Well shoot. Looking at ricks pic theres no frame behind where the outside light goes on the side. So of course I drilled a hole. Dummy me, should have looked at the frame pics at fwc and atc. They clearly show a piece of frame there. Not that its going to change anything on the outside. The light will still mount the same. I'll just have to do the wiring from the inside.

So here's a question. What holds the interior siding on? Is that stapled on like the roof?
 
interior siding

The inside walls are first put on with staples and then screws are added for various trim pieces and inside pieces.
 
Okay, I guess I'm not too bright. I decided to drill a small pilot hole to see where it lined up on the inside. Well, turns outs that it was a piece of frame back there. Also turns out it was very thin piece of material. So I punch out the hole to full size and what do i find?. The hot wire is dead center in the middle of the hole. So, bottom line is, the light is installed,functional, and I didnt have to touch the interior siding. I do feel pretty stupid for jumping to conclusions though.
 
Back
Top Bottom