I have been convinced for some time the lithium batteries were the future for marine and RV type applications and that lead acid's days were numbered. Lithium batteries have many major advantages over lead acid, including 4 times the energy density, much flatter voltage curve and less picky charging requirements. What has stopped me from installing lithium batteries in my Fleet flatbed was the huge 'early adopter' premium of ~$10/Ah as opposed to $2-3/Ah for high quality AGM or $1-2/Ah for flooded lead acid. Recently browsing on ebay I found a guy selling new old stock LiFePO4 cells for ~ $1.50/Ah (at 12.8V) and decided to take the plunge. The only draw back being that these batteries are 3.2V, 5.5Ah cells, so it would take some work to make an appropriate 12.8V, 150Ah battery pack. I figured I would describe the process and results in case anyone else was interested in a winter arts and crafts project that results in a large LiFePO4 battery pack at about 1/5th the cost of a commercial lithium pack and 1/4 the weight and 60% the cost of an equivalent lead acid battery bank.
1. Batteries. There are a lot of surplus Full River/Tenergy LiFePO4 cells available on ebay and amazon at the moment for very reasonable prices. These are new old stock (manufacturing dates from 2013 and 2014) from a reputable battery manufacturer in China. I bought 120 of the following 3.2V, 5.5Ah batteries:
http://www.ebay.com/itm/NEW-Box-of-60-Fullriver-LiFePO4-32700-3-2V-5400mAh-Rechargeable-Batteries-32650-/351913374341?hash=item51efabf285
From seller 'dougdeals' for $180. If you want to make a different capacity battery pack there are plenty other options for different quantities and sizes of batteries. These are amazingly cheap - this is the equivalent of a 150Ah at 12V, for $180! A similar sized battery would be about $1500 from manufacturers such as Battleborn.
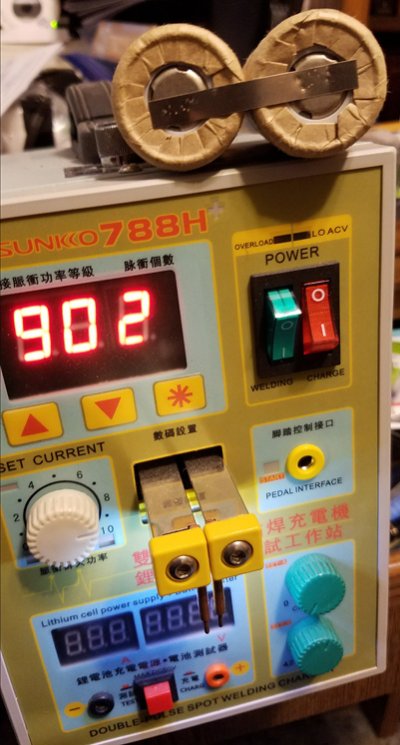
2. Pack Assembly. This is where the arts and crafts comes in. In order to get the right voltage (12.8V nominal) you need to put 4 cells in series. So I divided my 120 cells into four groups of 30 cells, and went about making 4 larger 3.2V batteries each comprised of 30 cells in parallel. There are two ways of assembling individual cells into packs - spot welding and soldering. I don't have a spot welder, so I went with soldering with a high wattage (140W) soldering gun and plenty of flux. Before soldering up the 30 battery packs I needed a way to physically assemble them. For this I used my newly acquired 3D printer to print out 5x6 battery plastic frames to hold the cells in a nice grid, but you could also glue the cells together or build a wooden box to hold them. I then soldered all the cells together using 12AWG copper wire:

The first one took me several hours, but once I had my technique down, it was probably only 90 minutes or so per pack. It is very much craft work and is not hard to do
Once the packs were all soldered up, I attached about 20cm of 12AWG wire to the positive and negative of each pack, covered the exposed contacts with some 1/8" ABS I had lying around and then shrink wrapped each pack into some massive heat shrink tube (also from ebay). All in all this was a weeks worth of evenings to do, and I ended up with four 3.2v 150Ah battery packs each about 7" wide, 8" long and 2.5" tall.
3. Putting it all together. To make the final product you need to wire the 4 packs in series to make the 12.8V battery. This is where a couple of caveats about lithium batteries come in. First, it is very bad to discharge lithium batteries below about 2 - 2.5V per cell. While not a fire hazard or anything like that, it has the potential to ruin the cells. Secondly, lithium batteries don't 'self balance' between cells like lead acid batteries do. That is to say that over many cycles the voltages of the individual cells can drift apart, so that some can end up over charged (not a big deal) and some undercharged (big deal). Both these issues can easily be solved with a Battery Management System (BMS) which monitors the individual cells and shuts things down if they get out of wack and also applies corrective action to balance the individual cells. Luckily BMS are now very cheap and effective. I happen to have this one from a prior project and used it in this project:
http://www.batteryspace.com/PCM-with-Equilibrium-function-for-12.8V-LFP-Battery-Pack-30A-limit.aspx
But there are now much cheaper options on ebay and amazon.
I wired all the individual cells to a blue sea terminal block and then used jumpers to put the cells in series:

Continued...
1. Batteries. There are a lot of surplus Full River/Tenergy LiFePO4 cells available on ebay and amazon at the moment for very reasonable prices. These are new old stock (manufacturing dates from 2013 and 2014) from a reputable battery manufacturer in China. I bought 120 of the following 3.2V, 5.5Ah batteries:
http://www.ebay.com/itm/NEW-Box-of-60-Fullriver-LiFePO4-32700-3-2V-5400mAh-Rechargeable-Batteries-32650-/351913374341?hash=item51efabf285
From seller 'dougdeals' for $180. If you want to make a different capacity battery pack there are plenty other options for different quantities and sizes of batteries. These are amazingly cheap - this is the equivalent of a 150Ah at 12V, for $180! A similar sized battery would be about $1500 from manufacturers such as Battleborn.
2. Pack Assembly. This is where the arts and crafts comes in. In order to get the right voltage (12.8V nominal) you need to put 4 cells in series. So I divided my 120 cells into four groups of 30 cells, and went about making 4 larger 3.2V batteries each comprised of 30 cells in parallel. There are two ways of assembling individual cells into packs - spot welding and soldering. I don't have a spot welder, so I went with soldering with a high wattage (140W) soldering gun and plenty of flux. Before soldering up the 30 battery packs I needed a way to physically assemble them. For this I used my newly acquired 3D printer to print out 5x6 battery plastic frames to hold the cells in a nice grid, but you could also glue the cells together or build a wooden box to hold them. I then soldered all the cells together using 12AWG copper wire:
The first one took me several hours, but once I had my technique down, it was probably only 90 minutes or so per pack. It is very much craft work and is not hard to do
Once the packs were all soldered up, I attached about 20cm of 12AWG wire to the positive and negative of each pack, covered the exposed contacts with some 1/8" ABS I had lying around and then shrink wrapped each pack into some massive heat shrink tube (also from ebay). All in all this was a weeks worth of evenings to do, and I ended up with four 3.2v 150Ah battery packs each about 7" wide, 8" long and 2.5" tall.
3. Putting it all together. To make the final product you need to wire the 4 packs in series to make the 12.8V battery. This is where a couple of caveats about lithium batteries come in. First, it is very bad to discharge lithium batteries below about 2 - 2.5V per cell. While not a fire hazard or anything like that, it has the potential to ruin the cells. Secondly, lithium batteries don't 'self balance' between cells like lead acid batteries do. That is to say that over many cycles the voltages of the individual cells can drift apart, so that some can end up over charged (not a big deal) and some undercharged (big deal). Both these issues can easily be solved with a Battery Management System (BMS) which monitors the individual cells and shuts things down if they get out of wack and also applies corrective action to balance the individual cells. Luckily BMS are now very cheap and effective. I happen to have this one from a prior project and used it in this project:
http://www.batteryspace.com/PCM-with-Equilibrium-function-for-12.8V-LFP-Battery-Pack-30A-limit.aspx
But there are now much cheaper options on ebay and amazon.
I wired all the individual cells to a blue sea terminal block and then used jumpers to put the cells in series:
Continued...


")