Bosque Bill
Senior Member
UPDATE
I used my new awning scheme for the first time in the field last week and made one modification to the procedure which helped. When erected as in my original post, though with the larger tarp, it was somewhat susceptible to medium winds. This was due to the edge along the roof rising up and causing the tarp to "sail." I took it down that first evening as the slapping sound was annoying.
I thought about the issue overnight and the next morning I raised the tarp, but with a second tensioning line running to the rear of the camper to the tarp edge along the roof. That line, combined with the one running to the front, pulled the tarp edge taut. This kept the wind from lifting the tarp, making the entire arrangement more stable with no noise of slapping tarp or carabiners. If you look carefully in the enlarged photo below, you can see the aft tensioning line.
The photo of the arrangement was taken late in the afternoon. Consequently, the ground is no longer in the shade, though the camper is shaded which was my main concern. You will notice there is plenty of shade on the other side of the camper and that's where I set up my chair and table. You can also see my 100W, deployable solar panel - I intend to describe my system in another post, it worked very well.
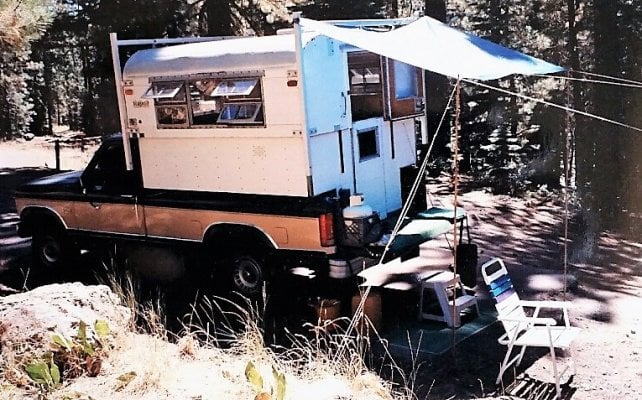