You are using an out of date browser. It may not display this or other websites correctly.
You should upgrade or use an alternative browser.
You should upgrade or use an alternative browser.
New Granby Home Build
- Thread starter Bisleybud
- Start date
Bisleybud
Advanced Member
Looks good and congrats on your new camper. It will be fun to see what you do with the interior. Thanks for keeping us posted.
Bisleybud
Advanced Member
Overland Hadley
Contributors
Looks good and congrats on your new camper. It will be fun to see what you do with the interior. Thanks for keeping us posted.
Yeah, what he said!
Yeah, what he said!
Overland Hadley
Contributors
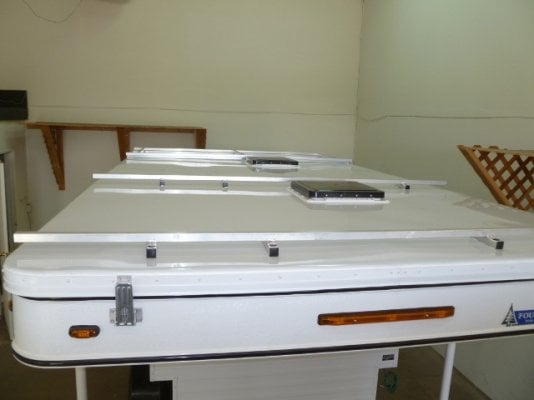
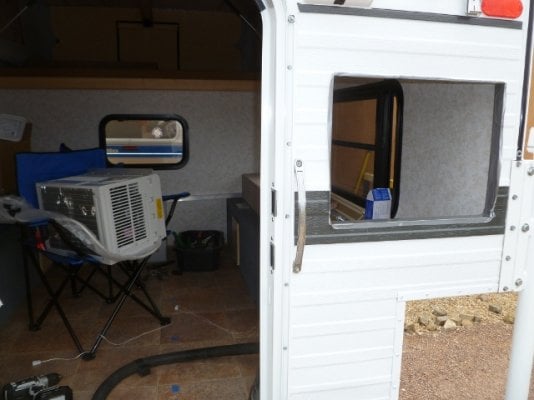
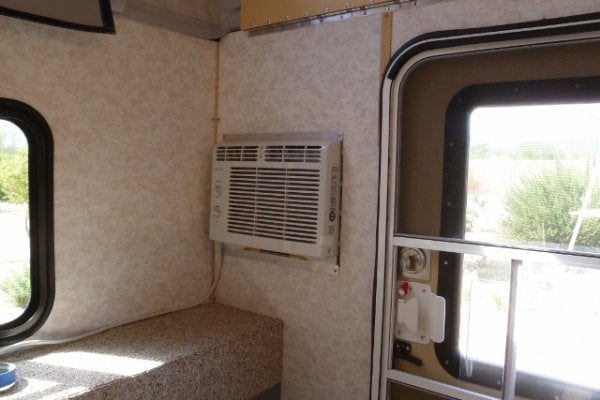
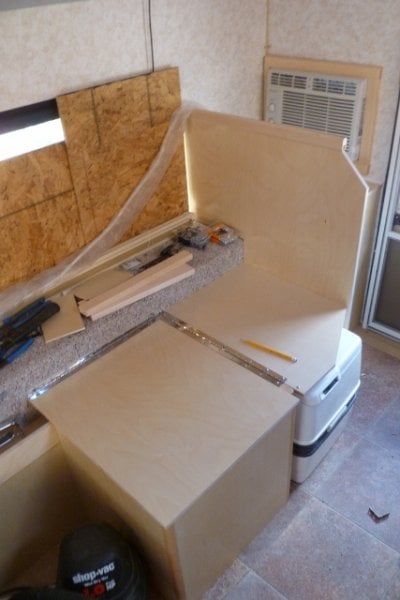
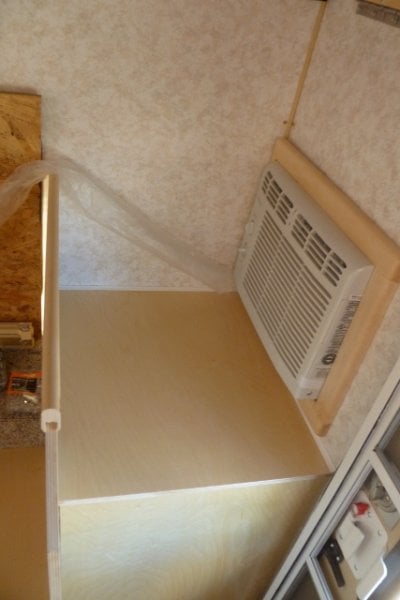
This meant I had to cut a 16x12 hole in my New Grandby.
Can you detail what you did to prepare to cut, and what you had to cut through?
Thanks.
Can you detail what you did to prepare to cut, and what you had to cut through?
Thanks.
Bisleybud
Advanced Member
Hadley, as a fellow rag bagger you know the first thing I had to do was have a big rum drink.Then I took the trimming router in hand and cut the aluminum siding out.not so bad the factory had cut out the interior paneling around the framing so I could see the siding from the back side.A edge trimmer bit cut though the aluminum like butter..
Overland Hadley
Contributors
Hadley, as a fellow rag bagger you know the first thing I had to do was have a big rum drink.Then I took the trimming router in hand and cut the aluminum siding out.not so bad the factory had cut out the interior paneling around the framing so I could see the siding from the back side.A edge trimmer bit cut though the aluminum like butter..

So the interior wall and insulation was already cut out from the factory? Looks like the normal factory cutout for a rear window, so no framing needed to be cut?
So the interior wall and insulation was already cut out from the factory? Looks like the normal factory cutout for a rear window, so no framing needed to be cut?
Bisleybud
Advanced Member
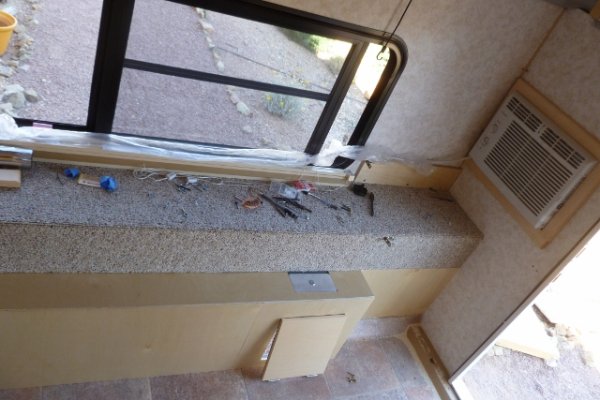
The A/C framing is different then for the window.I had them frame for A/C.No extra charge since I gave up the window..
Bisleybud
Advanced Member
Bisleybud
Advanced Member
Overland Hadley
Contributors
What is the white interior wall material like? How thick is it? How is it attached to the frame?
The thought crossed my mind today about pulling it out to do an interior skin of aluminum. It would be lighter and I think I could do something interesting with it.
The thought crossed my mind today about pulling it out to do an interior skin of aluminum. It would be lighter and I think I could do something interesting with it.
pods8
Contributors
What is the white interior wall material like? How thick is it? How is it attached to the frame?
The thought crossed my mind today about pulling it out to do an interior skin of aluminum. It would be lighter and I think I could do something interesting with it.
Just order you rig bare frame on the inside if you are thinking that route, should save time snd material costs from the factory...
The thought crossed my mind today about pulling it out to do an interior skin of aluminum. It would be lighter and I think I could do something interesting with it.
Just order you rig bare frame on the inside if you are thinking that route, should save time snd material costs from the factory...
It's always interesting to see how other people proceed with their projects -- I'm neck deep into what has amounted to a pretty complete rebuild of a '91 Granby, so it will be interesting to see what you do with yours.
Merrigahn's Arizona RoadRunner (Flowing Wells, just south of Wetmore) is an old-school RV repair place with lots of seemingly random bits that everyone needs - sort of like an Ace Hardware for RV's, except not nearly as organized. I've spent a bit of $$$ there (they made the new siding for mine) - nice folks.
Pancho's Upholstery (Stone & Ft Lowell) came to me highly recommended. Nice guys, but a bit slow on my new seats - maybe they're busy, or someone is on vacation, or something - who knows. I've also used Kwik Trim on 29th (east of Alvernon) in the past - they were pretty good too, but I've heard of them simply turning down work for what ever reason.
Anyway, congrats on the new project!
Overland Hadley
Contributors
Just order you rig bare frame on the inside if you are thinking that route, should save time snd material costs from the factory...
I wonder if I could order it that way. ?
I wonder if I could order it that way. ?
Bisleybud
Advanced Member
Hadley,
The interior paneling is a vinyl covered 1/4" ply.The aluminum skin on the inside might work ok.Thats the way Airstream did my 1990 excella.But it is cold to the touch in the winter.
Goodtime,
Thanks for the heads up on the RV supply places in Tucson.I have a place called Boca in S.Tucson who has done my Airstream cushions they did a great job.
pods8
Contributors
I wonder if I could order it that way. ?
It might through them for a loop for a half second, esp. on how to price it, but in reality it would save time/materials on the build so there should be a win/win common ground on deleting that. No point paying for all the materials/time if you're going to tear it out when it gets to you. I'm assuming you're ordering a 100% shell though, otherwise I can see issues with trying to have them do this.
However it could be tricky based on some of the trip work (top edge of the lower camper, where the cabover meets the front wall, etc.) that are normally on the outside of the interior walls. Also the window trim rings might not fit right w/o the paneling (but could probably just have some scraps stuck in for shipment purposes.
Final thought is if you know what paneling you'd really want to use see if they'd consider installing it.
Just spit balling here.
White Dog
Senior Member
How does the factory attach the inside and outside sheeting to the aluminum frame?
Bisleybud
Advanced Member
White Dog
The factory staples the aluminum outside siding on then the edging is screwed on.The inside is stapled and screwed on.
The factory staples the aluminum outside siding on then the edging is screwed on.The inside is stapled and screwed on.
Bisleybud
Advanced Member
Similar threads - WTW
- pods8
- Four Wheel Camper Discussions
- Replies: 47
- Views: 4K
- Ralph
- All Terrain Camper Discussions
- Replies: 10
- Views: 635
- fuse614
- Four Wheel Camper Discussions
- Replies: 5
- Views: 608
- Black914
- Four Wheel Camper Discussions
- Replies: 8
- Views: 532

