Panther Plan

On camper removal/installation

Needing the truck's bed to transport material for my [thread=1677]dinette mod[/thread], it was necessary to remove the camper. Removal and rolling back into the garage took, I think, about an hour. 15 minutes of that was attaching the jacks. And, I think, about 30 minutes to lower the camper w/ the cordless drill adapter. And about 30 minutes to cobble together a [post=16695]dolly[/post] and push it into the garage.

In the future, I think I could manage the whole thing in about 30 minutes.


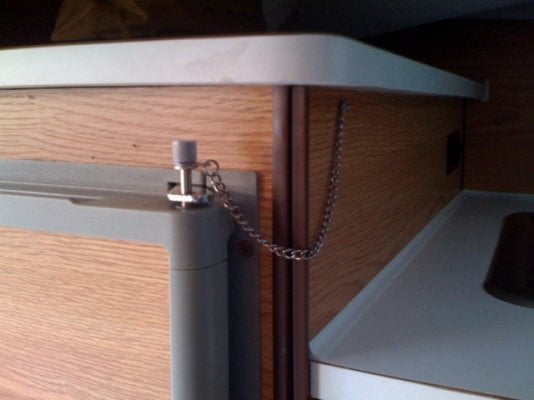
I find the reflection of the brake light off the camper and into the cab distracting at night. So before reinstalling the camper, I removed the combination brake/cargo light from the back of the camper. It is electrically connected via a simple connector that is easy to disconnect and will easily reconnect when I next remove the camper. This took less than 5 minutes. Doing this minor mod gave me a satisfying feeling.


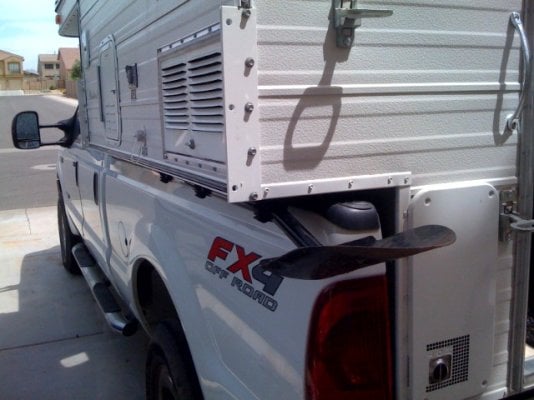
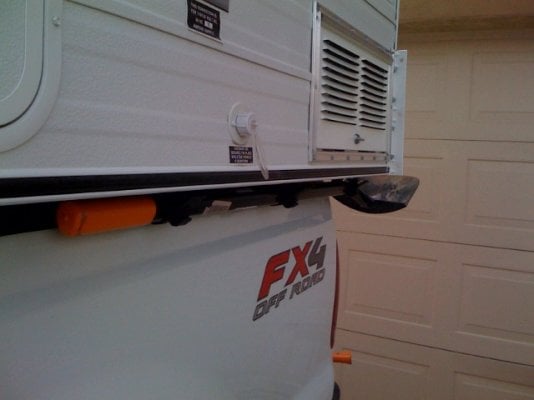
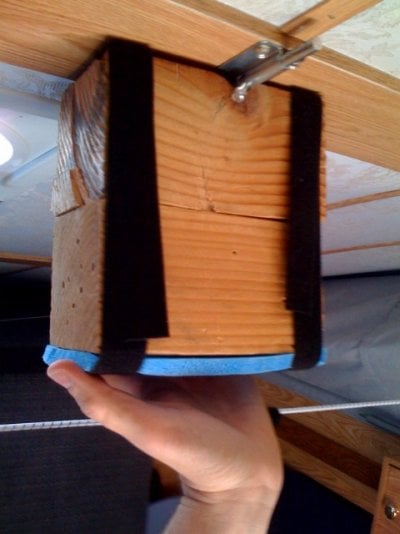
Reinstalling the camper took about 1.5 hours BUT included things like washing windows, thoroughly cleaning the truck bed, increasing the size of the wooden bumper (I'm thinking of Mr. Ingall's external [thread=1674]water bladder[/thread]) and generally installing it for the first time.

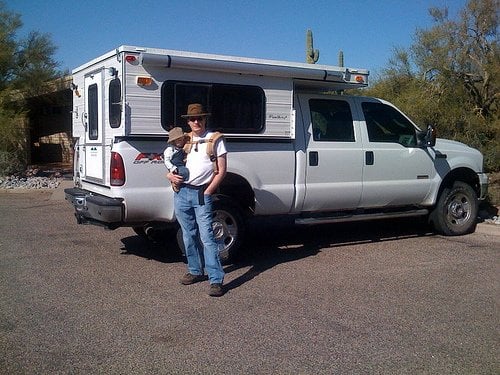
My son and I--each with a hand crank--raised the camper's floor above 41". The 4x4 F350 has a tall tail. I then backed the truck under the camper. The camper was lowered until it just touched the bed. From there I could single handedly center it by giving the camper the smallest push and then lowering the jack. I then attached the turnbuckles while my son removed the jacks.

This worked well for me. I think I'll manage the reinstall in 30 to 45 minutes in the future. I prefer having 2 people manage the jacks (4 would be even better!). It feels more stable to have 2 corners lower at the same rate than running down a single corner! Especially as high as this camper needs to go!

If I were going to frequently take this thing on and off by myself, I'd want to invest in an electric conversion kit. Pricey, but I suspect both safer and faster.


There are two things I'll do in the future. First, build a heavy duty dolly with the high floor height that allows the camper in my garage. (I'll add some sort of camper tie down to ensure safety.) Second, purchase another drill crank adapter. These two things should speed up the process and generally make it safer.
 
Went for a short day hike...

...and used the ATC as a base camp. Also, most of the hiking gear is stored there, so there wasn't much choice anyway.
 

Attachments

  • 3244796531_c4bf69573d.jpg
    3244796531_c4bf69573d.jpg
    134.8 KB · Views: 705
Mesquite CG

Not really worth it's own thread, but worth documenting. We went to Mesquite CG in the Tonto National Forest. It was a bit chilly, but not too bad. All in all, a great site.

The good: used the digital thermostat, worked well enough; tested the [thread=1677]dinette[/thread], very pleased.

The bad: although the frame is designed for off-road, the turnbuckles and curtains gave me problems! I already have the materials for a curtain upgrade that includes a switch from rods to simple Velcro hanging, just haven't done it, yet. I'll safety wire the turnbuckles, no other realistic option.

Legos rock!
3282537333_05b6171300.jpg


Little camper checking out grasses in the wash:
3283365212_70d760c48c.jpg
 
Propane Box Insulation

I'd thought this was a good idea, but hadn't felt the need until recently. But [thread=1837]Barko1 posted a pic[/thread] of his installation and that was enough. $24 for Reflectix and tape. Plenty of leftover insulation for windows, too.

Photos as follows:
  • All the parts, and a "helper".
  • Just one last thing...
  • All done!
 

Attachments

  • propane_liner_1.jpg
    propane_liner_1.jpg
    65.7 KB · Views: 472
  • propane_liner_2.jpg
    propane_liner_2.jpg
    122.1 KB · Views: 504
  • propane_liner_3.jpg
    propane_liner_3.jpg
    96.4 KB · Views: 503
I like that your door opens to the side, my goes up, and down.:(

I count 12 bolts on yours... If you've got a power driver and 10 minutes...? You'll probably need to move the hinges on the door, though...
 
I count 12 bolts on yours... If you've got a power driver and 10 minutes...? You'll probably need to move the hinges on the door, though...


Dang, never thought of that. My skills could turn it into a 2 hour job but I'll take a look at it.
 
Refer mod...

I got sick of opening the rear door to find food on the floor, so I adapted a pin to replace the plastic doohickey.
 

Attachments

  • refer_pin.jpg
    refer_pin.jpg
    65 KB · Views: 531
Mesquite CG II

Returned to Mesquite CG to test the bolt-through attachment, refer pin, and -- my wife reminds me -- have a wonderful family outing. Took most of the children (5 of 6!) as well as my sister's family. Rained a lot the first day, but sunny for Easter. I enjoyed hiding eggs for the children and they had fun searching! A nice trip.

We had one issue: during travel the camper was packed so tight -- food/gear for all those kids! -- the thermostat was jostled by a bin while traveling. The pins on the pop off piece were contacting the base, so we didn't have a heater until I'd fiddled with it long enough to find the problem...

Bolting the camper down looks like it will work out great.
 

Attachments

  • mcg.jpg
    mcg.jpg
    134.1 KB · Views: 476
Shovel Mount

Finally mounted the shovel OUTSIDE the camper. I don't know if I'm keeping this mount, but I'm committed to trying it out. My next trip has plenty of washboard road...

I used 3 regular QuickFist adapters (purchased from SierraExpeditions) and mounted them with 1 & 5/8th inch wood screws about four inches in from the outer edge of the camper.
 

Attachments

  • atc_shovel_1.jpg
    atc_shovel_1.jpg
    63.7 KB · Views: 450
  • atc_shovel_2.jpg
    atc_shovel_2.jpg
    47.5 KB · Views: 469
  • atc_shovel_3.jpg
    atc_shovel_3.jpg
    95.5 KB · Views: 453
  • atc_shovel_4.jpg
    atc_shovel_4.jpg
    62.3 KB · Views: 440
Shoulder Lift Adapter

While testing how much weight I could lift -- for solar panel investigation -- I thought I'd try out a simple tool. It's 2 pieces of scrap 4x4, a bit of spare foam, and a couple straps to hold it together. It has a cut out for the latch. I put my shoulder where under the foam and lift. I think it helps...

My test results for roof weight: I don't want to lift anymore than 15 extra pounds. Not much solar, but probably enough.
 

Attachments

  • atc_lifter.jpg
    atc_lifter.jpg
    76.8 KB · Views: 377
I like the mount but I think I'd go with through bolts.
Jay,

I'm not sure I like it. If I do, I'll use bolts. I think it should be out another inch.
 
Needed to link my [thread=2215]solar install[/thread] in this thread. Just forgot, before.

Dinette upholstery is done, but I haven't taken pictures yet. Probably tomorrow.

Added a front hitch. It sucked doing the install: serious contortions. If I'd have known, I'd have paid someone else! Huge PITA.

Just put the box on there for illustration. I like how high it sits, I don't think it'll do much to approach angle -- in the rear, it seriously impacted departure.

I don't know if it will impact cooling, the truck is really set up for a GCWR 3X what we run... I'll let you know when I find out.
 

Attachments

  • atc_front_hitch_01.jpg
    atc_front_hitch_01.jpg
    97.9 KB · Views: 284
  • atc_front_hitch_02.jpg
    atc_front_hitch_02.jpg
    86.6 KB · Views: 281
Back
Top Bottom