Tripod solar

buckland

Senior Member
Site Team
Joined
Jul 26, 2011
Messages
3,103
Location
New England
Here's a shot of the Eagle in the Adirondacks with our solar panel on a Tripod. We bought the On Stage speaker stand and use the central crank shaft to raise the camper (stored inside the table tube. The tripod was used to make the solar panel stand. I put in a plug on the side of the camper to the 2 glasspac batteries. This allows us to be in the shade and still charge the batteries as well as optimize the angle. Works great. The panel will be stored in the under cab overhang box 4"x48"x24" that will also have a wind foil. The panel has 4 sm.wood blocks on the sides to allow it to snap into the roof rack as well. The Eagle (2011) has performed flawlessly.
 

Attachments

  • Eagle.jpg
    Eagle.jpg
    162.8 KB · Views: 484
  • OnStage Speaker stand.jpg
    OnStage Speaker stand.jpg
    27.9 KB · Views: 459
Here's a shot of the Eagle in the Adirondacks with our solar panel on a Tripod. We bought the On Stage speaker stand and use the central crank shaft to raise the camper (stored inside the table tube. The tripod was used to make the solar panel stand. I put in a plug on the side of the camper to the 2 glasspac batteries. This allows us to be in the shade and still charge the batteries as well as optimize the angle. Works great. The panel will be stored in the under cab overhang box 4"x48"x24" that will also have a wind foil. The panel has 4 sm.wood blocks on the sides to allow it to snap into the roof rack as well. The Eagle (2011) has performed flawlessly.


Truly awesome. Thanks for this.
 
Looks very functional -- good idea. :)

I have a plan and materials (aluminum channel and angle stock) to make an easel-type stand for my free-standing solar panel. For the past year+, my panel stand has been one of my spare camp chairs...
mellow.gif
 
Thanks, I forgot to mention we store the camper in the garage for the New England weather. The solar panel fits into a slot in the window and the cord reaches the sidewall plug. That way the batteries are charged daily when in storage.
 
Thanks, I forgot to mention we store the camper in the garage for the New England weather. The solar panel fits into a slot in the window and the cord reaches the sidewall plug. That way the batteries are charged daily when in storage.


I'd say you have the situation covered, Buckland! Thanks for the info.
 
Well not completely, I found out yesterday there was a recall (?) on 1314 battery tender. I did not get a notice. I bought the Eagle in 2011. I opened the case but could not see a serial # anywhere. Any hints are appreciated.
 
Built an over the cab, storage box/air foil, serves dual purpose. The panel pops of the tripod and slides into the box. Bingo. I have also attached small ash wood blocks as 'feet' (on the framewhere it would normally be attached to the roof) The panel snaps into and is clipped to the aluminum roof rack if in full sun or on the go.
 
Perfect.

As for your sure power the sn is on the unit, the way mine was installed I had to use my camera to see it as it was not visible with being taken out. Sure enough mine was on the recall, my hawk is a 2010.
 
Hi Buckland,

I'd be interested in knowing a little bit more about your over-the-cab storage for the solar panel. Like how you made it and how it is attached. I'd like to do similar.

Thanks, Ted
 
Hi Buckland,

I'd be interested in knowing a little bit more about your over-the-cab storage for the solar panel. Like how you made it and how it is attached. I'd like to do similar.

Thanks, Ted


Interested also, photos?
 
Interested also, photos?


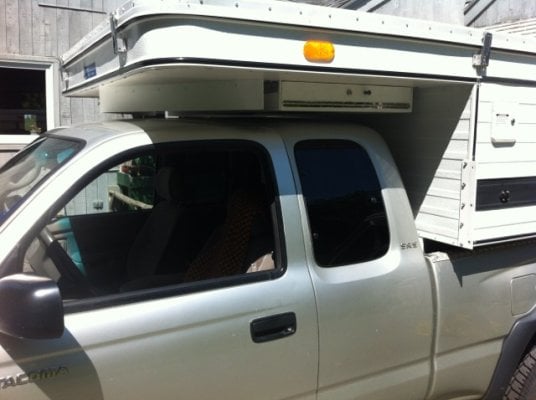
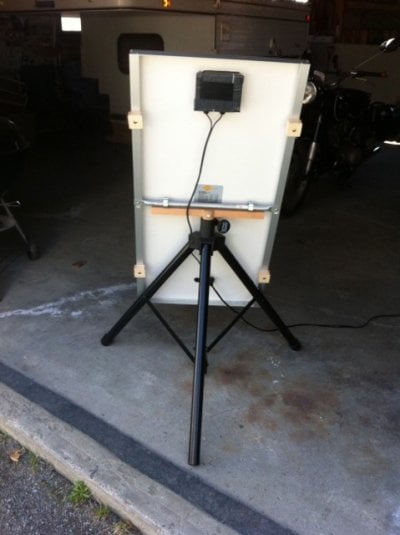
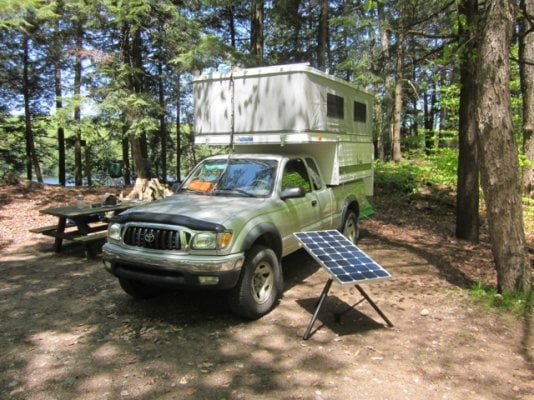
Hi just back from a trip to the North Maine Woods last night. I used a piece of 3/4" alum. conduit and hammered the ends and drilled 1/4" holes, this to mount to the solar panel frame across the center. I turned a piece of cherry on the lathe so it fit the tripod center and epoxied a 1 x 2"x 16" cross piece into a bridal joint on the top to make a "T". This T then had put on either end underneath, stainless a 2" hose clamp attached to the T with a screw so that the clamp was open up over the top. This allowed the cross bar on the panel to rest on top and a few turns of the hose clap tightened the panel to the stand... this allow for rotation of panel or adjusting the angle. I installed a DC outlet on the drivers side of the camper below the water fill door...into the end cabinet and over the top of the water tank to the battery box controller. I made a 12 foot extension cord to allow me to put te panel on the roof or on the stand. If I leave the camper at a 'canoe in' camp site. I put the panel on the truck and use a revolver barrel lock to secure the panel to the rack for security... no one seens to be able to see it up there anyway ...nice to come back to a couple cold beers! (we have an Engel).

The box sides were made from poplar 5/8"x 4 1/2" wide by 48" with a 1/4" dado 1/4"up for a 1/4" luan base. The door, on piano hinge with a barrel lock. (I installed 4, 1"x2"x2" ash 'feet' on the panel frame to elevate it off the base of the box as the circuit box is thicker than the frame... this also allows the panel to fit into the rack on the roof. I slide the panel into the box (glass up)and then.....!!!!!... I slide my deflated thermorest sleep pad into the box on top of the panel and then open the valve... the pad inflates and completely pads the panel so it won't move in any direction. The box is attached with 2 48" aluminum angle and sheet metal screws positioned at the back wall. It is 24 5/8" wide total. I then cut 2 4 1/2" x 30" wide 1/4" luan and using aluminum angle make a "V" wind foil in front of the box (it truly made a 1.5 mpg difference). The whole thing was painted with primer and a second coat of white paint.

The end.
 

Attachments

  • IMG_0846.jpg
    IMG_0846.jpg
    80.1 KB · Views: 545
  • IMG_0847.jpg
    IMG_0847.jpg
    111.6 KB · Views: 544
  • paneltripod1.jpeg
    paneltripod1.jpeg
    77.1 KB · Views: 464
I slide my deflated thermorest sleep pad into the box on top of the panel and then open the valve... the pad inflates and completely pads the panel so it won't move in any direction.

Very clever! Thanks for the how-to. :)
 

New posts - WTW

Back
Top Bottom