You are using an out of date browser. It may not display this or other websites correctly.
You should upgrade or use an alternative browser.
You should upgrade or use an alternative browser.
Truck camper home build
- Thread starter Avg.Joe
- Start date
Avg.Joe
Senior Member
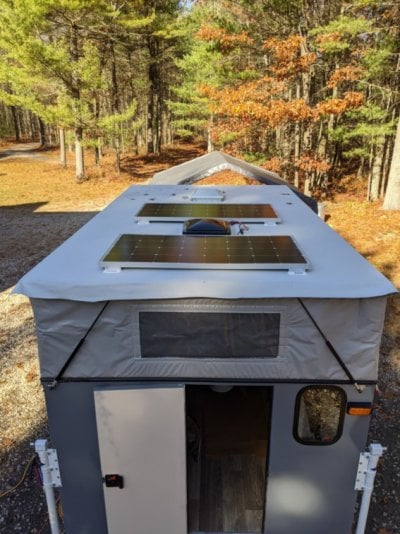
After the sun dried the frost on the roof, I mounted the solar panels. Did you know that Alpha 1021 sealant can be applied down to 5°f? I didn't, but I was thankful to learn that today.
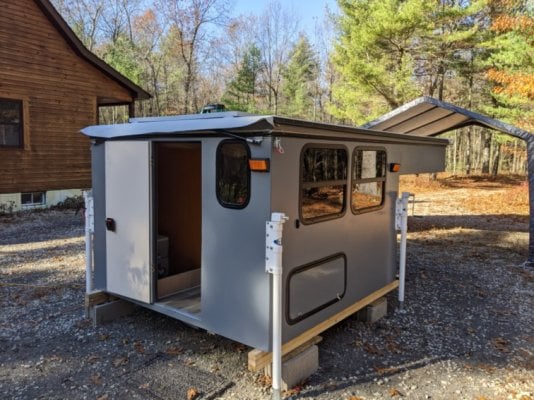
With the panels mounted and the new 95lb struts installed, I tried lowering and raising the roof by myself. Aside from really needing some bungee tethers on the liner, it went super smooth! Man I was jazzed!! I had noticed that in the raised position the roof is off to one side a little bit. I could not figure out how to re-center it and figured it probably won't hurt anything...part of the home built character, I guess.
With the panels mounted and the new 95lb struts installed, I tried lowering and raising the roof by myself. Aside from really needing some bungee tethers on the liner, it went super smooth! Man I was jazzed!! I had noticed that in the raised position the roof is off to one side a little bit. I could not figure out how to re-center it and figured it probably won't hurt anything...part of the home built character, I guess.
Attachments
Getting there!
Avg.Joe
Senior Member
Thanks Vic. It feels like it's slowed down but realistically there's not that much left to do.
I'm spending today rewatching John McK 47's YouTube videos on diesel parking heaters. He did a great series explaining every aspect of them from design to install and use. I'll be ordering the heater when I get a list together of all the things he points out to look for.
I'm spending today rewatching John McK 47's YouTube videos on diesel parking heaters. He did a great series explaining every aspect of them from design to install and use. I'll be ordering the heater when I get a list together of all the things he points out to look for.
WillTheThri11
Senior Member
With this design, the roof is raised by two opposite sides. The sides that do not have mechanical supports (conduit lifters in this case) act as a kind of soft shear wall that needs to be taut and only gets that way by the pressure provided by your conduit lifters.Avg.Joe said:... I had noticed that in the raised position the roof is off to one side a little bit. I could not figure out how to re-center it and figured it probably won't hurt anything...part of the home built character, I guess.
If the lifter bars are not making the canvas taut the roof will lean over like a parallelogram until the canvas becomes taut and that shear feature is then activated. If this is the case, I think I'd want to fix this. I wouldn't want it shifting in the wind
If there is pressure and the canvas is taut it may simply be that the canvas was not attached to the roof and camper wall uniformly.
Oh and more obviously, but less likely due to the find craftsmanship of this built. The lifters could be different lengths or mounted to the wall at different heights.
Avg.Joe
Senior Member
That's a great explanation Will and thanks for the kind words.
It's a combination of factors I think. The conduit lifters are not exactly the same. That's a product of my apprentice level skills. The roof and side walls did not match perfectly before parts were connected. What I mean is the top rim of the hard side walls was not perfectly straight (slight bow in the center of the wall). I centered the roof as best as I could. The lifters were attached where they landed on the attachment points. I did measure the bottom anchors so they are at the same height. Then the canvas was hung as evenly as we could fit it but the top edge did have some unevenness to it. Based on all that, it's not hard to see where it could be off some.
The front is really close. The back is where it shows the most. When I discovered the unevenness, I removed the props inside and tried to shift the roof but it wouldn't budge. That's probably due to the liner being tight.
At the end of the day it comes down to me accepting that it won't be as perfect as I would like. I have limits in engineering and building, and materials like wood are going to move. What matters to me is that it keeps us dry and warm, holds all of our stuff, and withstands cross country road trips on paved and unpaved roads.
Avg.Joe
Senior Member
I ordered the diesel heater. A friend has had good luck with the happybuy brand so that's what I got.
https://www.amazon.com/gp/aw/d/B07KDL5633/ref=ya_aw_od_pi?ie=UTF8&psc=1
https://www.amazon.com/gp/aw/d/B07KDL5633/ref=ya_aw_od_pi?ie=UTF8&psc=1
Avg.Joe
Senior Member
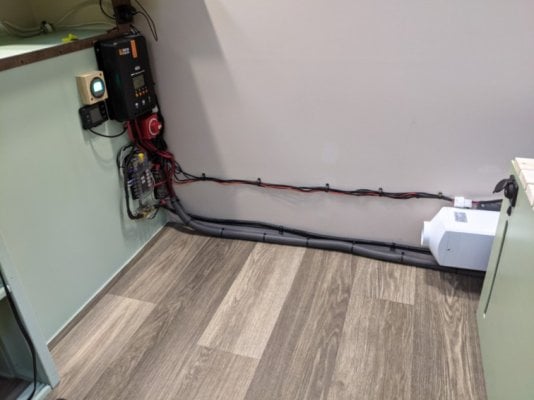
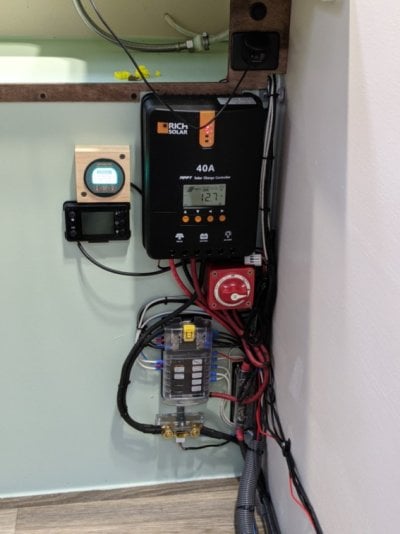
The diesel heater arrived. I'm working on the plumbing at the moment. I'm attempting to pack a lot in a small space. Water, heat, and electric need to fit in the front corner opposite the kitchen. I'll post pics of progress.
Yesterday, I finished the roof latch installation and got the screw cover trim run all around the roof. It was sunny so I took care of some touch up painting also.
Yesterday, I finished the roof latch installation and got the screw cover trim run all around the roof. It was sunny so I took care of some touch up painting also.
Packing lots into small spaces is one of the areas that I think "home" builds can really improve on vs the factory builds. I see and hear folks talking about "wasted space" in their campers.... that's space where rarely touched devices - pumps, controllers and other stuff can go. I did this on my first build, and in my second build (the PUMA) I made darn sure I could actually get at those places I tucked stuff into. That was a lesson learned....Avg.Joe said:The diesel heater arrived. I'm working on the plumbing at the moment. I'm attempting to pack a lot in a small space. Water, heat, and electric need to fit in the front corner opposite the kitchen. I'll post pics of progress
Avg.Joe
Senior Member
There is going to be quite a bit of stuff packed into a relatively small space. That probably would mean replacing a water pump in the future will require disassembling some other things. This is a risk I'll have to take to still retain as much storage space as possible.
Vic, your cabinet work on the Puma looks amazing. Mine will be nowhere near the level of yours. My goal is neat and usable. Pretty is a little beyond my capability.
Vic, your cabinet work on the Puma looks amazing. Mine will be nowhere near the level of yours. My goal is neat and usable. Pretty is a little beyond my capability.
Avg.Joe
Senior Member
I finished the heater installation yesterday. I wasn't able to get it working though. It didn't come with any instructions and the controller programming doesn't match what I could find on the interwebs.
After emailing the seller last night, I found a response with pdf instructions this morning. We'll be giving it another try today. With thousands of these units out there, I'm sure mine will work great once I figure out how to work it.
After emailing the seller last night, I found a response with pdf instructions this morning. We'll be giving it another try today. With thousands of these units out there, I'm sure mine will work great once I figure out how to work it.
Avg.Joe
Senior Member
Heater update: The heater seller refunded enough money for me to get another controller after I couldn't get theirs to do anything.
The new one arrived and after hooking it up, it showed a line fault. That made sense because the first controller should've shown line voltage but didn't.
All the wires and connectors checked good. It looks like a bad motherboard.
Now I'm waiting for the seller to answer my request for a new unit or a refund so I can replace the motherboard.
It's a pain for sure but it'll work at some point.
Avg.Joe
Senior Member
Avg.Joe
Senior Member
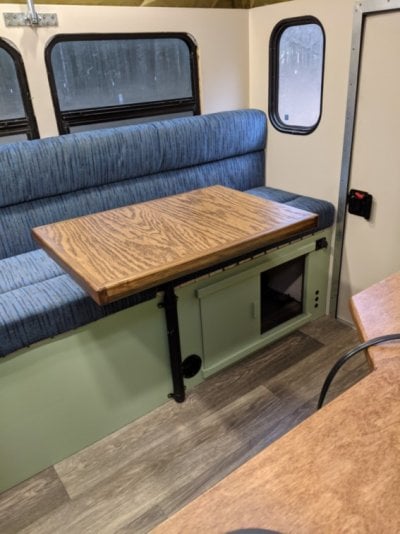
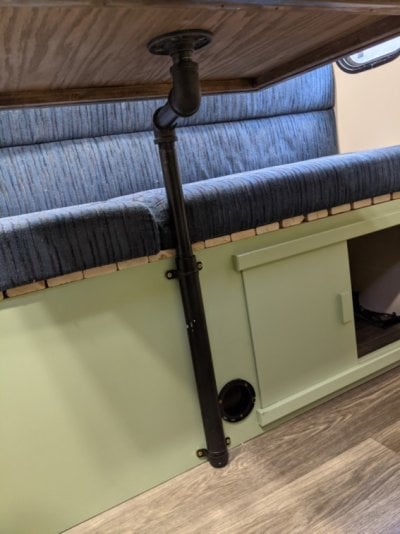
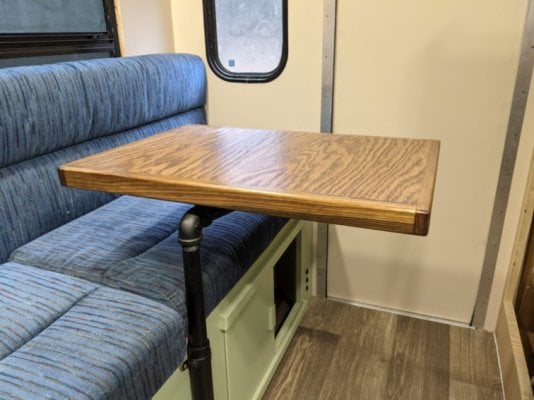
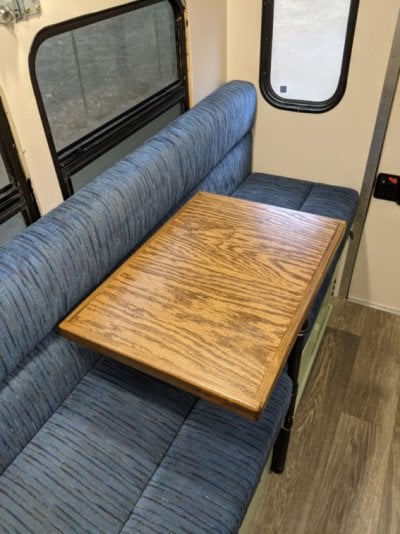
We decided not to go with the Lagun table leg and instead followed directions from a YouTube video for a DIY version. The top swivels easily giving infinite setup possibilities and the top can be easily removed by simply unthreading from the leg. I am super happy with how it turned out. The top was made with scraps. I wasn't sure how it would look but stain and poly really turned it into a good looking table. All in on this part was $50.
Attachments
Avg.Joe
Senior Member
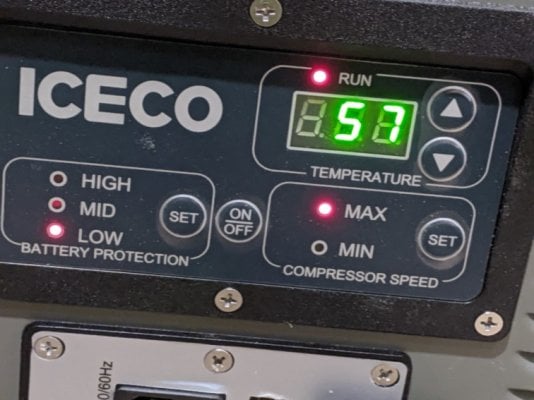
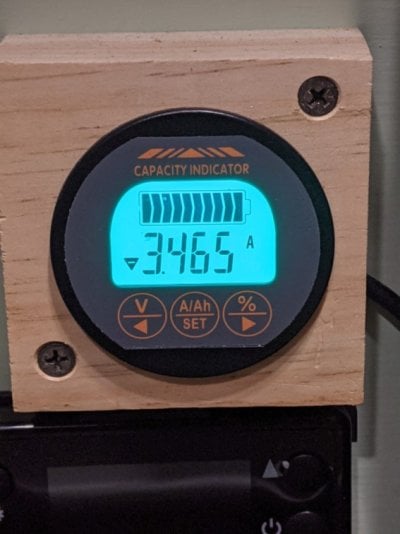
The Iceco fridge is now in place and wired direct to the fuse block. It was 55°F in the camper and the fridge cooled to 37°F in about 20 minutes drawing about 2.5 amps. The meter shows more but I had a couple of lights on. In the dark it read 2.5.
Attachments
Avg.Joe
Senior Member
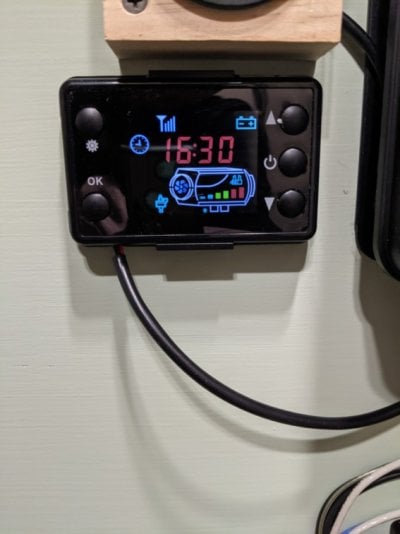
Looks like you have a heater control panel mounted, did you get that all resolved? Are you pulling diesel from your trucks fuel tank(don't recall what truck your putting this on) or you doing an auxiliary tank?
-Chris[/qu
The new display gave me a fault code that helped diagnose what looks like a bad motherboard. I've got a new one on order. Fuel for the heater is in a 5 gallon jug in an exterior compartment. I'll try to remember to get a pic of that uploaded.
Avg.Joe
Senior Member
The new motherboard for the heater was installed this afternoon. Initially it gave another error code e-01 low voltage. After some digging, I found a Chinese language YouTube video on how to get into the menu where voltage is. It came set for 24v so I changed that to 12v and the code went away.
After priming the fuel line, it fired up and ran great albeit a little stinky. All worked as expected. I'll run it a bunch more in the coming week or so to make sure it's going to be reliable.
After priming the fuel line, it fired up and ran great albeit a little stinky. All worked as expected. I'll run it a bunch more in the coming week or so to make sure it's going to be reliable.
Attachments
longhorn1
Ouch, that stings!
Just came across your build. Read the whole thing. Absolutely amazing what you have done. Thanks for sharing the build. JD
Avg.Joe
Senior Member
Thanks for reading the thread JD. It's been fun to build and I'm still working to finish it.
Similar threads
- Glenn
- Truck Campers
- Replies: 11
- Views: 772
- Shawn S
- Alaskan Camper Discussions
- Replies: 7
- Views: 1K
Try RV LIFE Pro Free for 7 Days
- New Ad-Free experience on this RV LIFE Community.
- Plan the best RV Safe travel with RV LIFE Trip Wizard.
- Navigate with our RV Safe GPS mobile app.
- and much more...


