Water tank

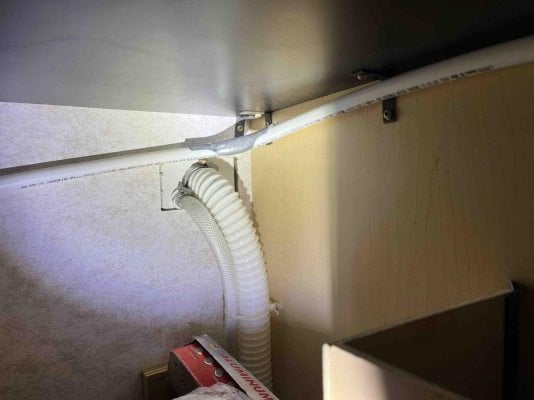
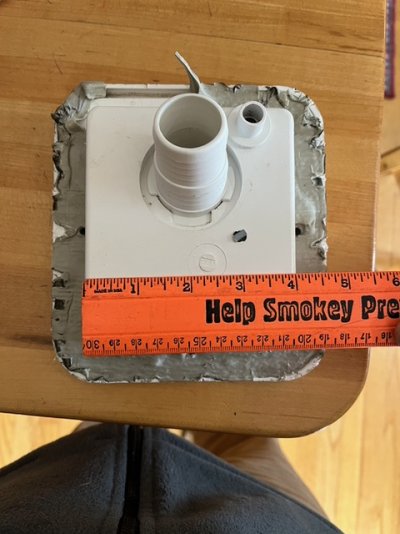
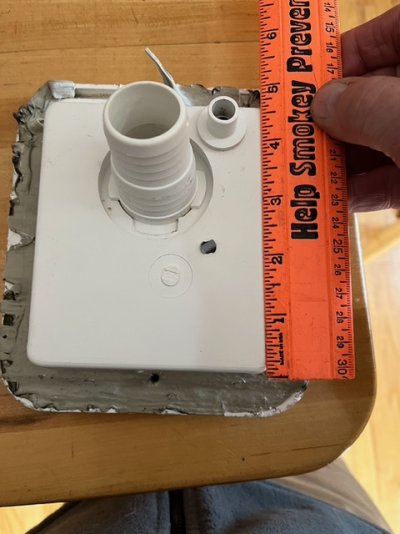
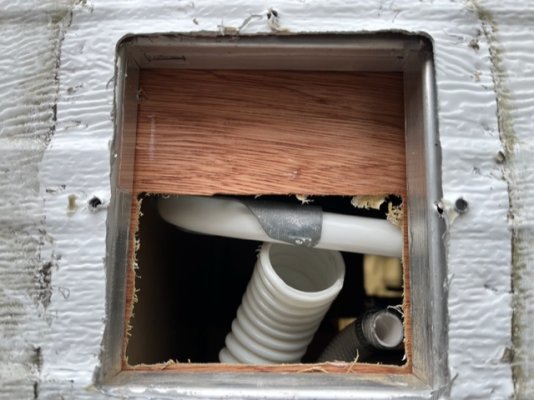
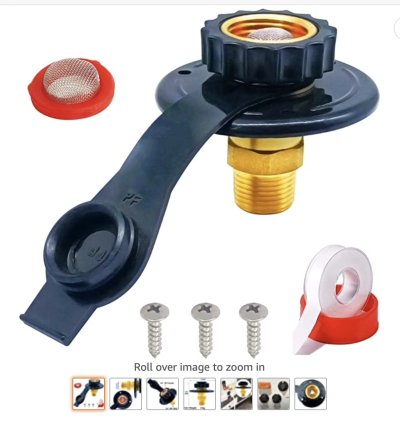
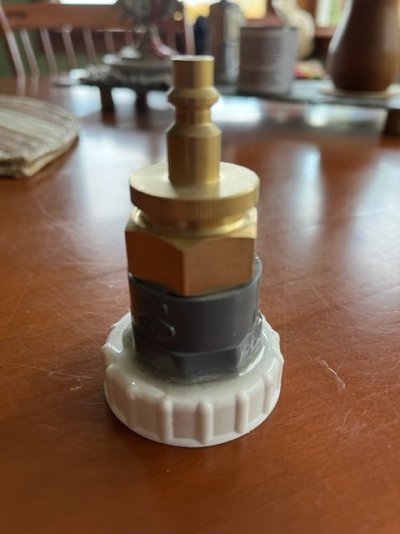
That's the exact one I found but my original is 6"x6.5" and this one isa bit wider (1") ...I wonder if the cutout is the same or iff not I can cut a bit more. When you did yours is there aluminum frame in the wall there?

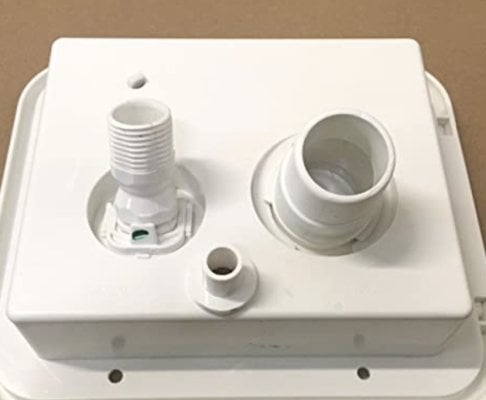
The only other question is the configuration difference in that currently just the fat one hose from tank (minus the breather) and now there will be two different diameter hoses needing to go into the single tank hose. Anyone know a source of a "Y" fitting with two different diameter male ends?
 

Attachments

  • Screen Shot 2022-08-29 at 3.15.04 PM.jpg
    Screen Shot 2022-08-29 at 3.15.04 PM.jpg
    59.8 KB · Views: 29
  • IMG_6647.jpg
    IMG_6647.jpg
    90.7 KB · Views: 32
The tank that I ordered from FWC had the right fittings on it. Can you see the fittings now? There is likely one that is not it use of the correct size (1/2")

I do have framing around mine. If this one is too big, look around, you can likely find one the correct size.
 
hey thanks for that I assumed the tank only had the one so I will open that up and take a look. I sure hope so it would make it easier. Appreciate the direction! Tomorrow more investigating.
 
Hey Vic I got into that cabinet and down too the water tank and there is only the 1.5" hose intake and the breather. So Looks like the next step for me will be to ask FWC parts department if they know the frame measurements (I tried removing the water access door but it is extremely tight and don't want to pull that apart until I get more info).
Then the obvious next step would be to acquire a "Y" fitting with the 3/4" and 1 3/8" in the Y and 1 3/8" and splice that into the single feed line into the tank.
 
Hello again.... I ordered a door unit that was recommended by the FWC parts dept. Alas it was bigger but hoped I could turn unit 90º. i removed one in the camper and was confronted by a stop sign. the space is surrounded by frame 4.5" square. So I will return the door unit I bought. TO ALL EAGLE OWNERS.....does anyone have a source for a replacement that would fit that space (which would have the city water hose too)?
There was frost on the pumpkin this morning so will reassemble to old one back in.
I am an expert in working hard and getting nowhere!
 

Attachments

  • IMG_6847.jpeg
    IMG_6847.jpeg
    162.1 KB · Views: 25
  • IMG_6849.jpeg
    IMG_6849.jpeg
    153.9 KB · Views: 27
  • IMG_6850.jpeg
    IMG_6850.jpeg
    128.6 KB · Views: 30
I think I will punt and do my own with the original box and cut a 7/8"" hole and install this. The 1 1/4" gravity fill pipe I will have to cut and put in a wye so that I have 2 into one into the tank. I'll have to slice off a bit of the circumference on opposite sides of the round 3" rubber mount.... a tight fit but it should work!
 

Attachments

  • Screen Shot 2022-09-30 at 1.36.19 PM.jpg
    Screen Shot 2022-09-30 at 1.36.19 PM.jpg
    169.6 KB · Views: 23
A change of idea that makes it less work. For those with an older camper prior to the city water hose fixture (only gravity fill). The photo below is 4 parts: $7 for a replacement cap (a forstner bit 3/4" hole cut in top), a pipe thread waterline fitting, a male pipe thread to female hose thread adaptor, and the hose thread air pressure fitting. I used 5 minuter epoxy to join cap to pipe fitting.
Simply unscrew water cap on camper, put this cap on and use compressor at 30lbs to blow out water in system out the rear petcock drain.
Sure hope this works as it is getting cold here and I want to winterize the water tank. We leave in January for the southwest. My hope is to once far enough south, fill the 20 gallon water tank for 3 weeks in Big Bend. We will also carry suitcase water. After the three month wandering around we head back to the Northeast and I can use this cap with my onboard compressor to blow out the tank should the temps still be below freezing. It is mostly for when we are out in the desert I want to have a lot of water.

yup it worked!
 

Attachments

  • IMG_6919.jpg
    IMG_6919.jpg
    40.2 KB · Views: 26

Latest posts

Back
Top Bottom