Solar controller placement

takingatrip1

Advanced Member
Joined
Oct 7, 2014
Messages
70
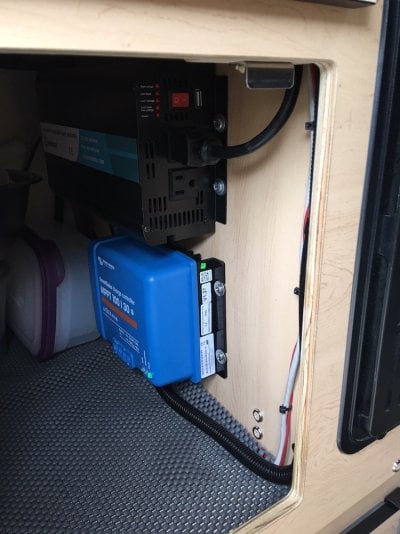
Question for those of you who have solar controllers .

The shortest distance from the controller to the battery is recommended .

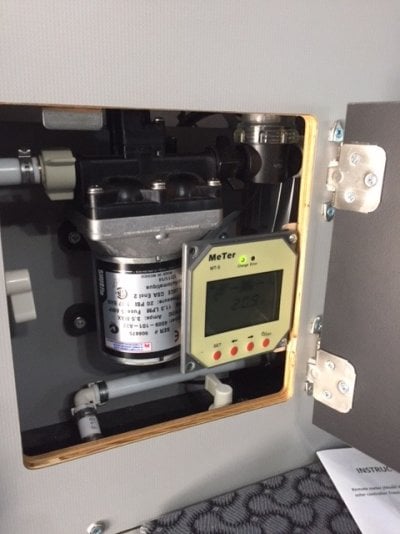
If using an AGM battery is there a safety concern mounting a controller in the same compartment as the battery.

There are no relays just a circuit board . AGM batteries don't need to be vented so following that logic no gases escape .

The controller is totally sealed in back . the instructions don't make any reference that I see .

Go Power GP-Pwm 30

Opinions? Experience ?
 
No concerns by me.
Going on 5 years, so far.

MorningStar SunSaver 15T Solar Controller, mounted upside down for easy access to wires, in top right corner of this photo.
Remote MorningStar digital display meter slightly to the left of controller.
LifeLine 100 Amp/Hr AGM battery in protective plastic box.
A few switches and fuse panels, all in the same cabinet/seat.

img_149722_0_ecbb56b54caa0507d453ffaf9412619f.jpg
 
MPPT controller mounted in cabinet right above battery storage area. Keeps it out the way and 8" from batteries. 2013 FWC Fleet with 200 watts of Renogy solarImageUploadedByWander The West1471487840.785563.jpgImageUploadedByWander The West1471487870.800208.jpg

I used the plumbing holes for wiring. No need to create new ones. Heat dissipation from controller is required. I also like the easy access. Suggest location decision based on access, heat dissipation and distance to battery in that order. Works great for me.


Sent from my iPad using Wander The West
 
So, here is the final product

Drilled a hole from the interior of the camper for solar panel leads to pass thru


Used Eternabond tape to secure the "cable gland" to the roof


Cable Gland


Dicor self leveling sealant applied


160W Grape solar panel mounted to the Yakima rails


Solar controller up and running
 
I used split loom to protect the wires as they passed into the camper
I used silicon to provide additional protecting on the compression fittings to the cable gland
I used 30 amp inline fuses on the solar leads into the controller
I used Renogy Z brackets to mount the panel to the rails

I was really surprised at how secure the eternabond attached to the camper. I initally intended on adding a screw in each corner of the gland but dont think it's going to be necessary. With this eternabond tape its really just a "one shot " once it makes contact your not re positioning anything.
The panel shields the roof penetration from direct sun / rain so I think the sealant will last longer
The 28 lb panel does increase the effort needed to lift the roof. Lift struts will be next but im able to use the camper without them. Although it takes everything i've got each time. (how is that...it's only 28 more pounds ! )
 
How is it that the Truck and the solar can charge the batteries at the same time ? As I drive the panel will be getting sun and the alternator will be supplying juice also. Does the charge controller and the Iota just see when the batteries are full and then just stop supplying power ?


forgive me...im new :unsure:
 
I placed the controller and remote meter behind/inside the cabinet.
 

Attachments

  • image.jpeg
    image.jpeg
    90.6 KB · Views: 137
  • image.jpeg
    image.jpeg
    53.7 KB · Views: 159
  • image.jpeg
    image.jpeg
    82.4 KB · Views: 145
I'll just throw this note here. I just finished installing my Bogart SC2030 charge controller and then reread the directions and had to move it. Instructions say to mount it with the heat sink fins vertical for cooling. Something to keep in mind. I missed it in prior reading. There is a lot of documentation with the Bogart stuff.
 
Squatch said:
I'll just throw this note here. I just finished installing my Bogart SC2030 charge controller and then reread the directions and had to move it. Instructions say to mount it with the heat sink fins vertical for cooling. Something to keep in mind. I missed it in prior reading. There is a lot of documentation with the Bogart stuff.
Yes, I also saw the vertical fin requirement. And for my hawk install, upside down worked well. Wires accessible with the drawer removed.
 

Attachments

  • image.jpeg
    image.jpeg
    82.6 KB · Views: 126
  • image.jpeg
    image.jpeg
    126.8 KB · Views: 112
Like Sledawg, I used the cabinet above the battery on a FWC Fleet. I used the north wall instead of the south wall. A very short run to the battery and a short run up and over to the factory solar panel wiring.

I vented the cabinet using a Sea-Dog #337390 louvered vent to match the IOTA vent in the camper.
 

Attachments

  • Solar_Controller.JPG
    Solar_Controller.JPG
    248.8 KB · Views: 85
  • Vent.JPG
    Vent.JPG
    246.4 KB · Views: 92
Back
Top Bottom