Yukon
Senior Member
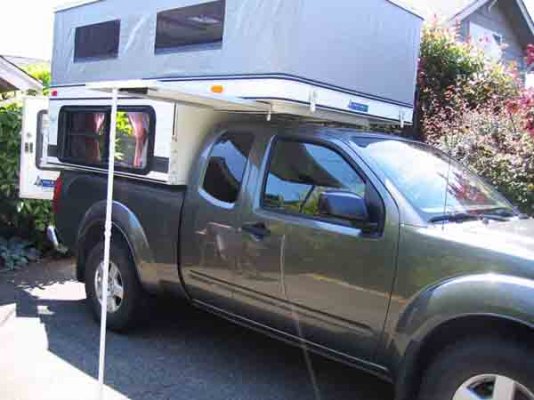
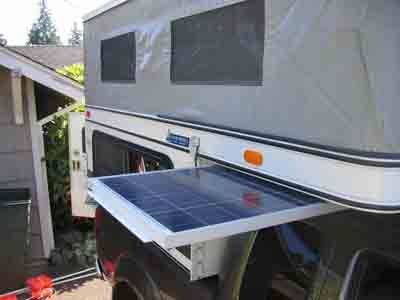
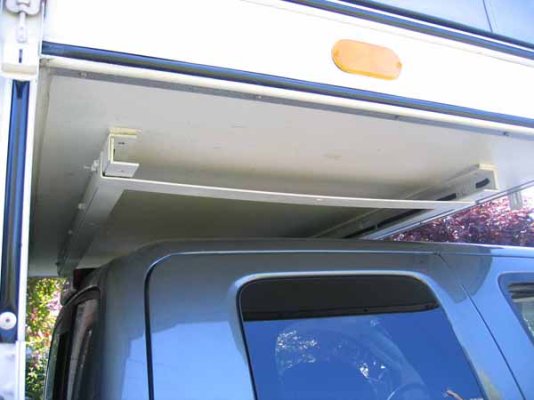
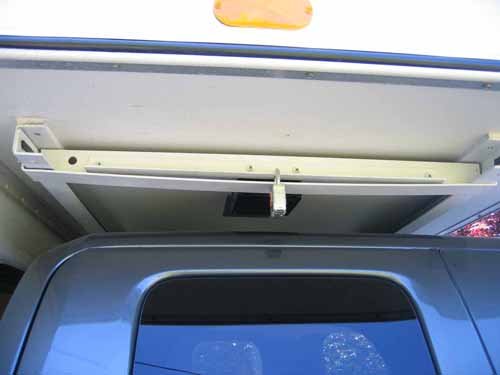
Thank you to all of the many people who posted Solar articles on this site. You helped me a lot in doing my project for my 2008 Eagle! In spirit of sharing, here’s my implementation in 2012. The panel is mounted under the camper bed (outside of course). I didn’t want to have to lift the weight on roof and also this allows me to easily remove it when not on a trip.
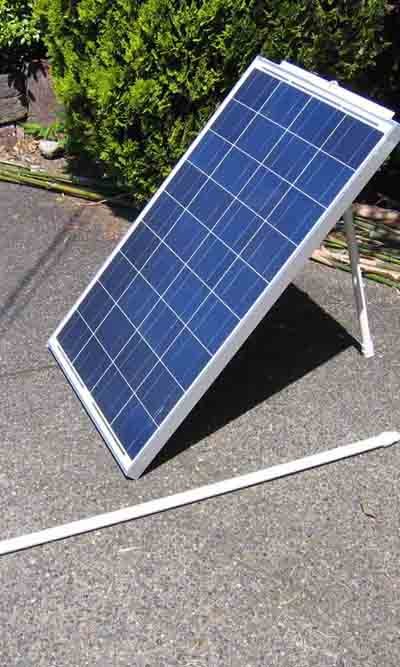
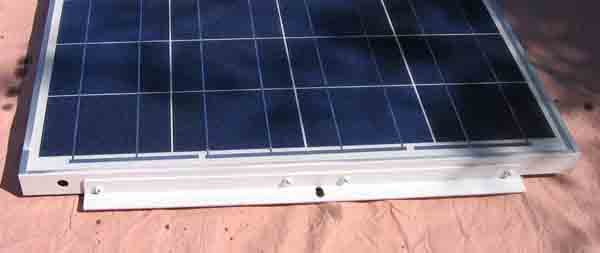
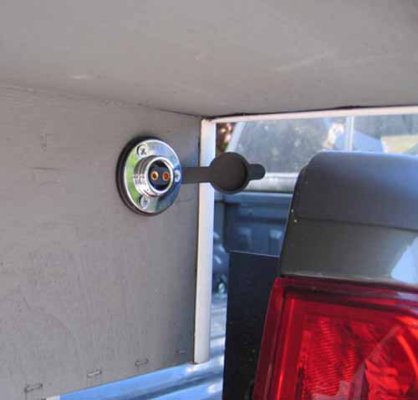
I can slide the panel out and leave it in bracket with a PVC post holding it up. There is a pad lock that locks it both in the full out position and the storage in position. The PVC pipe screws together allowing me to use half of it as a stand post (if I take the panel completely out and use it on the ground). The cable plugs into the side of the camper using marine jack and wiring goes into the long storage compartment very close to the battery. The PVC pipe has an end cap on it with an eye hook screwed into the cap which ‘hooks’ to end of panel.
I have about 15 foot of free cable allowing me to put panel anywhere I wish if not in the bracket.
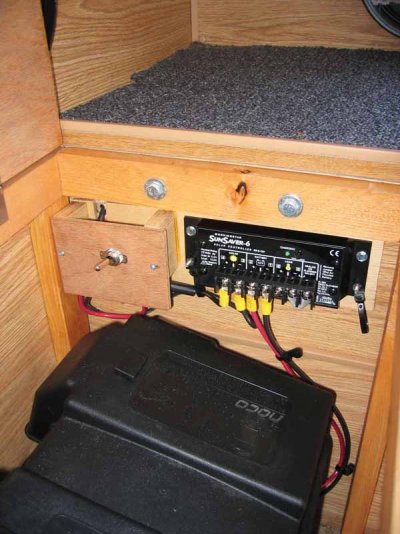
I used stranded 10 AGW wire (I didn’t buy expensive Solar cables). Power goes from panel, through wire to jack on side of truck, to switch, to fuse, to controller, to battery. Simple. It puts out about 5 amps in direct sun.
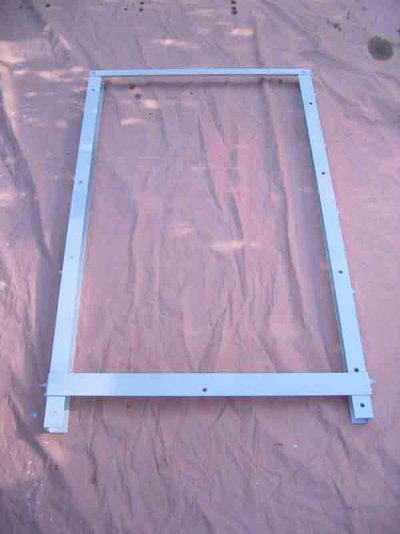
If I were to do this again I would spend the bucks to add aluminum welding gear to my Lincoln welder and weld the bracket together instead of bolting it. You cannot remove bolts though while the panel is locked into storage.
[For those of you living in Northwest, maybe I will see you at the Overland Rally in Leavenworth, WA at the end of the month? ]
Cheers,
Chris (aka Yukon)
Parts Info (Prices approx.)
Solartech 85 Watt Panel (Wind & Sun, AZ) $240
Morning Star Sunsaver 6 amp (12V) controller (Wind & Sun) $39.00
Cable socket (West Marine) ($15)
10 amp fuse & holder (Home Depot) ($3)
20 amp toggle switch (Home Depot) ($2)
10 AWG stranded wire (Home Depot) $ 0.50/ft
Cable protection sheathing (West Marine) $10
¾ inch PVC Pipe & fittings
¼ inch bolts & locknuts, stainless (Lowes)
Aluminum 1.5 Inch L bracketing (Home Depot ) $40
Aluminum 1.0” L bracket (end piece) $10
Aluminum 2.0” 1/8 thick cross piece $10
I can slide the panel out and leave it in bracket with a PVC post holding it up. There is a pad lock that locks it both in the full out position and the storage in position. The PVC pipe screws together allowing me to use half of it as a stand post (if I take the panel completely out and use it on the ground). The cable plugs into the side of the camper using marine jack and wiring goes into the long storage compartment very close to the battery. The PVC pipe has an end cap on it with an eye hook screwed into the cap which ‘hooks’ to end of panel.
I have about 15 foot of free cable allowing me to put panel anywhere I wish if not in the bracket.
I used stranded 10 AGW wire (I didn’t buy expensive Solar cables). Power goes from panel, through wire to jack on side of truck, to switch, to fuse, to controller, to battery. Simple. It puts out about 5 amps in direct sun.
If I were to do this again I would spend the bucks to add aluminum welding gear to my Lincoln welder and weld the bracket together instead of bolting it. You cannot remove bolts though while the panel is locked into storage.
[For those of you living in Northwest, maybe I will see you at the Overland Rally in Leavenworth, WA at the end of the month? ]
Cheers,
Chris (aka Yukon)
Parts Info (Prices approx.)
Solartech 85 Watt Panel (Wind & Sun, AZ) $240
Morning Star Sunsaver 6 amp (12V) controller (Wind & Sun) $39.00
Cable socket (West Marine) ($15)
10 amp fuse & holder (Home Depot) ($3)
20 amp toggle switch (Home Depot) ($2)
10 AWG stranded wire (Home Depot) $ 0.50/ft
Cable protection sheathing (West Marine) $10
¾ inch PVC Pipe & fittings
¼ inch bolts & locknuts, stainless (Lowes)
Aluminum 1.5 Inch L bracketing (Home Depot ) $40
Aluminum 1.0” L bracket (end piece) $10
Aluminum 2.0” 1/8 thick cross piece $10
Attachments
-
 Full Out3.jpg45.3 KB · Views: 501
 -
 controller3.jpg81.7 KB · Views: 485
 -
 frame3.jpg36.1 KB · Views: 420
 -
 Ground mount3.jpg55.4 KB · Views: 396
 -
 half Out3.jpg30.8 KB · Views: 402
 -
 install closeup3.jpg45.5 KB · Views: 415
 -
 Lock3.jpg33.7 KB · Views: 386
 -
 panel brkt3.jpg26 KB · Views: 400
 -
 socket3.jpg33 KB · Views: 377

