1976 Cab Over Alaskan Camper .... As-Is, Mods,Damage and Fixes

docalex

Advanced Member
Joined
Jun 29, 2019
Messages
57
Location
Southern California
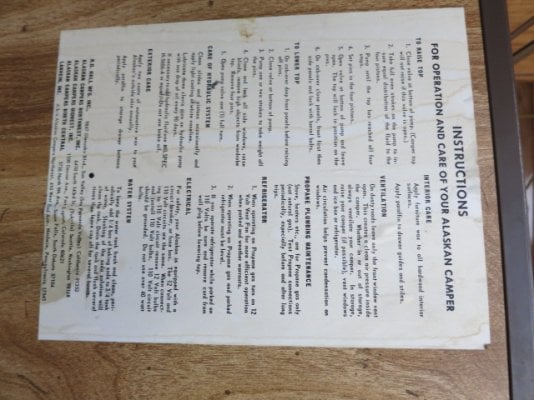
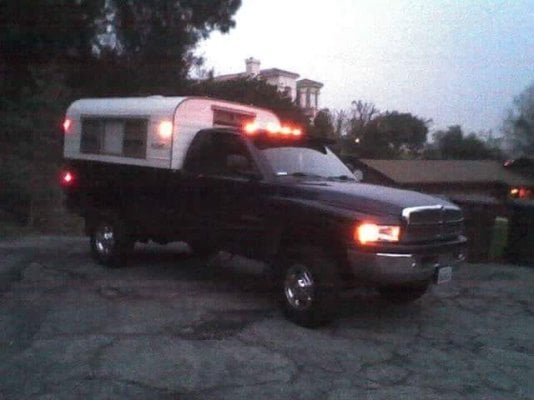
I was looking to buy a Camper. I wanted to buy an Alaskan Camper but I was unsure of what I was getting myself into. What I struggled with and ruminated over was purchase cost, condition , time and effort money issues. Do I buy the old beater and restore it (less time camping and I have enough unfinished projects in my life) ... Or... Buy a new or newer one ( 30 K new is way out of my price range )
I found this forum and other information on the internet very very helpful. I really liked the youtube videos
of the guy completely gutting and de-roofing his CO Alaskan. I also like and appreciate the build, mads and fixes with lots of pictures ( re...1000 words).

" Experience is knowledge every else is just information " - Einstein

So thanks for the info.... sharing your experiences

and I am going to post mine up here........

DocAlex

IMG_3816.JPG
 
The previous owner bolted an angle iron frame on the bottom of the camper and fabricated these beefy stairs. He stored the stairs between the camper and the bed of the truck.The ladder wont fit in my truck....

IMG_2822.JPGIMG_2823.JPGIMG_2824.JPGIMG_2825.JPG
 
Looking forward to more. We are going through the same thought process right now. Although getting a 3/4 ton truck is first on the list! I am leaning towards and older Alaskan so we can pretty much gut it without remorse and build it out how we want. But the time vs. fun ratio is going to get better once I retire.
 
I have owned six Alaskan's since 2008 and each one needed repair of some sort or another. My first was a 59' NCO and I refinished the cabinets and reupholstered the cushions only. Latest is a 1968 NCO and needs extensive dry rot repair in the top section. You can find a good later model year in the area of 9K to 15K if you are vigilant. I moderate a group on Facebook and do a nationwide search a couple times a week.
Extremely nice 58' NCO in Santa Cruz, CA. for $5500
https://sfbay.craigslist.org/scz/rvs/d/santa-cruz-1958-alaskan-pop-up-camper/6925656574.html
 

Attachments

  • 59 nco.jpg
    59 nco.jpg
    29.3 KB · Views: 218
Purchased her for $ 2500 ...
Drove 1869 miles to get her .....
Burned less than 100 gallons of fuel.
With her on my back I was passing trucks with a 50 mile an hour cross wind going up a grade..
I am really impressed with my new old dodge...paid 4k

Here is the craigs list ad...

IMG_2839.JPG
 
Cabinet Latch Fix

The pin that pushes in has been worn down and is too short to trigger the mechanism. I cannabilized an electrical butt splice and pounded the hollow metal piece on to the pin to extend it. I trimmed it to size with a grinder and drilled out a bigger hole on the latch mounting piece to accomodate the now thicker pin.
Solved that problem, and what a pain, the non functioning latch was on the most used pump access cabinet.

IMG_2844.JPG

IMG_2846.JPG

prior owner latch hack ...other issue

IMG_2847.JPG
 
Froli bed system,

I purchase the froli star basic package from amazon . I was concerned that I would need a few extra modules.... they are perhaps spread a bit then... but they work perfect...

After my first order success I ordered another basic package for the bottom bed ... spread even thinner but works great...

Huge difference in comfort ....

IMG_2923.JPG


hung from thumb tacks in dinnette mode


IMG_2924.JPG
 
added another piece of table attachment rail ... so I could off center the table and give myself more room when I am not entertaining..
I also used a small piece to attach my battery monitor which I can easily remove and put behind the window so I can see it while driving

IMG_2925.JPG
 
GOOD EYE..... ground wire fried .... I replaced it ...... My fault... I did not have a fuse when I was testing a circuit.... a + wire worked loose and grounded out. Thank my lucky stars I had a battery monitor attached and could see it jump to a 60 amp draw and disconnect it before a fire started. The damage seems confined to the smaller gauge ground wire. I have zero amp draw on the 2 circuits with an amp meter when all equipment is turned off and the circuit is powered up......
 
docalex said:
Froli bed system,

I purchase the froli star basic package from amazon . I was concerned that I would need a few extra modules.... they are perhaps spread a bit then... but they work perfect...

After my first order success I ordered another basic package for the bottom bed ... spread even thinner but works great...

Huge difference in comfort ....

attachicon.gif
IMG_2923.JPG


hung from thumb tacks in dinnette mode


attachicon.gif
IMG_2924.JPG
Was it thin enough to use the factory mattress in the CO, or did you have to get a thinner one?
 
I am not sure if my mattress is factory or not. What I had is an upholstered 2 inch ish upholstered mattress on top of another 2 inch ish piece of un-upholstered foam. I remove the the bottom foam and replaced it with the froli system. Cabover folds down no problem, actually even better than before, because the froli system is spread thin and does not extend all the way to the edge. This allows the hinges more room on the fold down... I purchase the system from amazon and figured I would order extra pieces if needed. The cabover fit is perfect... in my opinion. The system I installed in the lower bunk interferes a bit with the dinette seating. that bed is bigger and could easily fit another row of froli modules. I am going to roll with it as is for awhile and see how i like the arrangement. Extra modules are kind expensive when ordered from the USA supplier... I was also interested in the elevated headrest froli has to offer. The headrest would replace some of the froli modules.. module could also be removed from the feet area and used elsewhere.....
 
I suggest you install a strain-relief wire clip like the one seen in this factory set up for the pigtail. It will keep the vibrations and movement of the wiring from wiggling loose the small plug from the camper. Chuck the pic out, I have several and they all show the last/bottom screw holding the wire clip:


1976 R.D Hall Pigtail.jpg
 
Back
Top Bottom