Portercassidy
Senior Member
Damnit, I need to read up on linking URLs to share photos.
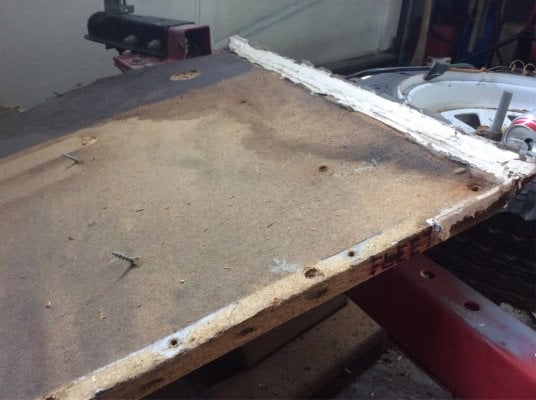
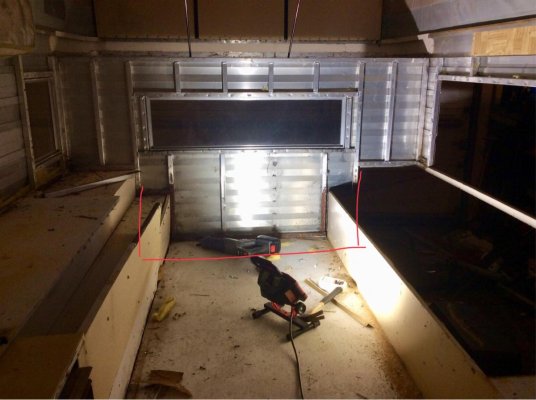
I assume by foundation wood you mean the plywood floor pack? With the camper looking pretty well gutted, it shouldn't be much of a project. My brother and I had my floor pack built in less than a day. IIRC, you need to remove the trim pieces and then the screws that hold the floor pack to the aluminum framing. Of course you will have to provide some type of support for upper body and roof once you separate the two. I built mine out of 5/8 plywood, and stapled and glued the joints, same as the original. One of the easier tasks when completely rebuilding a FWC.Portercassidy said:Good Hell, what did I do. Wondering how hard it is to just replace the Foundation wood. Looks like there are a few layers of plywood now.
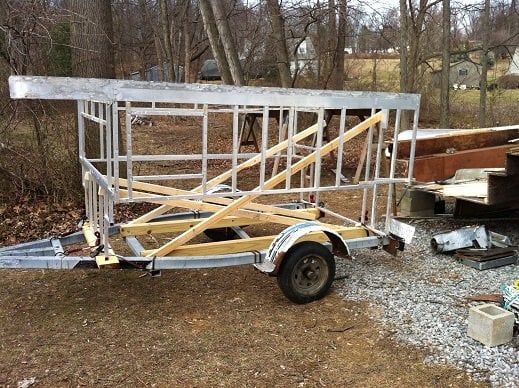
Did you build the floor pack separately?shellback said:I assume by foundation wood you mean the plywood floor pack? With the camper looking pretty well gutted, it shouldn't be much of a project. My brother and I had my floor pack built in less than a day. IIRC, you need to remove the trim pieces and then the screws that hold the floor pack to the aluminum framing. Of course you will have to provide some type of support for upper body and roof once you separate the two. I built mine out of 5/8 plywood, and stapled and glued the joints, same as the original. One of the easier tasks when completely rebuilding a FWC.
.
That was my thought too. The only area that I would be concerned about adding more siding to, would be below the door, and the sides on the back. I am pretty close to being able to completely eliminating a 90 degree turn in the floor pack.longhorn1 said:Could you not increase the height in the floor pack so you don't have to mess with the siding? Then you could purchase white flat stock aluminum to cover parts of the floor pack at the back of the camper.