2003 Eagle on 03 Tundra lots of Mods

The Next Adventures

Advanced Member
Joined
Dec 14, 2012
Messages
85
Location
Colorado
I am now on the road traveling south through Mexico, Central and South America. Feel free to reply here to posts or private message me with any questions. It may take a few days or a week for me to reply depending on if I have an internet connection.​
I can also be contacted at:​
www.thenextadventures.com​
www.facebook.com/thenextadventures​


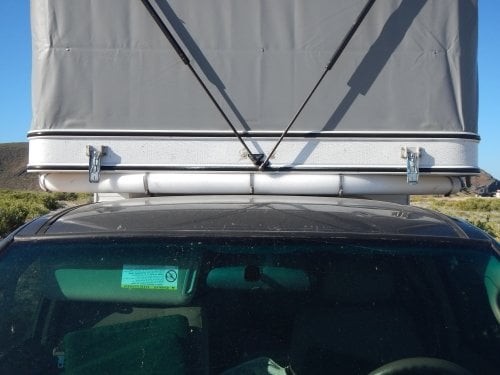
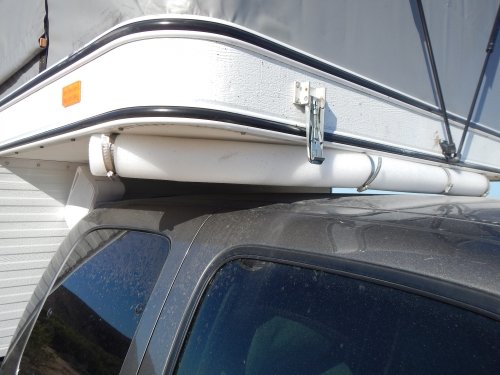
Hi Everyone, After purchasing a FWC Eagle in December of 2012 I have finished and started many modifications I will share here. First off let me explain the fit of the 03 Eagle on the 03 Toyota Tundra. The camper runs length wise to 1" before the end of the bumper. Width wise it fits perfectly to the outside edge of the truck bed walls with no overhang. I like the fit and it looks great.
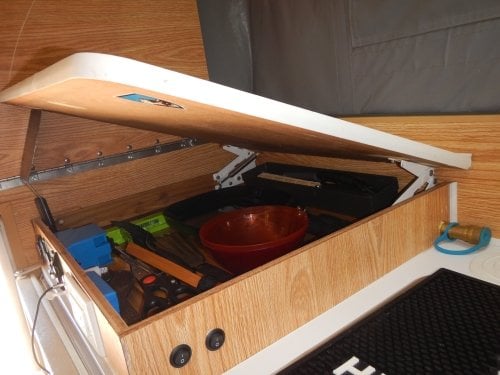
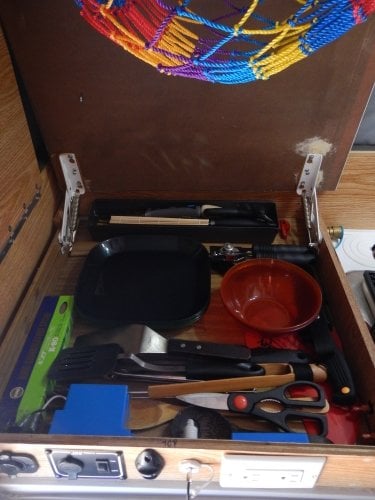
There is a good amount of storage space on the inside of the truck bed that was not accessible. After a few months of coming up with ideas and planning I made a commitment. Cut holes in the bed walls and put in locking marine access panels. Check the pics:
cut out.jpg
inside cutout.jpg
access.jpg
lock.jpg
 
That looks like it is going to work real well. I would like to know where you bought the access panel. I have thought about doing the same thing. Nice!

Steve
 
super doody said:
Awesome! How did you make your cuts so clean?
I used a hole saw to cut the radius corners then an angle grinder with a cutting blade. The hole on the inside wall is a larger diameter, so I can fit larger items in at an angle. If anyone wants a guide to how I completed the project let me know and I will post here.
 
NorCalSteve said:
That looks like it is going to work real well. I would like to know where you bought the access panel. I have thought about doing the same thing. Nice!

Steve
Hi Steve,
I got these from greatlakesskipper.com http://greatlakesskipper.com/en_us/jim-black-581-1330-07-13-x-30-in-taupe-boat-deck-hatch
Made in the USA, honeycomb construction and a strong piano hinge. They surpassed my expectations upon arrival and should take some abuse. If your truck/camper fit is like mine the amount of space I gained is huge.
 
Next up the grey water tank. After over 6 months of contemplating a few different designs the actual install of the one I chose took only an hour. The location and idea for the design got sparked after the cutouts in the bed walls were made. The tank is a 3 gallon rotopax wedged in between the body of the truck and bed. This area would otherwise be unused dead space. I fitted a hose bib to the underside for draining the tank. Check the pictures below and as always if anyone is interested in details for completing the project just respond here.
 

Attachments

  • grey water tank.jpg
    grey water tank.jpg
    116.7 KB · Views: 242
  • grey water tank 2.jpg
    grey water tank 2.jpg
    132 KB · Views: 271
  • grey water tank 3.jpg
    grey water tank 3.jpg
    160.2 KB · Views: 256
picture from under the truck. I can attach a hose to the bib for draining and I'll replace one of the bungees with a cable lock for extra insurance. There is nothing visible when looking at the truck from the side so you would never know its there.
 

Attachments

  • grey water tank 4.jpg
    grey water tank 4.jpg
    162.3 KB · Views: 276
Very interesting mods.I have a Bobcat on a 02 Tundra and also have a lot of space that could be used for storage.I don't need to carry large items so I wouldn't cut into the truck sidewalls,but that is a clever idea.
Frank
 
Moving up along the water system I replace all the lines as they were dirty and the electric water pump because whatever was in the lines had to be in there as well. While I was doing this I installed an everpure water filter. This filter works on the super chlorination method. The filter surpassed my expectations as the water tastes great and has no trace of chlorine.
 

Attachments

  • water filter.jpg
    water filter.jpg
    323.7 KB · Views: 285
Next Adventures, I've been watching your project with interest. Thanks for posting your creative ideas. Do you have more photos and explanation on what you did with the truck bed? I understand the outside latch but what did you do with the inside hole to the bed and do you access this area from the camper?
 
Very interesting ideas....keep them coming! Instead of the outside access hatches, I assign each of the kids an indoor access door (for tie down access) and that is where they get to keep their "junk" and shoes and stuff while we travel. :unsure: 
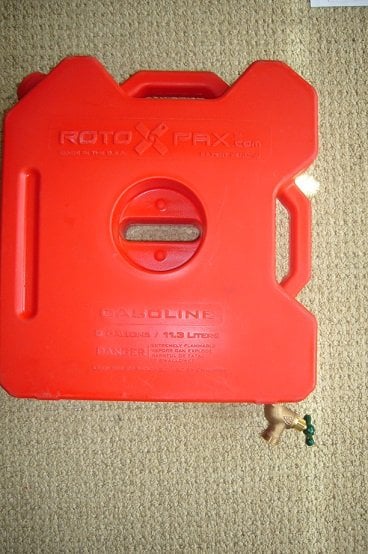
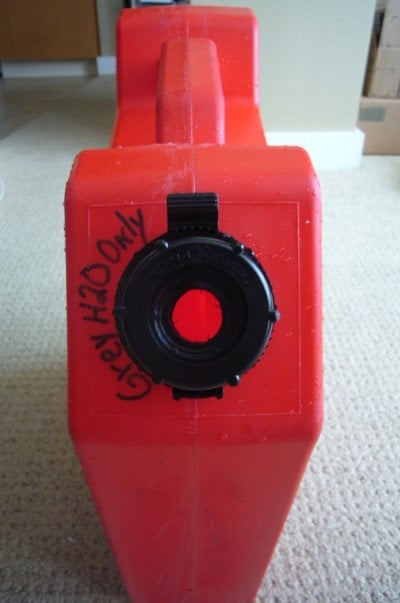
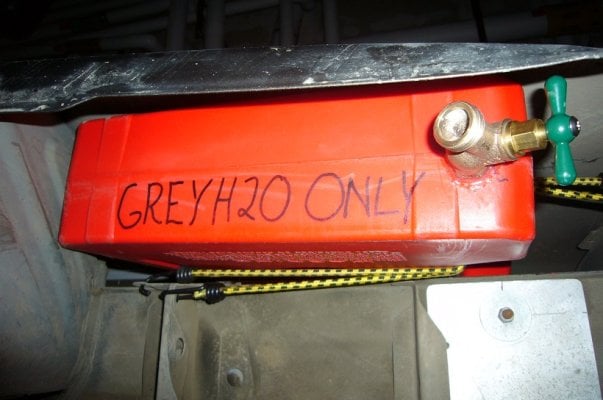
I especially like your rotopak idea....I've been wanting to add graywater storage, but not sure about the ABS pipe some have used between the camper and truck bed (kind of in the way for me because the camper comes off and on the truck a lot). Your idea opens up some new options for me. Thanks for sharing.
 
ski3pin said:
Next Adventures, I've been watching your project with interest. Thanks for posting your creative ideas. Do you have more photos and explanation on what you did with the truck bed? I understand the outside latch but what did you do with the inside hole to the bed and do you access this area from the camper?
Hi ski3pin, besides installing the outside latch I put v-groove rubber edge trim on the cutout (made by trim lok) for a finished look and cover the sharp edge. To give you an idea of what I can fit in this space: dutch oven, 3 burner camp stove, blaster stove, collapsible outdoor table, carefree weekend'r add a room (this attaches to my awning I have a outdoor kitchen/living room) kayak seats and paddles. I still have more space for fishing gear, charcoal or firewood? I could still access this area from the inside factory holes in the camper but I have no need to anymore, They are small and difficult to access. I even access and tighten the T buckles from the cut outs I made.
 
Construction of the air dam took some time to figure out but once I settled on a design it was one of the least complicated projects. A pool noodle mounted to the underside of the camper handles the task efficiently.
 

Attachments

  • DSCN0084.JPG
    DSCN0084.JPG
    148.1 KB · Views: 397
  • DSCN0083.JPG
    DSCN0083.JPG
    160.2 KB · Views: 393
The gap between the fridge and the top of the counter provided a lot of use. First you have to access it. The counter went onto a spring loaded hinge, the fridge was lined with reflectix and I used plywood to create a cabinet. A gas line t's off the fridge line and runs inside to a quick connect for a heater.
control and charging ports went in here as well.
two usb ports for charging electronics
volume control for the amp (amp is located under the bench seat)
outlet for ipod
 

Attachments

  • DSCN0122.JPG
    DSCN0122.JPG
    164.9 KB · Views: 410
  • DSCN0118.JPG
    DSCN0118.JPG
    171.1 KB · Views: 386
  • DSCN0060.JPG
    DSCN0060.JPG
    141 KB · Views: 362
400 watt motorcycle amp powers two sets of speakers
one set inside (permanetly mounted from the roof next to tv) and another outside that can be moved around depending on where we are outside the truck
Volume control for the amp is located above fridge in control center
Ipod connects to the amp directly in two spots. Inside at the control center and outside. Both these connections output at all four speakers.
Flip down tv connects to the amp as well for sound.
 

Attachments

  • DSCN0051.JPG
    DSCN0051.JPG
    106.7 KB · Views: 348
  • DSCN0081.JPG
    DSCN0081.JPG
    149.3 KB · Views: 336
Back
Top Bottom