Direct Bolt on Flatbed

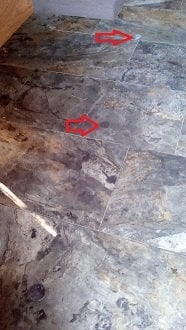
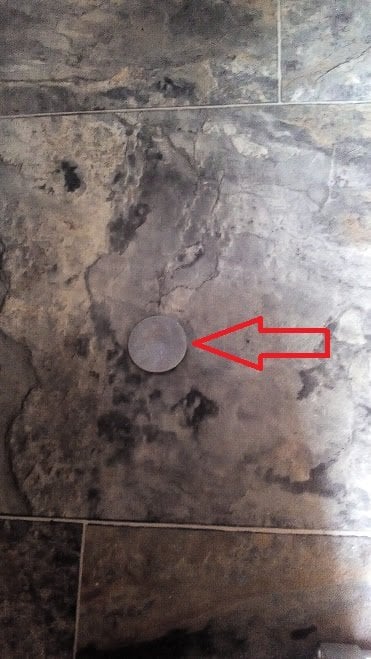
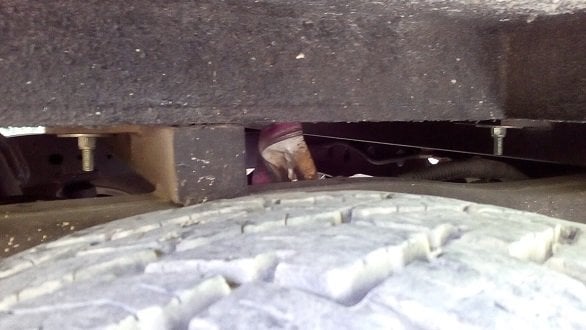
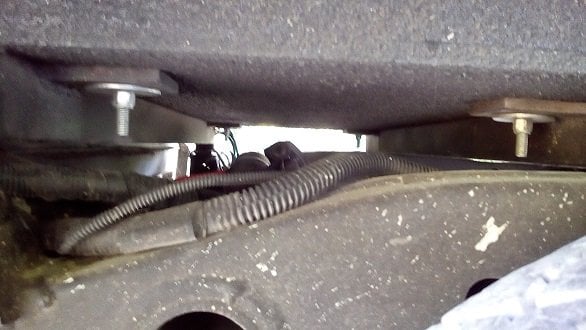
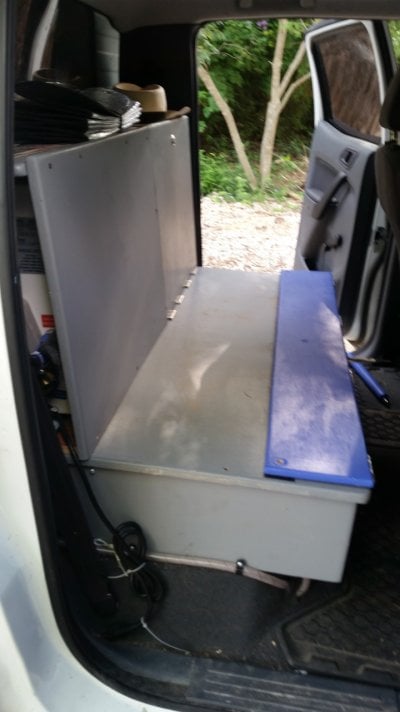
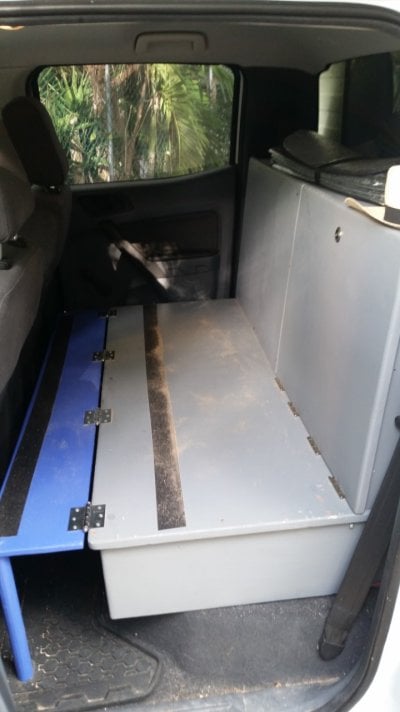
Some pictures of how it was bolted on to the frame. The metal shop had added tabs to the cross bars that were about 2" x 3" and drilled 3/8 holes in them. At ATC we set the camper onto the cross bars and spent quite a bit of time lining the camper up to the cab. They then crawled underneath and began drilling holes through the 3/8" holes in the tabs into the camper floor. A special "flat head" bolt was then inserted through the inside of the camper and a washer and nut tightened on. The bolt head is about 1" or so in diameter and there is a washer under the head with tabs that grab into the floor so it does not spin while tightening (the bolt is square just under the head and the washer is a square hole). All told there are 10 of these bolts holding the camper on.
 

Attachments

  • camper bolts 4.jpg
    camper bolts 4.jpg
    32.9 KB · Views: 215
  • camper bolts 3.jpg
    camper bolts 3.jpg
    102.4 KB · Views: 246
  • camper bolts 2.jpg
    camper bolts 2.jpg
    67.2 KB · Views: 228
  • camper bolts 1.jpg
    camper bolts 1.jpg
    77.9 KB · Views: 201
Looks like solid mounting.

I knew you guys had it worked out balance wise. My earlier comment was just about the 1st impression visual. I had read the part about extending the frame a little bit.

If I didn't already have my camper I think I could be real interested in a set up like this. It makes more sense than the slide in or a tray bed for a dedicated camper rig.
 
No, there is a lot of visual "material" behind that rear axle, but so far it works. I do need a back up camera so I can parallel park again. :oops:


I thought about the design for some time. I just did not see the point in something I could take off. I've been a Eurovan pop top owner for years, but got tired of trying to maintain a 20yr old vehicle. This just seemed to be a good compromise. I looked into VW Crafters (the MX version of the Mercedes Sprinter) and this was cheaper.
 
Wow, over a year since I posted anything on the camper. I almost have it finished so thought I'd add more pics (hopefully faster than it took to get around to this post). Keep in mind while you look and read that of some of the things I wanted to have/do were:
1. Hot and cold shower inside and out, yes I know the feelings of some on indoor showers ;-)
2. The ability to sleep at least a single person without popping the top (I had it built 6'1" long on the lower inside to give me that inch of wiggle room
3. Heat for travelling to altitude and back to northern climates (we currently live near Tulum MX and the double ceiling fans are great)
4. Light weight, simple build with most weight as far forward as possible due to the double cab causing much of the camper to sit behind the axle.
5. Double cab for our large Australian Shepard.
 
Interior pics. Built out of roughly 1/2" plywood to keep things easy and light. The right side storage containers are IKEA and they run on aluminum "L" pieces. I knew from having my previous VW Eurovans that I did not want regular cabinets as we always put stuff into Tupperware containers inside the cabinets. This design eliminated the weight of the doors and simply put things into containers straight off. A deep sink sits above where the propane box is and I left the fuses and solar controller between the sink and propane box.

The other side has two "boxes" with a "mop sink basin" in between for showers. The table bracket is old school VW bus design.

The AC/DC freezer/fridge is a Whynter via Home Depot special order. I love not having things floating on melted ice and the possibility to have ice cream at night. This was the cheapest two compartment model I could find. It ran well for a year and then stopped cooling. I took it to local repair shop and he flushed the lines clean and refilled them and now it cools like a champ.

Will try to get around to posting more specific pictures and descriptions over the next few weeks.
 

Attachments

  • Camper interior right.jpg
    Camper interior right.jpg
    122.2 KB · Views: 208
  • Camper interior left.jpg
    Camper interior left.jpg
    124.7 KB · Views: 278
  • Camper sinker refer.jpg
    Camper sinker refer.jpg
    126.8 KB · Views: 212
  • Camper interior left back.jpg
    Camper interior left back.jpg
    114.8 KB · Views: 201
Original back seat came out to make more room for the dog, water tank and hot water heater. Under the plywood base is a 20gal water tank. Filler is currently behind the storage door on the drivers side. Behind the passanger side is an Isotemp square heater (5gal electric and engine coolant loop). Water pump is a small 1gal/min one under the seat and the tubing runs from the passenger side to the driver's side behind the seat, where I put a passthrough from the cab into the camper. The seat has a small hindged piece to make it larger for the dog to have more room and typically a coushion is sitting there for him. Put the hinge in so someone(s) could sit back there should we ever need to give anyone a short lift in an emergency.
 

Attachments

  • back seat passenger.jpg
    back seat passenger.jpg
    128.8 KB · Views: 158
  • Back seat.jpg
    Back seat.jpg
    127.2 KB · Views: 170
Looks like a great project. If you don't mind me asking, what was the price range for a flat bed camper like that from atc? They don't have anything listed on their site.
 
In 2016 the custom flatbed shell was going for right around $8K about $500 more than the other shells. I added on things like solar, propane box, higher side panels, lift struts, two ceiling fans, so we came closer to 10K when I picked it up.
 
Picking up this idea, - posted elsewhere on this forum I asked

Vic Harder, on 07 Dec 2017 - 8:11 PM, said:
Vic Harder said:
I've thought the same. I like the way that Broverlanding went with his taco flatbed, and wondered about the extra height. Would it be possible to mount the camper on a simple sheet of alum (in place of the truck bed) and hang the side storage boxes off the camper?

I'm thinking, that way there would be no extra height gained, and you would still have the functionality of a flatbed.
And MexiDan kindly pointed me back here:

Have you seen what I had done? It sounds a bit like what you are describing minus the sheet of Al: http://www.wanderthe...olt-on-flatbed/

So, this is not quite what I was asking MexiDan... yes, I like the mounting approach. I would think a thin 1/4" aluminum plate between the truck and camper would help keep the camper bottom in better shape. Maybe not, as it could trap water and dirt. Did ATC apply any kind of special coating to the outside/bottom of the camper?

Plus, I am thinking of doing this to an existing slide-in style Hawk. Boxes on the side (see Broverlanding's rig) would be underhung on the side from the camper itself, not from a sturdy flat deck. It would put strain on the camper for sure. Would it be too much?
 
ATC did nothing special to the underside. The bottom of their rigs (as I understand it) are constructed of a coated below water line marine grade plywood, from what I understand. I had never seen anything like it. It is an impressive grade of plywood (quite heavy per sq ft) and has a textured coating that appears very robust. I have noticed no issues under the wheel wells so far after about 1.5 years of use and maybe 35,000 KM. Not sure which is really gong to be worse in the long term, the way I have it, or sitting on a thin sheet of aluminum. I thought about the sheet of aluminum but the guys at ATC had already used the direct bolt on approach for their own rig and thought it would be fine like this.

I think I had looked at Broverlanding's at one point and thought about this approach, but since I did not already own a camper it did not seem to make sense from the amount of work vs cost.

I'm not a mechanical engineer but I would think if the boxes were aluminum (light weight) and fit tightly into the space of the camper meant for the truck bed, they could be bolted from the top and back (if that makes sense) onto the camper and might actually add rigidity to the frame. I'm not sure I would put my lead weights into them and drive like that, but for camping things it would make sense. Also if you were to go with the wedge shaped boxes on either side of the wheels, could those be part of the truck under the think aluminum sheet rather than part of the camper?
 
When I had my Ocelot shell built in Feb 2013, I asked ATC if they would use Skidguard plywood for the floor & bed over the truck. I had used it for river rafting boat frame floors & camp tables. It's a marine grade plywood with a textured, polyglass face. I offered to bring them a couple of sheets, but they found a source in Sacramento and did the upgrade for free just to try it out. Turned out to be a great upgrade as the exposed face over the truck will outlast the truck itself and the camper floor doesn't need any linoleum. I believe it's what they are using on all their campers now.
 
Back
Top Bottom