Yukon
Senior Member
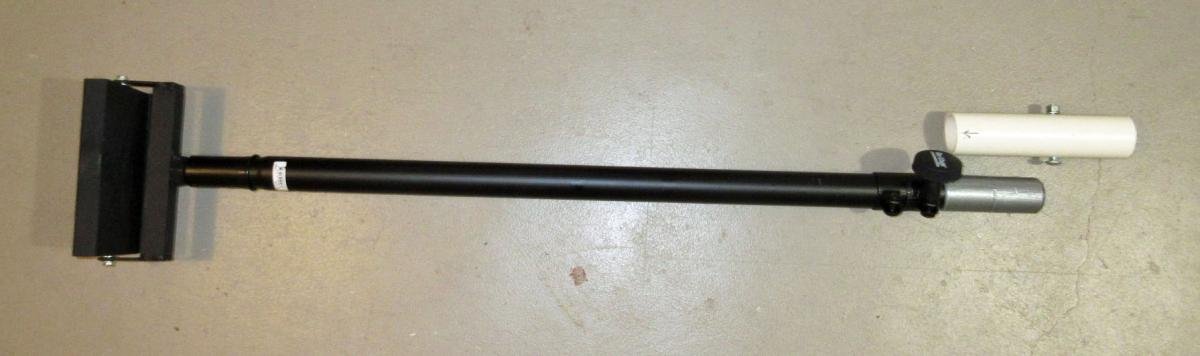
Homemade roof "assist" device.
Been a long time since I posted work done on my 2008 Eagle shell.
Due to injury to one arm, I was having difficulty lifting my roof despite having exterior roof lift pistons. The problem was getting it up past the initial 12-15 inches where the exterior lifts do little to assist. Bought an air assist speaker stand pole without a base from On-Stage for $50. (model SS7748). Lifts up to 45 lbs. from 36 to 60 inches.
In down position the pole is only about 36 inches so I had to make a wooden extender from a piece of 4X4 and add a flat piece of wood that distributed the push against the cross piece of wood in the ceiling. Turn the little knob and the roof lifts up automatically. Once pretty far up, I can finish the lift using one arm. The bungie cords catch the wood extender piece so it doesn't fall to the floor.
I realize this is pretty fancy just to get that initial lift but I just didn't see an easier way that wasn't to expensive. I hope that when my arm heals that I don't need it any longer.
I still love my Eagle shell which I built out in 2008 (bought directly from Woodland). Great camper!
Chris