Free for a reason- Hawk restoration/renovation

I might not get any work done over the next week or two, but I made some decisions on the exterior.

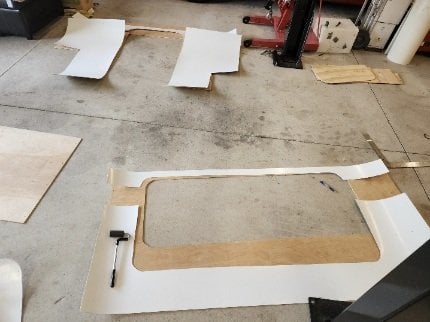
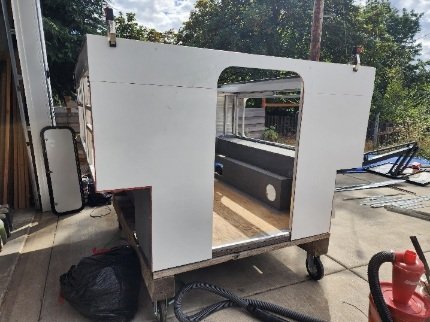
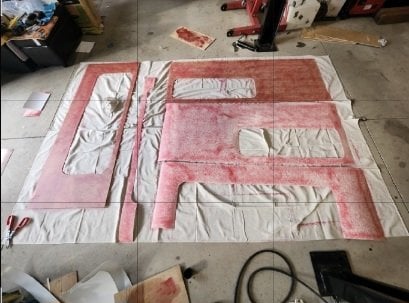
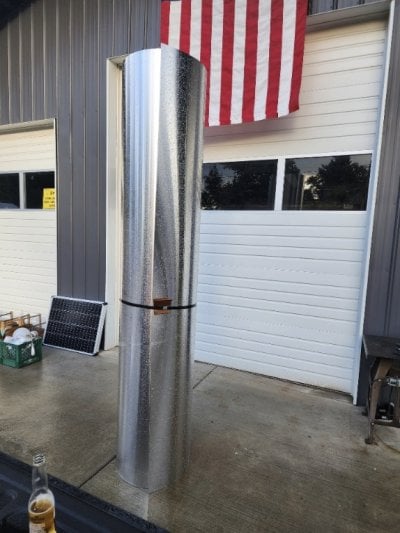
I bought two 8'x8' rolls of arctic white filon, I think vhb tape will keep it in place al9ng the vertical studs. They say to glue it to luan, but I'm on the fence... I feel like I'll be ok without it.

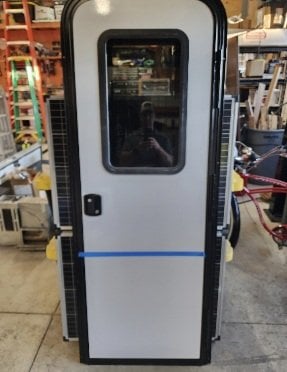
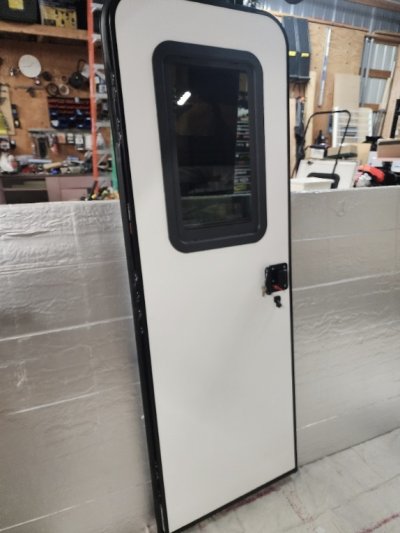
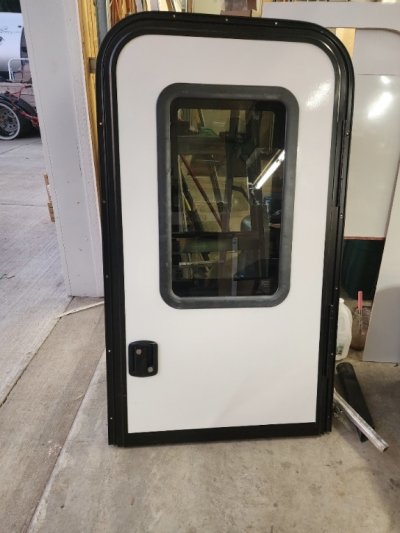
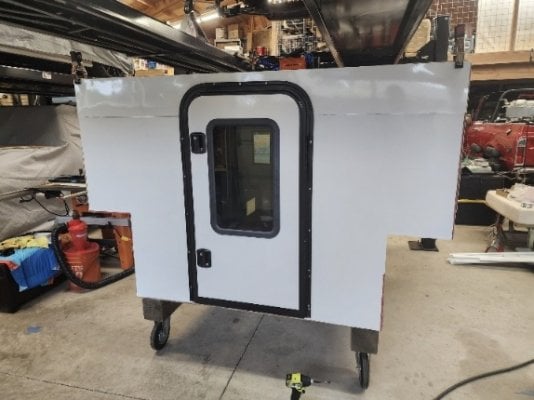
New rear door, I will have to cut it down to 46", bit it has a screen and should be easy enough to resize. Only downside is the handle will be a bit low from the inside.

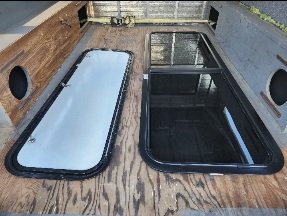
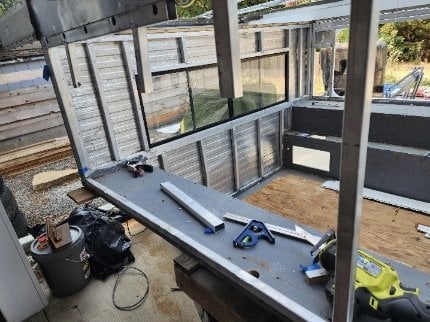
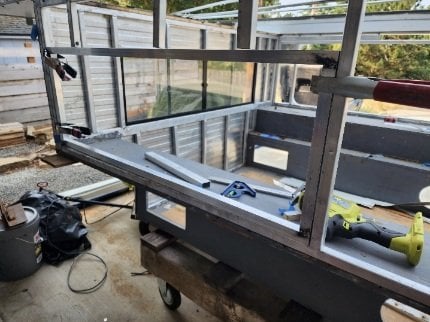
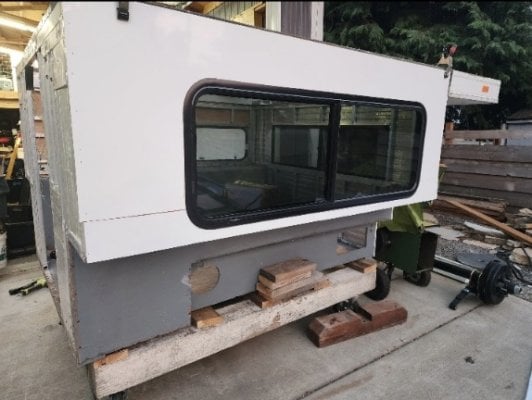
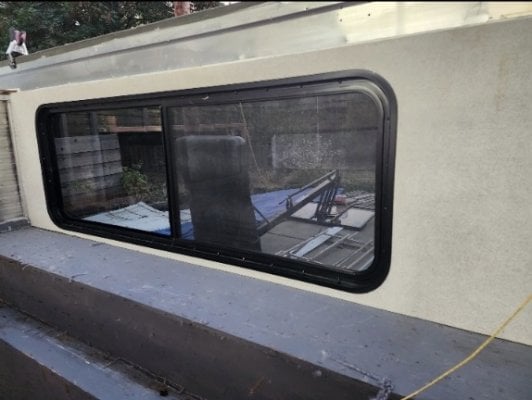
The second hand shop had a 58x20 slider, it is a little small, but I'll just add a stud at the rear to close in the opening.

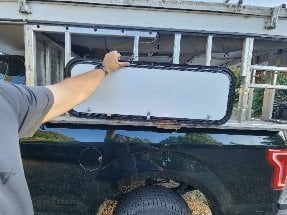
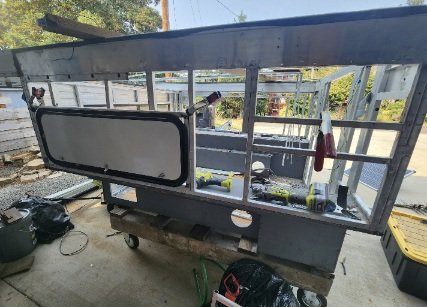
I'm only going to do one baggage door on the drivers side. This one is 42.5"x14. I will need to chop a few studs to make the opening fit. That compartment it leads too will be the lower level cabinets and not accessible from the inside.

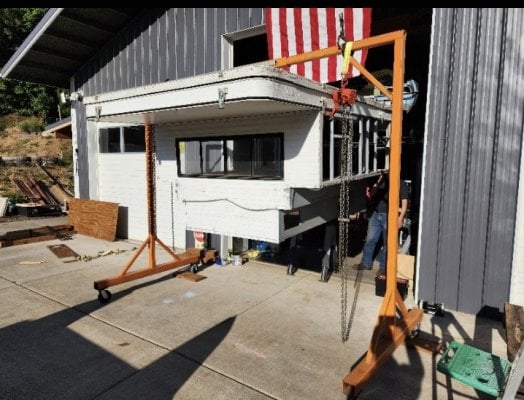
For the jack corner brackets, I'm considering putting steel angle on all four corners and all the way from top to bottom. I'll have an eyelet at the top to use an overhead hoist as well as the right pattern for a jack, should I go that direction in the future.

Lots of other projects around my house, my wife's birthday and my daughters all in the next 25 days, so on the back burner this goes.
 

Attachments

  • Screenshot_20230717_200315_Gallery.jpg
    Screenshot_20230717_200315_Gallery.jpg
    33.5 KB · Views: 65
  • Screenshot_20230717_200326_Gallery.jpg
    Screenshot_20230717_200326_Gallery.jpg
    31.9 KB · Views: 60
  • Screenshot_20230717_200336_Gallery.jpg
    Screenshot_20230717_200336_Gallery.jpg
    41.4 KB · Views: 53
Ruck_and_Roll said:
curious on cost
Unit was free.. so, really nowhere to go wrong.

128 sq/ft of filon was roughly $415
Man door - $250
Baggage door - $80
Sliding tinted window with screen - $150
20' of corner trim - $70
40' of butyl tape - $20?
Tube of sealant - $11

So, roughly I'm into it for a thousand bucks, but I'm most of the way to a new exterior that will last decades.

I'm guessing I'll have $250 into flooring.
I want to wire clearance lights, high mounted brake light, LED tail lights, high power reverse lights as well as flood lights, that's a couple hundred at the most.

Interior is going to be simple bench a.d storage cabinets no plumbing or gas planned T the moment. I may add an externally mounted diesel heater.

I've got the metal around to fab corner brackets.

I haven't costed the top repair yet, should easily be under 2 thousand...
 
I've decided to go all in on on the rebuild. I pulled the camper off my truck and got it on a cart today. It is a little tippy when I am inside, I need to do a little bracing so I can unscrew the lift panels, release the canvas and remove the roof. Im going to do some reading on the pitfalls others have fallen I to, and hopefully avoid any major errors.

Since Hawk is older, it has the multiple sheets that are screwed on along with some broken aluminum racks amd a broken 14x14 vent.

I've got a place near me that sells the roof material, should I use that over a luan base, or what is the best way to replace an older roof? I don't have any leaks, buy there are definitely dips between the supports and I'm in Oregon where it will rain. The screws look like the rubber washers are about ready to give up. Is there a treatment or should I just replace everything?

Getting the camper off the truck was pretty easy, and I'm envisioning jack brackets with loops for overhead lifting when the siding goes back on.

What was first a simple refresh has gone down to the foundation...

My buddy who sews is going to have a go at making me a replacement canvas, he sews as in it is his profession.
 

Attachments

  • Screenshot_20230725_202410_Gallery.jpg
    Screenshot_20230725_202410_Gallery.jpg
    324.6 KB · Views: 75
  • Screenshot_20230725_202421_Gallery.jpg
    Screenshot_20230725_202421_Gallery.jpg
    73.3 KB · Views: 90
  • Screenshot_20230725_202431_Gallery.jpg
    Screenshot_20230725_202431_Gallery.jpg
    73.8 KB · Views: 89
i second the thinking of extending jack brkts up as high as you can go.
provides more attachment points, for little extra cost/effort.
i wanted to do that on my atc, but changed mind. now that i have it, i wished i hadn't.
go
 
Since you are redoing the whole thing, take a look at how FWC builds the cab-over section of their flatbed models. You get a full 5' cabover (I think) queen size without having to have a pull out. I'd love to see someone do that with a slide in camper!

Second the idea of having a taller fabric section. Think about sitting UP in the cabover!

The roof/ceiling is a multi-layer construction... previous posts here have described a complete redo. When I did my ceiling liner, I did it from inside the camper. I used rigid foam cut to size for the various sections, stuffed any remaining voids with fiberglass pink, taped it all in with duct tape, and layered on Reflectix to get a smooth, uniform colored surface. Turned out great!

The rubber washers will clean up nicely with acetone, and you can reuse them with some 3m 4200 in the screw holes, and Dicor Lap Sealant over that. No need for Luan under the top sheets. Unless you are thinking of a one piece roof? Note that some folks (Wallowa) have commented a lot about OIL-CANNING noises with the one piece roofs.
 
It took me 2 hours unassisted to go from top on to top stripped on saw horses. There is no way I would have rid the camper of the funk, so many dead ants.

I wish I had more time to really build this out... but, I need it back together by mid September, so I'm going to hurry up and build. The edges of the roof were stapled over the canvas, the roof ripped when removing staples so it needs to get replaced.

Since the roof flashes over the canvas, it seems like I need to install it last? Unless you put the roof on and bend edges after the canvas is on?

I can get .040 aluminum 8.5' wide at $31/linear foot, not horrible... I figured some VHB tape in the center ribs would hold it down.

My second thought is luan then cover with a membrane like every other travel trailer and RV out there. Is there a reason FWC always used aluminum? Seems the membrane roof would be quieter?

I don't care about roof weight all that much. I used a digital hanging scale and stood outside and pulled the roof up, it peaked about 35lbs.

I'm undecided on rebuilding lift panels, using bent conduit or some other lift method.
 

Attachments

  • Screenshot_20230726_191849_Gallery.jpg
    Screenshot_20230726_191849_Gallery.jpg
    91.4 KB · Views: 55
  • Screenshot_20230726_191933_Gallery.jpg
    Screenshot_20230726_191933_Gallery.jpg
    81.1 KB · Views: 54
I feel comfortable with every aspect of rebuilding this unit. What I find myself questioning are two things: The layout and the order of assembly.

I am not worried about installing a stove or a sink, If it comes down to it, I can use a small camp stove if I have to heat some food in inclement weather. I have a battery powered water pump that fits a small 1-5 gallon jug, if I have to get crafty, I can use it over a bin and dump my wash water.

I don't want to hazard and space of a propane heater, if I find myself using the camper in the cold where clothing and blankets don't cut it, I can attach a diesel heater to the rear and duct it into the cab. easy enough to add a jerry can holder for additional diesel too.

I'm putting 400 watts of solar on the roof with 2 100ah batteries. I have a Victron 75/15 smart controller and a smart shunt, each battery has its own victron voltage and temperature sensor as I went for less expensive Litime batteries. I may add a DC/DC charger but for the most part I want the camper to be independent of the truck. I currently have a Harbor Freight 2000 watt modified sine wave inverter, that may need to be upgraded, but I don't have any plans for higher voltage appliances. My 45L chest fridge is really the only appliance besides lights and exhaust fans so my power generation and storage is probably overkill, but if I upgrade, its just a little more now compared to a lot more down the road.

Since I have the rollover couch model there is a massive window on the passenger side, I'm questioning if the window that faces the pickup back window is necessary or if cabinets would be better placed there. I'm removing the window to replace the metal siding with filon, and it would be easier just to leave the window out. I can't see behind the truck from the drivers seat since I've got a new rear door with a window that is a little higher, so the only function is light for the cab... I know some may like the pas through window, but my truck has solid glass so all it does is cause weird reflections at night as the double panes close together make me think there's a car coming straight at me in my rearview mirror!


Now, part two of my quandary is the order of assembly.
For the roof, the way it appears when I took everything apart was the wiring is installed, then the headliner and trim strips. Then the insulation is laid down. After that the velcro strip for the thermal pack, then the liner is stapled in, then the roof skin is applied and finally the lift panels are riveted on.

Personally, I would install the exterior skin first, then work on triming out the interior, but, I believe the interior walls are installed prior to the exterior, can anyone give me a good idea of which goes first/last?
 
Been following your build, coming along nicely. I haven’t commented so far, but in case you haven’t seen my build from several years back, thought I’d copy you on it. Take a look, it might help answer some of your questions above, but maybe some other things that may come up. Let me know if you have any specific questions I might answer. Continued best wishes for your build, make it the way you personally like, and meets your personal needs and taste!

https://www.wanderthewest.com/forum/topic/12116-full-build-reconstructing-a-1981-grandby-into-a-custom-hawk/
 
PokyBro said:
Been following your build, coming along nicely. I haven’t commented so far, but in case you haven’t seen my build from several years back, thought I’d copy you on it. Take a look, it might help answer some of your questions above, but maybe some other things that may come up. Let me know if you have any specific questions I might answer. Continued best wishes for your build, make it the way you personally like, and meets your personal needs and taste!

https://www.wanderthewest.com/forum/topic/12116-full-build-reconstructing-a-1981-grandby-into-a-custom-hawk/
I've been on a few different parts of your build thread lookin at lift panels and roof construction, I took some time today and went back to tbe start, you added some great designs.

It also got me thinking about my time line. I'll have 4 weeks to get it done and back on the truck for my trip. As much as I'd like to add roof height and play around with different designs, I don't think any delays would tolerated.

I don't think this will be my last camper build. Seeing how simple it is, knowing where to get materials, aluminum square tube, windows, doors, trim etc amd knowing a guy who sews, I might make something totally custom down the road if I don't get sidetracked, which is very possible.
 
Birthday parties are over, house/yard projects are all done, nothing urgent on my calendar except getting my camper ready to roll in 4 weeks!

Plan is to install siding, doors, windows and get it dried in. The interior will get trimmed out if tine allows before I leave.

From all the comments I've read, windows in the canvas portion are important, I've come up with a plan that works for me.

My fiend has some thick clear material, we are going to sew long skiny windows along each side, placed high up so they are above the 'fold'. They will not open, so no screen or potential for water leaks through the screen.

I will come up with some curtains for privacy, but it will be hard to see in, but easy to look out with this arrangement.
 

Attachments

  • Screenshot_20230814_115919_Chrome.jpg
    Screenshot_20230814_115919_Chrome.jpg
    35.7 KB · Views: 32
Moving along. I learned some things, next time, I might do something different. Bit with deadline and budget...

I'm using the filon, and have enough from one 8x8 piece, it is actually 102" which is perfect since the back is 51" high.

I'm ditching the exterior hatch idea, the only penetrations will be the window and the door at this point. I'm not sure when I am going to finish all of the inside so I might add some connections like water fill, shore power plug etc.

The filon was easy to cut with regular snips, I had to be a little careful to keep it unsurpassed so it didn't crack out. But, no fiberglass flying in the air was a big plus.

I tried out my new spool gun for my welder, I'm not the best. But it stuck the new square tube in for the smaller window.

Tomorrow I hope to have the rest of the filon and underlayment cut out and glued together.

Pictures aren't uploading today for some reason.
 
I changed my mind on the hatch. Waiting on some tips to finish welding up the hatch.

The Filon ended up with horizontal seams on the back wall, about 8" from the top, and on the window side, 6" from the bottom. I am thinking this will be a good place to put a strip of L Track, seals up the seam and it gives me a place to mount stuff later.
 

Attachments

  • Screenshot_20230821_182058_Gallery.jpg
    Screenshot_20230821_182058_Gallery.jpg
    37 KB · Views: 51
  • Screenshot_20230821_182109_Gallery.jpg
    Screenshot_20230821_182109_Gallery.jpg
    76.5 KB · Views: 60
  • Screenshot_20230821_182122_Gallery.jpg
    Screenshot_20230821_182122_Gallery.jpg
    66.7 KB · Views: 48
  • Screenshot_20230821_182154_Gallery.jpg
    Screenshot_20230821_182154_Gallery.jpg
    65.6 KB · Views: 51
  • Screenshot_20230821_184710_Gallery.jpg
    Screenshot_20230821_184710_Gallery.jpg
    53.2 KB · Views: 52
I don't think I will build with filon again... I think it is going to look nice when I'm done, but it's been way more work than the OG metal siding.

I used Helmiprene 4545 adhesive, followed the instructions and slrayed it with an El cheapo LVLP harbor freight gun. They are right, when they touch, they are stuck...

I'm working out the trim, I can't use the original style since my corner gaps are a little wide. I will use new trim along the bottom edge and along the top edge to secure the fabric top.

I have a fair bit of aluminum 1.25" angle, I think that will work along the lower edge on the back where FWC just used 3/4" thin aluminum.

You can see where the seam is on the back that I will be covering up with L track.
 

Attachments

  • Screenshot_20230822_192045_Gallery.jpg
    Screenshot_20230822_192045_Gallery.jpg
    64.7 KB · Views: 41
  • Screenshot_20230822_192103_Photo Editor.jpg
    Screenshot_20230822_192103_Photo Editor.jpg
    57.9 KB · Views: 40
It is a big project, after spending 5 years remodeling a house, it's a relatively easy one. I'm learning as I go, an trying to economize every chance I get.
I got the drivers side wall with the baggage door installed yesterday. Today I got the window and the passenger side done.

Window was a bit tricky until I came up with a simple solution. The windown i had is a clamping style, they have a trim ring on the i sode that clamps on either side of the wall. The benefot is there are no exposed fasteners. are made for thicker walls. A 1/2" sheet of insulation was enough. I pinned it on with some longer 1 1/4" staples I had.

The door was a lot of work, but. I had to take off 24 3/4" off the bottom of the frame, door and screen. They all have modular designs so the bottom frames come off and it was really pretty straight forward. Benefits is the door is brand new, has a screen door, nice window with a built in blind and the threshold means that I chopped the 1" tube that goes across the doorway. Less to trip on and an extra inch to get through. The down side is the door handle ends up being pretty low when you're inside the camper.

I almost filled the wall up with insulation but I forgot I still need to run wires...

There was a little mishap with the back panel. I moved the clamps that was holding them up to the side wall as I was installing them... I came out and it had fallen over and it split in half.

Remaking the panel means $44 in another sheet of plywood and a whole other roll of filon at the tube of $208.

Or, I can run a patch over it or maybe l track or someth8ng else.
 

Attachments

  • Screenshot_20230824_203802_Gallery.jpg
    Screenshot_20230824_203802_Gallery.jpg
    108 KB · Views: 32
  • Screenshot_20230824_203842_Gallery.jpg
    Screenshot_20230824_203842_Gallery.jpg
    130.1 KB · Views: 40
  • Screenshot_20230824_203822_Gallery.jpg
    Screenshot_20230824_203822_Gallery.jpg
    91.3 KB · Views: 37
  • Screenshot_20230824_203831_Gallery.jpg
    Screenshot_20230824_203831_Gallery.jpg
    78.9 KB · Views: 34
Boy, I heard the weather was changing on Tiesday, figured I'd get ahead of it and move everything inside, as it rained last night I'm glad I was on top of it!

So, the door problem is solved. When I cut the bottom off, the hinges are not secure enough to seal the top of the door when only the bottom latch is engaged. So, I cut in a second latch. Not going to have any accidental opening now!

Only thing to figure out is the screen, from the inside you can't use the top handle, so, that's going to be a project down the road.

I'm leaving Sept 22nd, so it may be a winter project.

I got a deal on a new set of jack brackets, $50 for all 4, couldn't pass it up. Better to have them and not need them.

With the rear door mounted, it is time for corner trim and lower edge moulding.

I need to find some exterior lights, if anybody has any suggestions for flood lights let me know.

I don't know yet which layout I'm going to do, front/side dinette or couch. With 24 build days to go, it will likely be a shell for trip one.
 

Attachments

  • Screenshot_20230828_185932_Gallery.jpg
    Screenshot_20230828_185932_Gallery.jpg
    114.8 KB · Views: 30
  • Screenshot_20230828_185945_Gallery.jpg
    Screenshot_20230828_185945_Gallery.jpg
    86.4 KB · Views: 36
While I waited for jack brackets I cleaned up the shop a little, picked up some L-track from a friend and a roll of .040 aluminum. The process the factorybises where the metal roof goes on last doesn't make sense to me. I've also read about the tin canning, which I'm sure is the sheet metal shrinking and expanding without enough attachment points to the frame.

The other thing I want to avoid is a shiny silver roof that will signal aircraft.

My plan is is to install the aluminum, rivit to the frame and trim it flush, no overhang at all. I will make my holes for vents, then insulate, brackets for lift panels/bars amd sideliner. After that's all on, I will lay a TPO roof panel down. I can get it for about $80. It will seal all of the rivets, will be super easy to lay over the edge and make good seal with the perimeter trim. Should help deaden sound from rain too. And it's white.

On another note. I need to research how to make firm attachment points in the bed. Looks like drilling and setting some elevator bolts, basicsllynthe opposite of the camper shell.
 

Attachments

  • Screenshot_20230829_193532_Gallery.jpg
    Screenshot_20230829_193532_Gallery.jpg
    157.9 KB · Views: 23

Latest posts

Back
Top Bottom