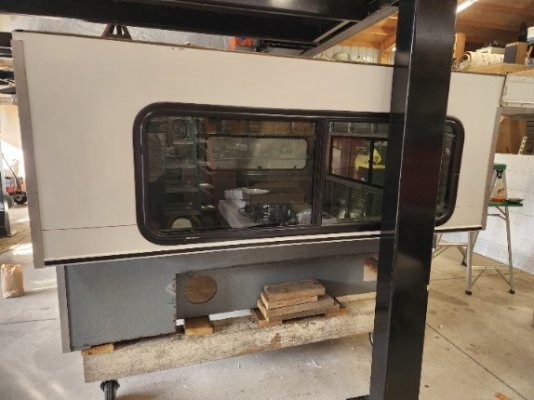
Free for a reason- Hawk restoration/renovation

Great project!

On the exterior flood light question, this Dream Lighting fixture is working great for us. It’s mounted with 3m heavy duty 2 sided tape with a bead of silicone around the perimeter. It’s a pricier option, but there’s two to a bundle and the robust low profile aluminum housing is outstanding.

https://www.amazon.com/gp/product/B00ODSBXB0/ref=ppx_yo_dt_b_search_asin_title?ie=UTF8&th=1

It’s super bright, so we added a small dimmer to tone it down.

https://www.amazon.com/gp/product/B07Y2XC225/ref=ppx_yo_dt_b_search_asin_title?ie=UTF8&psc=1

Best of luck,
John
 
Those are pretty slick looking, I like how they are slim LED's.

Another day, another couple hours spent figuring things out.

The brackets that I was sold must be some generic pieces. They have an extra couple inches so the mounting will be messy... not happy $50 was wasted, buy I'll try to recoup my money.

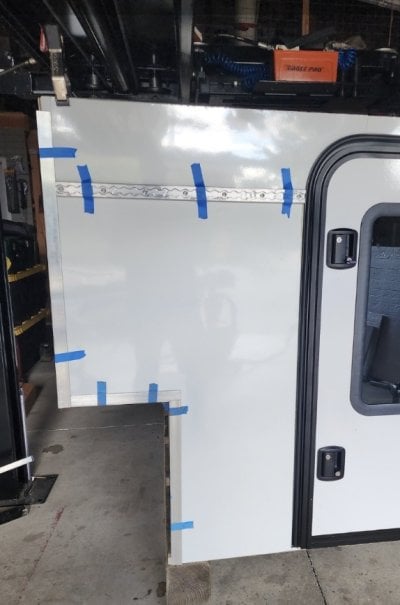
Started trimming my 1 1/4" aluminum angle and L track. Part of me wants to have it anodized black but the rest of me is just fine with the raw aluminum look.

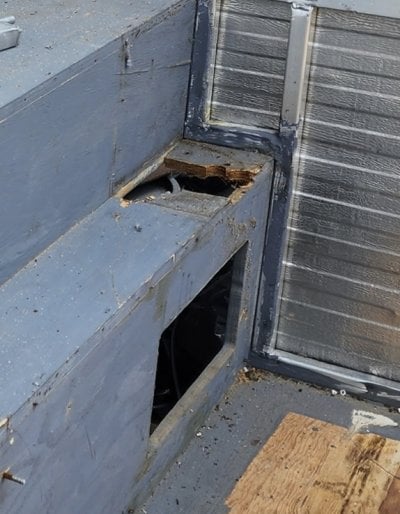
Starting to look at mounting provisions, not sure if this is a stock front mount or if it was monkeyed with over the years.
 

Attachments

  • Screenshot_20230830_120226_Gallery.jpg
    Screenshot_20230830_120226_Gallery.jpg
    147.6 KB · Views: 58
  • Screenshot_20230830_212123_Gallery.jpg
    Screenshot_20230830_212123_Gallery.jpg
    121 KB · Views: 59
FreeHawk said:
Those are pretty slick looking, I like how they are slim LED's.

Another day, another couple hours spent figuring things out.

The brackets that I was sold must be some generic pieces. They have an extra couple inches so the mounting will be messy... not happy $50 was wasted, buy I'll try to recoup my money.

Started trimming my 1 1/4" aluminum angle and L track. Part of me wants to have it anodized black but the rest of me is just fine with the raw aluminum look.

Starting to look at mounting provisions, not sure if this is a stock front mount or if it was monkeyed with over the years.
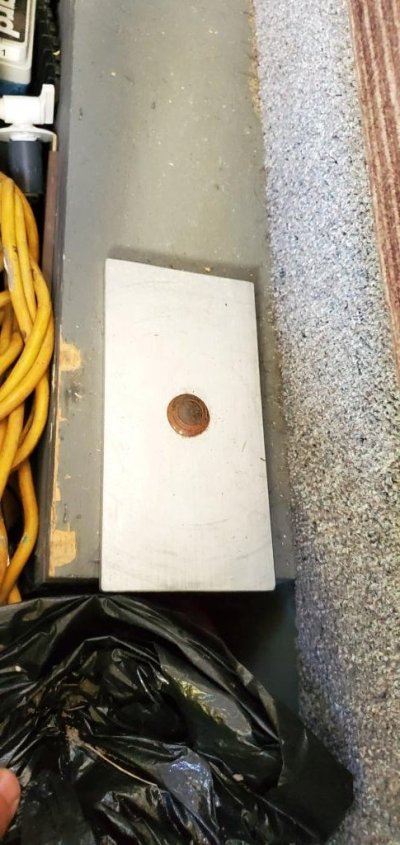
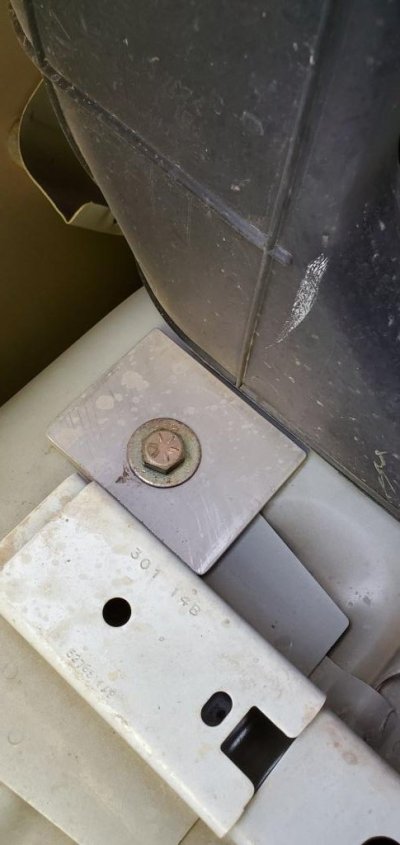
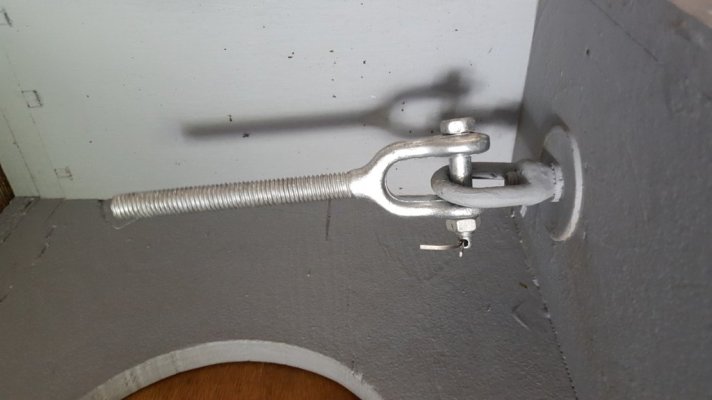
that's where the eye bold normally goes... I wonder if there was a catastrophic failure there at one point.... Use large, alum, backer plates and heavy duty grade 8? eye bolts and turnbuckles (if you aren't mounting directly to the bed). The picture of my (partial) turnbuckle was prior to adding the backer plates and heavy duty eye bolts.
 

Attachments

  • 20200905_092755.jpg
    20200905_092755.jpg
    110.3 KB · Views: 37
  • backing plate.jpg
    backing plate.jpg
    68.3 KB · Views: 38
  • 20160419_124310.jpg
    20160419_124310.jpg
    64.9 KB · Views: 38
i vote for you to wait to decide on your seating. i am a big fan of using the camper, and then figuring out layout details. its amazing how things come to you out in the forest, sitting back on a nice chair, sipping a cold brew, and just looking at the camper..... :)
 
That's why our home remodel lasted 9 years...we'd do something, then think about the next part. I've got 19 build days left, so, whatever happens on the insode wil be sparse.

Got my sika211 amd some rubber washer screws, finishe up the corner Nd lower edge trim today.

Also picked up a box of Vinyl flooring. One box is 2sq/ft short of covering the entire floor, so, ill be putting a box along the back or something.

I'm on to the roof tomorrow and Monday, hopefully...

I will put one more piece of l track on each side of the back, amd a short piece on the seam on passenger side.
 

Attachments

  • Screenshot_20230902_174452_Gallery.jpg
    Screenshot_20230902_174452_Gallery.jpg
    155.8 KB · Views: 59
  • Screenshot_20230902_174506_Gallery.jpg
    Screenshot_20230902_174506_Gallery.jpg
    82.5 KB · Views: 57
  • Screenshot_20230902_174517_Gallery.jpg
    Screenshot_20230902_174517_Gallery.jpg
    82.9 KB · Views: 46
  • Screenshot_20230902_174530_Gallery.jpg
    Screenshot_20230902_174530_Gallery.jpg
    84.1 KB · Views: 42
Screeching hault to the project as I've been in hospital with my 7 year old for the last week. 95% chance it is autoimmune encephalitis. As a guy who likes to fix things, it is unbelievably hard when I don't have the skills to help my little girl.


Sept camping trip is canceled so I won't be rushing as kuch to slam the top on and hastily finish the inside, which is probably better for the build.
 
FreeHawk said:
Screeching hault to the project as I've been in hospital with my 7 year old for the last week. 95% chance it is autoimmune encephalitis. As a guy who likes to fix things, it is unbelievably hard when I don't have the skills to help my little girl.


Sept camping trip is canceled so I won't be rushing as kuch to slam the top on and hastily finish the inside, which is probably better for the build.
We are sending our best to your daughter. I hope she has a speedy and complete recovery! She is far more precious than a camper!
 
Thanks for the thoughts fellas. Things are better, but still tough.

I got a couple hours on the camper this weekend, first time since walking away back in September.

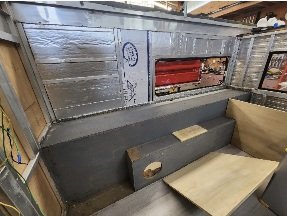
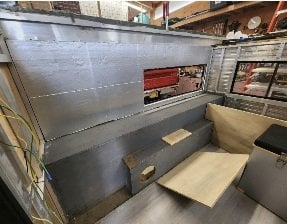
I insulated the walls with rigid 1" then added a full sheet of 1/2" followed by some 1/8" plywood with rv wallpaper.

I'm still deciding where to put the batteries but I think the corner where the heater was is my best option.

The part I'm really questioning is my roof and how it gets sealed. I'm using a .p40 aluminum skin. Should I glue it on, screw it on like the original or use blind rivits with a glob of sealer to keep the rivits from leaking? Should I fold the sides over like the original to flash the sideliner, or use sika221 to flue some corner trim on? What's everyone's opinions on this?

I'm putting a considerable amount of weight on the roof, lights, 400 watts of solar, maxxair fan, rigid foam insulation, clearance lights flood lights etc.

I don't want any real electrical running in the walls, I'm planning on most of it being in the roof with the exception of the inverter amd outlets for fridge.
 

Attachments

  • Screenshot_20231113_132731_Gallery.jpg
    Screenshot_20231113_132731_Gallery.jpg
    33.5 KB · Views: 50
  • Screenshot_20231113_132758_Gallery.jpg
    Screenshot_20231113_132758_Gallery.jpg
    33.2 KB · Views: 41
  • Screenshot_20231113_132813_Gallery.jpg
    Screenshot_20231113_132813_Gallery.jpg
    32.6 KB · Views: 42
FreeHawk said:
Thanks for the thoughts fellas. Things are better, but still tough.

I got a couple hours on the camper this weekend, first time since walking away back in September.

I insulated the walls with rigid 1" then added a full sheet of 1/2" followed by some 1/8" plywood with rv wallpaper.

I'm still deciding where to put the batteries but I think the corner where the heater was is my best option.

The part I'm really questioning is my roof and how it gets sealed. I'm using a .p40 aluminum skin. Should I glue it on, screw it on like the original or use blind rivits with a glob of sealer to keep the rivits from leaking? Should I fold the sides over like the original to flash the sideliner, or use sika221 to flue some corner trim on? What's everyone's opinions on this?

I'm putting a considerable amount of weight on the roof, lights, 400 watts of solar, maxxair fan, rigid foam insulation, clearance lights flood lights etc.

I don't want any real electrical running in the walls, I'm planning on most of it being in the roof with the exception of the inverter amd outlets for fridge.

Curious why no electrical in the walls? I assume because of potential heat loss but having a lot of electrical in the roof means that the wire will be stressed (granted only a little) each time you raise/lower the roof. I've seen on some campers, the wiring that goes down along the push panels, get worn out.
 
Regardless of where you run the wires, plumbing, etc, make sure you can get at those wires etc after the build is done. Modifications and improvements will always occur to you and you'll want to be able to make changes (and do servicing) later. Also, document the heck out of it, as it will be unique and the owner/user after you will need/want to be able to maintain it.
 
No electroc in the walls for future proofing like Vic is suggesting.

Most electeoc will be on drivers side, batteries, inverters, power for cooking hob etc. There is a 16" wife shelf on the top ledge and with a board straight up from the floor, there's a natural chase for water, or plumbing if I choose to build out something close to the cab of the truck.
The wires will come straight up the wall to the top, ill need to pick some flexy multi stranded wire, or, maybe there will be a quick disconnect for some systems... I'll build it, them figure it out, that's my thought process today (not the best, but it's what I've got!)
 
Making decisions as I go... as I get deeper into a build I'm thinking about either a Van (seems lime they are all ridiculously overpriced) or a F250 that can haul a granby or other full size camper that can fit the family and the dog.

And, since I do everything g better the second time, I'm keeping it simple.

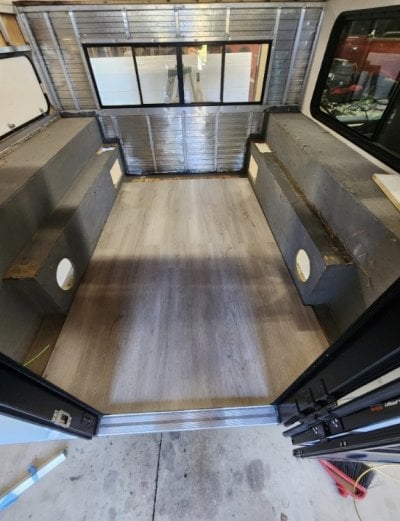
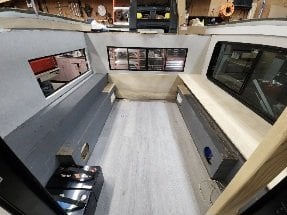
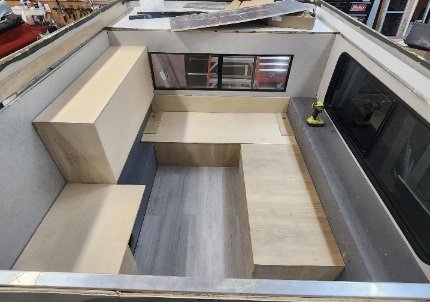
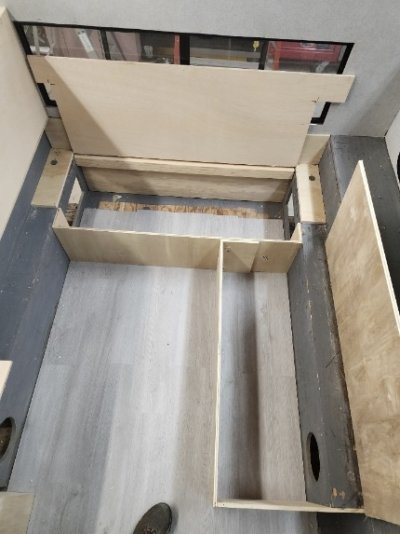
You can see the exterior storage is boxed in. I have two lower benches that have simple hinges for storage. I'm debating on where I put the two batteries, inverter and controller.

My guy who was going to sew me a sideliner is now too busy so I'm going to put a solid liner in, one seam at the back with a 4" wide velcro strip to adjust size.

After finishing the inside I ran a 5.5" strip of 3/4" plywood around the top. The paneling material I have left that gap at the top. It will give me good place to attach anything I need to. The sides are just screwed the wood that runs in the aluminum channel, the rear is attached with nutzerts in the aluminum frame.

I chopped up some aluminum angle and used nutzerts to attach them to the rear wall. Top height is going to be 32".

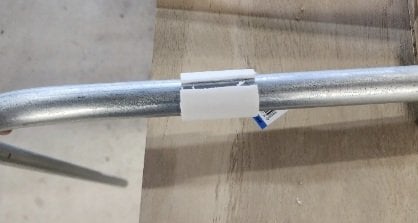
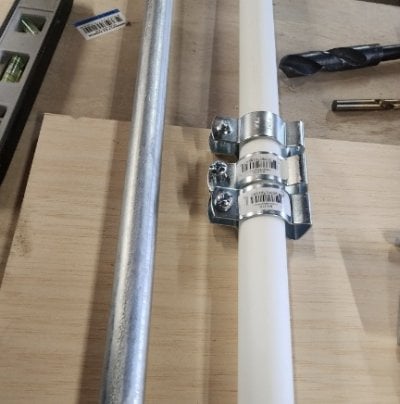
I've seen how people use the conduit to tbe roof with clamps and I didn't like it. I ised 1" pex, sliced so it fits tight on the conduit. Then a strut clamp will fit around the pex. I'll attach a plate to the roof with a stud that I can attach the strip clamp to. Should make for a nice smooth action.
 

Attachments

  • Screenshot_20231214_181703_Gallery.jpg
    Screenshot_20231214_181703_Gallery.jpg
    52.8 KB · Views: 25
  • Screenshot_20231214_181715_Gallery.jpg
    Screenshot_20231214_181715_Gallery.jpg
    79.9 KB · Views: 29
  • Screenshot_20231214_181248_Gallery.jpg
    Screenshot_20231214_181248_Gallery.jpg
    28.7 KB · Views: 45
  • Screenshot_20231214_181233_Gallery.jpg
    Screenshot_20231214_181233_Gallery.jpg
    60.7 KB · Views: 26
  • Screenshot_20231214_181259_Gallery.jpg
    Screenshot_20231214_181259_Gallery.jpg
    31 KB · Views: 33
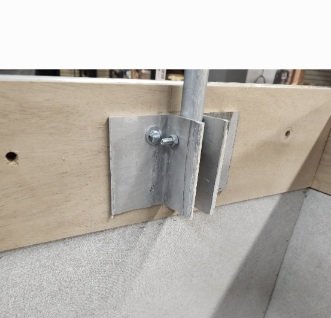
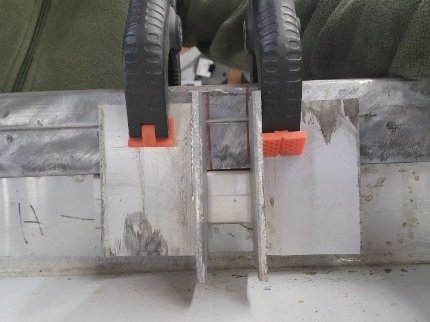
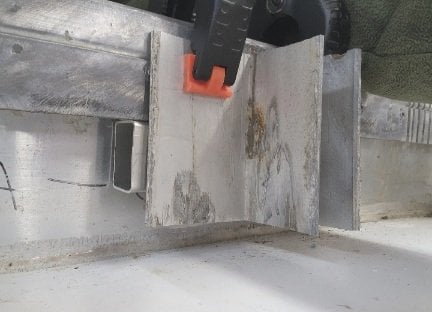
Working on the front lift mechanism. I'm doing a similar set of brackets, adding a 1x1.5 piece if aluminum tube to support the brackets. The top latches line up with the brackets (not on purpose). I will attach the brackets and screw them through the 1x1.5 to secure it. Then I'll use nutzerts to Ttach the angle brackets.

Looking at the brackets, they are big and sharp amd very likely to cut somebody! After I get them moved up, I'm going to trim down the protruding section of angle and soften the corners.
 

Attachments

  • Screenshot_20231215_183237_Gallery.jpg
    Screenshot_20231215_183237_Gallery.jpg
    48.7 KB · Views: 15
  • Screenshot_20231215_183241_Gallery.jpg
    Screenshot_20231215_183241_Gallery.jpg
    48.1 KB · Views: 17

Latest posts

Back
Top Bottom