Furnace Problem

ski3pin

Belay On
Site Team
RV LIFE Pro
Joined
Jun 30, 2009
Messages
15,651
Location
Sierra Nevada Range
The Lady & I were getting ready to roll out of bed just as the sun was rising in central Nevada. Reached down and turned on the thermostat. Awful squeal as the furnace tried to kick on. Sounded like a bearing was froze up. It freed up before I could turn it off so at least we had a warm place for breakfast.

I'll be digging into this repair this week. Have any of you had similar issues with the Atwood furnace and how about convenient sources for parts?

Thanks for the help.
 
My furnace is a Hydroflame but I have had that same awful squealing and thought it was bearings. I lubed what I could and also discovered that there was a missing screw holding the furnace in place and after attending to that the worst of the noise was gone. At times I get some noise, usually when it initially starts, but it does run much quieter than before.
 
Barko1, thanks for the info. I had a little time at lunch today. Looked it over and ran the furnace with no noise. Both the blower and combustion fans on either end of the motor turn fine without noise. I do not think it is bearings. I'm looking for other sources and am wondering if this is cold weather or ice related. It was in the mid twenties Sunday morning.
This is a Hydroflame Excalibur II Atwood, model 8516.
 
I have an old Hydroflame in my '86 Grandby.
The blower finally seized up and tripped the circuit breaker that is located (hidden) on the back side of the furnace.
I took it apart. The blower shaft bearings were dry and gunked up the shaft. A lot of wd40 freed it up. After that I lubed it real good with 3 in 1 oil and it works like new.


Desert Rancher, thanks for the info. I try that as I look for other possible causes.
 
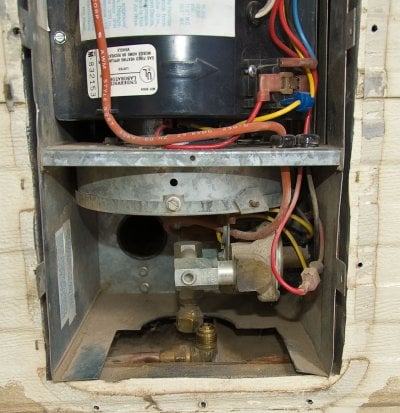
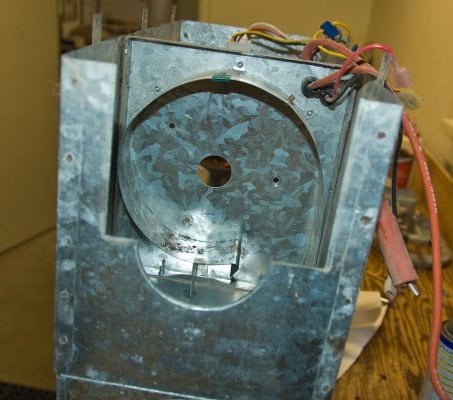
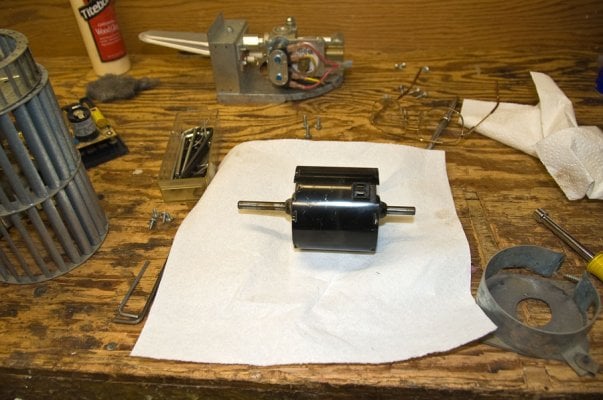
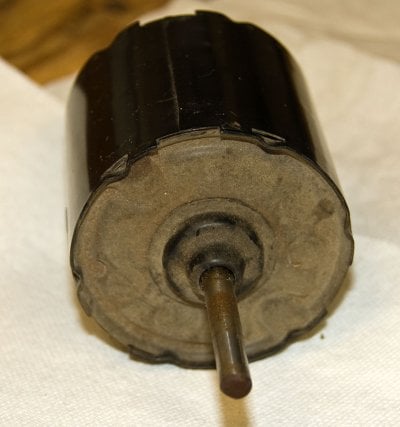
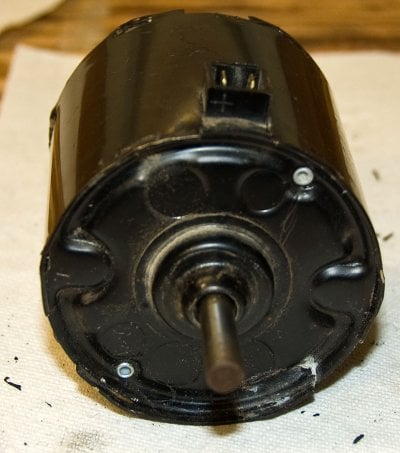
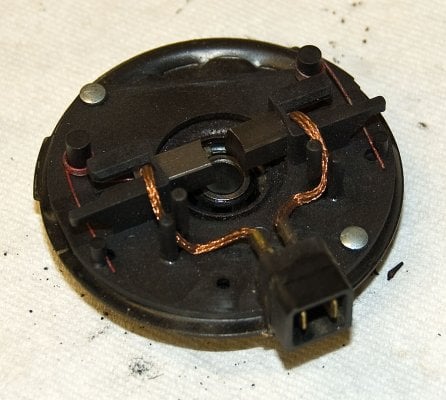
Furnace squealing is almost always due to motor spindle either dry or bent (or both.) Although it could just be a loose screw on the sheetmetal somewhere and squeaks from the vibration. The furnace itself is a pretty simple unit. If you're reasonably handy you can probably do the whole job in about 3 beers. Take it all apart, if the motor is the type you can separate from the case, then clean and lube the spindle with dielectric grease, all other moving parts (hamster wheel) with dry graphite, and reassemble while snugging up all the other screws, paying extra special attention to the motor mount. If you determine the motor to be the culprit they run about 90 dollars direct from Atwood (YMMV depending on part #) but at least you'll be comfortable doing the job because you've already had the unit apart once. Also be sure to check the hamster wheel for roundness and the motor spindle to make sure it's not bent even a little. If they are, you must replace or the problem will never go away.

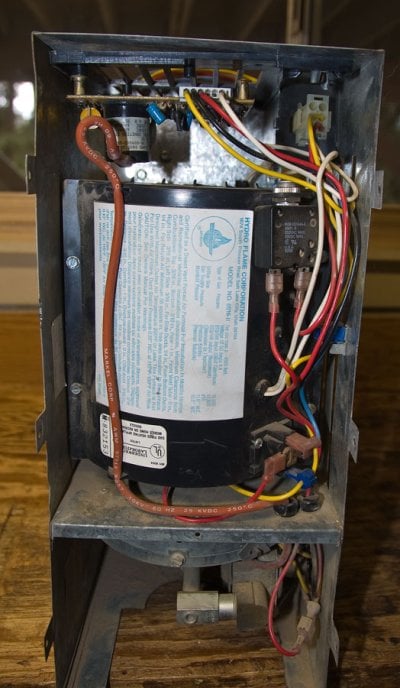
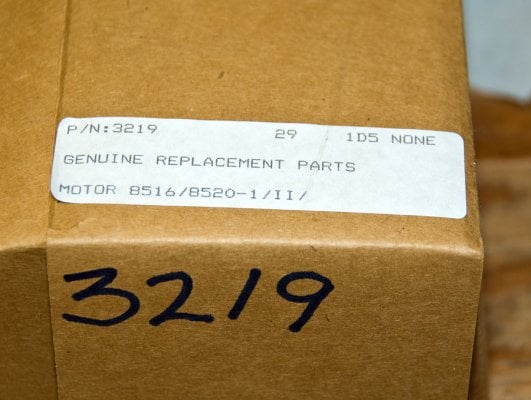
Also FYI you really need to order the motor by the part number stamped on it or on the sticker, not by the furnace's model number. They change the impedance and winding and all sorts of stuff all the time with really no rhyme or reason and the wrong motor will smoke your board pretty quickly.

By the way here's your service manual: http://bryantrv.com/docs2/docs/hflamefurn04.pdf
 
I'll go one weirder for you. My furnace gets that awful high pitch squeal but only when it's windy out. No wind, no noise.

Any thoughts on this one?
 
BSS, thanks for the detailed info. That's a great help and really appreciated. I owe you three beers!
 
I'll go one weirder for you. My furnace gets that awful high pitch squeal but only when it's windy out. No wind, no noise.

Any thoughts on this one?


Has to be the bearings. The grease dries out after time.
My guess is that the wind puts a load on the blower when it's running and causes the squeal.
It's really a simple fix, but you have to remove the unit. There's only two or three screws that hold the furnace in.
The outside vent is a bit of a challenge. There is a screw on the inside that holds it in place. It then slides to the outside of the camper.
 
First off, thanks to everyone here sharing info on thoughts on this problem.

I pulled the furnace out today to get a look at it. Door came off the outside, inside vents and cabinet around it on the inside off, check for extra screws holding it in place (found one inside), removed the small heat vent duct, removed the exhaust port to easily get at the propane supply connection, pulled it out the outside access and clipped the four wires at the old connectors.

I called Marty at All Terrain before doing this and asked about the procedure to remove and any "little" things to look for. These guys are always helpful. Thanks Marty!
 

Attachments

  • furnace-001.jpg
    furnace-001.jpg
    186.6 KB · Views: 318
  • furnace-003.jpg
    furnace-003.jpg
    164.2 KB · Views: 272
Down in the shop and on the bench. I was waiting for a warm day to do this. It snowed on and off here today, wouldn't you know it.

Took a look at the unit and how to get at the blower motor. Circuit board out. Black blower fan cover off paying attention to attached switches and all the wiring. Removed the burner unit. Allen wrench to take off the lower squirrel cage fan - heat side - and then I could get at the three screws holding the motor mounting bracket.

Close quarters with sharp sheet metal, pay attention.
 

Attachments

  • furnace-005.jpg
    furnace-005.jpg
    119.4 KB · Views: 212
Here's what remains after the fans and blower motor is removed.
 

Attachments

  • furnace-007.jpg
    furnace-007.jpg
    142.7 KB · Views: 218
  • furnace-008.jpg
    furnace-008.jpg
    161.7 KB · Views: 230
I found the motor is a sealed unit with no access to either bushings or bearings. Rotating the shaft feels rough with some up and down slop; and with no way to inspect or grease bearings, I'm getting a new motor, especially since it's not a simple process to get to it.

Allied Trailer Supply in Sacramento has one in their warehouse I can pick up late Monday.
 

Attachments

  • furnace-006.jpg
    furnace-006.jpg
    126.4 KB · Views: 183
I found the motor is a sealed unit with no access to either bushings or bearings.


The motor housing has some tabs that are bent over the end plates. The tabs are very easy to bend out with pliers and allow the end plates (with the bearings) to be removed. The bearings can then be cleaned and lubed. Re-assembly can be completed by bending the tabs back into place.

After you get back together, run it on the bench (without LPG) to make sure the blower doesn't rub anywhere or squeak.

Also, you can see the dirt/dust that has built up inside the motor compartment. This contributes to the bearings going dry.

Since you have a new replacement, I am posting this for the benefit of others. Mine is an '86 and it now runs like new.

Jeff
 
The motor housing has some tabs that are bent over the end plates. The tabs are very easy to bend out with pliers and allow the end plates (with the bearings) to be removed. The bearings can then be cleaned and lubed. Re-assembly can be completed by bending the tabs back into place.


Since you have a new replacement, I am posting this for the benefit of others. Mine is an '86 and it now runs like new.

Jeff


Ah....I see that. After I get the new one in I will pull this one apart and photograph. Thanks again for the insights, very much appreciated.
 
you should post the allied part numbers for the replacement!


On the phone with Allied yesterday afternoon I gave them the part number right off the original owners manual for the furnace - 3219. The fellow checked, said it was still a good number, cross referenced with the model number of the furnace (8516-II) as a double check, and said they had one. I'm buying from them because I can take the old one down and compare side by side.
 
Picked up the new motor and reassembled the furnace last night. Installed it back in the camper early this morning. Ran it and all seems well with its operation. Here is the part # and box for the new motor.
 

Attachments

  • motor-002.jpg
    motor-002.jpg
    111.6 KB · Views: 158
I did pull the old motor apart to illustrate its construction for anyone interested. Here's a photo of the bent tabs that hold the end plates in place. This motor has been in dusty conditions.
 

Attachments

  • motor-001.jpg
    motor-001.jpg
    99.7 KB · Views: 175
Here are the tabs bent, freeing the end plate that the brushes are attached.
 

Attachments

  • motor-004.jpg
    motor-004.jpg
    118.2 KB · Views: 196
  • motor-005.jpg
    motor-005.jpg
    135.5 KB · Views: 197
Back
Top Bottom