Gutted Fleet - Rebuilding

Thanks for the advice! I decided not to tackle this...yet. There was a bit of separation on the drivers side, and I'm sure the floor pack on my camper could use a rebuild, but I was hoping to get on the road in a few weeks so I decided to just seal up the floor on that side, and build a platform to set the camper on. If I ever do rebuild the floor pack, I'd definitely consider adding some additional height in the floor. I needed an additional 6 inches just to clear the bed rails.

Good luck with your project!
 
I have been meaning to update forever now... The shell is now complete and I've had it on the truck for a month, the interior is almost done...I'll pick up where I left off.

Sideliner Replacement-
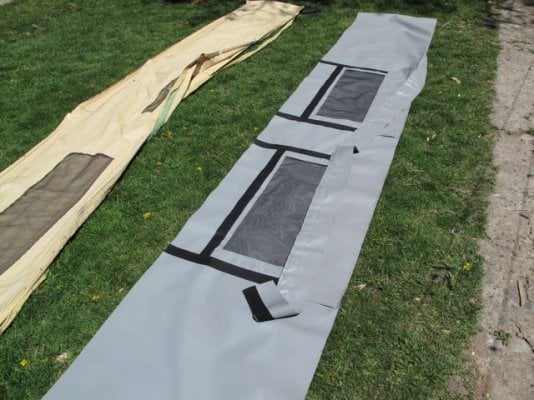
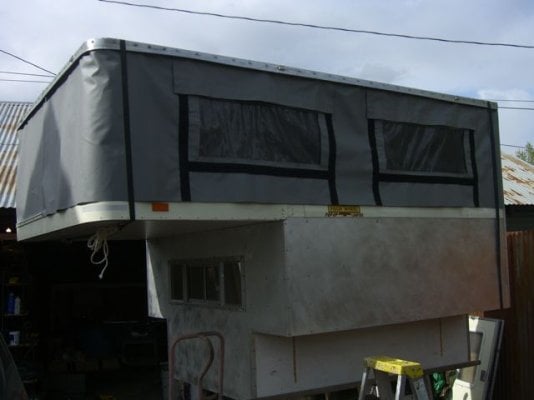
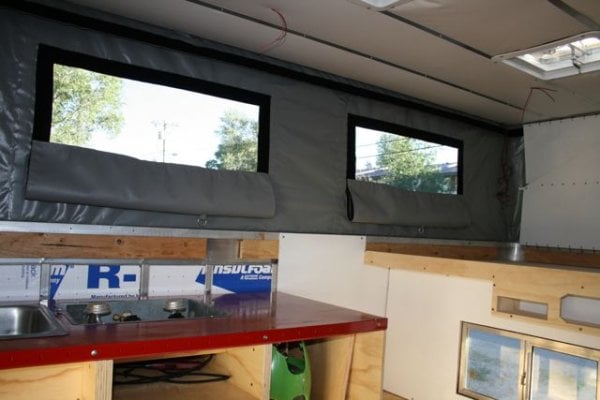
I was really excited the day the sideliner showed up for the camper. The first thing I did was lay out the old canvas and new canvas on the grass to check the size. The new canvas is so nice compared to the brittle old one. Four big windows, exterior storm flaps, and some added height as well as the velcro on the inside for an insulation pack. Now I just needed to figure out how to install it.

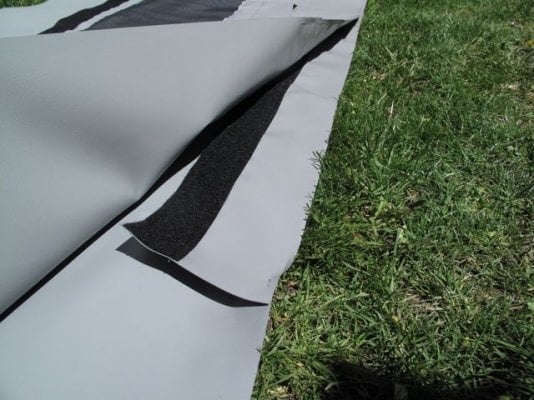
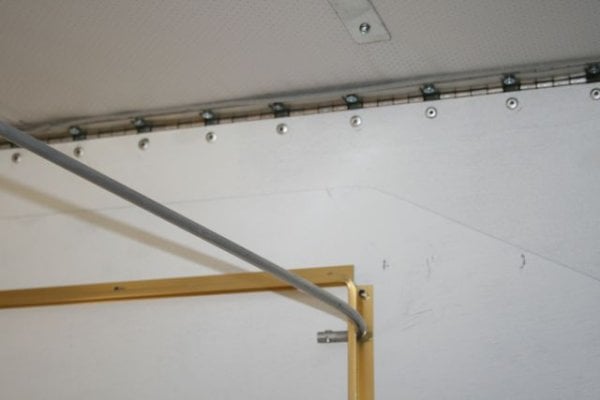
I started by marking the middle of the new canvas(front and back) so I could line that up with the middle of the camper. I then attached the insulation velcro strip using regular staples every 18" or so along the very edge. I'm not sure why they don't just sew it on at the factory, I guess so it is optional?

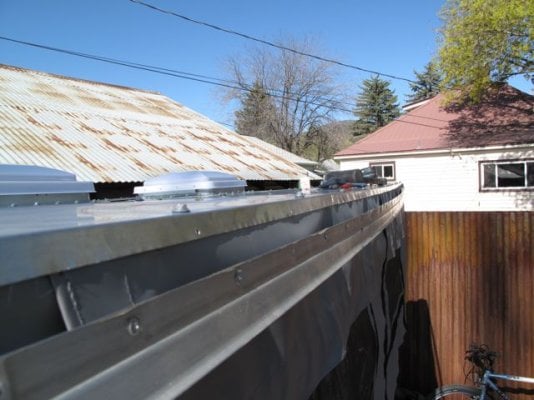
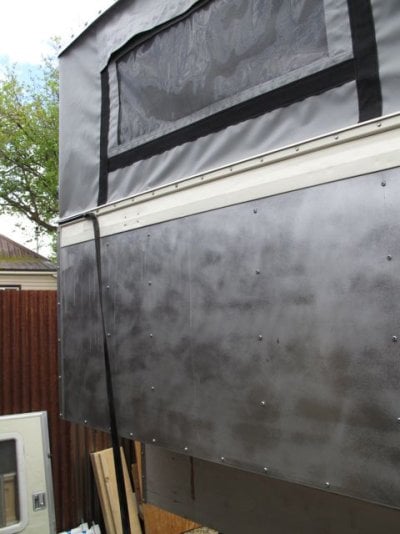
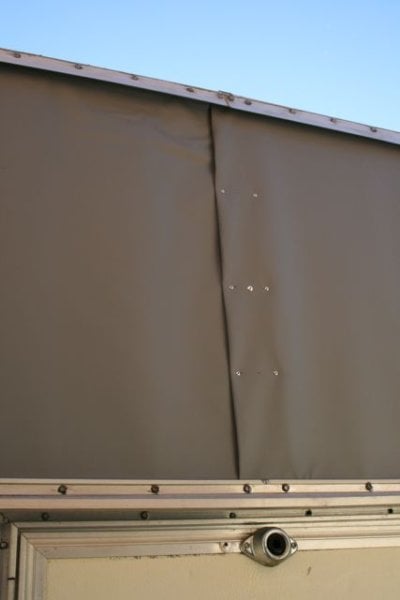
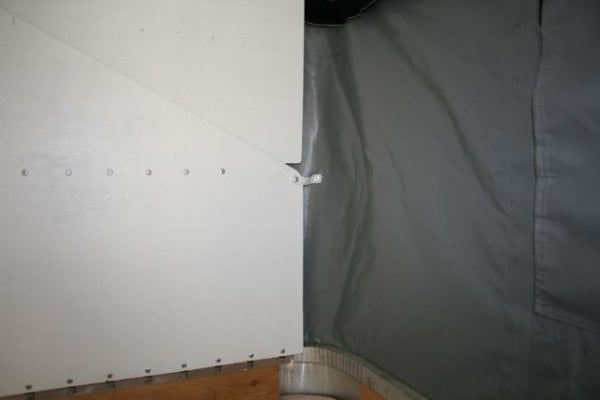
Then I went around the edge of the roof and bent the lip of the sheet metal up enough so I could slide the new canvas up under the metal. I started in the front and center of the camper with the canvas and worked it up into the metal, moving down one side and then the other. I used an air staple gun to hold the canvas in place as I worked it around. My new sidliner ended up being about 6" too long(not sure if my measurement to ATC was wrong or the canvas was sewn wrong, I tossed the paper that I had the measurement on when I called the order in). I ended up just folding the canvas over in the back(center) to make it the right length. I then bent the roof edge back down and attached the trim strips in the same fashion(working front to back).

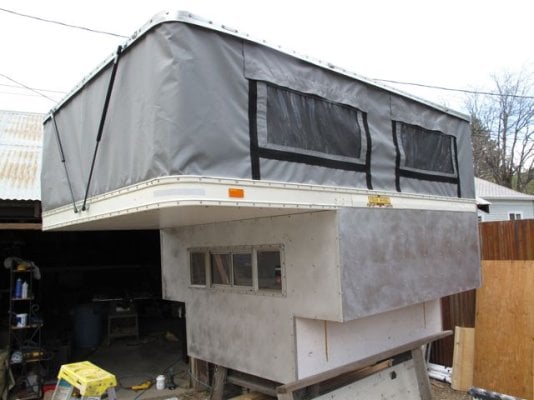
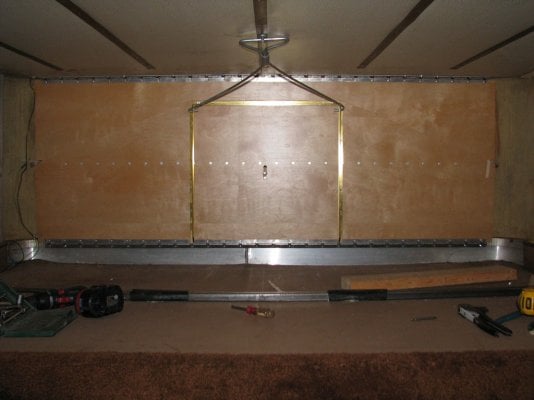
Once the canvas was attached to the roof, I lifted the roof up so it was high enough that the canvas would line up with the bottom trim strip. I did it this way because I figured I would just make my new lift panels to match and keep the canvas as long as possible. If you were reusing your old lift panels you would just pop the top up and let the canvas hang long attaching the trim first and then trimming the extra length after. The one drawback to that method you can't get the canvas super tight(I ended up making my lift panels so they pulled the canvas nice and tight). I also got some new trim strip insert from ATC as the old stuff was pretty brittle and would have been hard to reuse.

The pictures are before I installed the lift panels which tightened up the canvas.
 

Attachments

  • IMG_2197.jpg
    IMG_2197.jpg
    72.8 KB · Views: 636
  • IMG_2198.jpg
    IMG_2198.jpg
    67.6 KB · Views: 778
  • IMG_2199.jpg
    IMG_2199.jpg
    57.1 KB · Views: 926
  • IMG_2203.jpg
    IMG_2203.jpg
    49.3 KB · Views: 937
  • IMG_2206.jpg
    IMG_2206.jpg
    48.1 KB · Views: 922
  • CIMG3473.jpg
    CIMG3473.jpg
    36 KB · Views: 712
Skilled people drive me nuts. Looking good. I wonder if FWC knew they would be be the skilled person's dream hobby?
 
Thanks for the comments guys.

Desert Rancher-Thanks for the offer on the door pieces. What I really need is an entire door(now the one I have looks hammered compared to the rest of the camper), I'll probably eventually rebuild it.

Hadley- I think I have about 6-4 for headroom now. I'll measure it today and let you know. If I remember correctly I gained 4".


I'll try to post some more progress and pictures tonight.
 
Scheefdog, your photos and reports are a boon to the community, even though you've been getting relatively few comments. Excellent job, keep it up with the pics.
 
Scheefdog, your photos and reports are a boon to the community, even though you've been getting relatively few comments. Excellent job, keep it up with the pics.


we're watching and appreciate your report
 
Scheefdog, your photos and reports are a boon to the community, even though you've been getting relatively few comments. Excellent job, keep it up with the pics.

+1
 
Scheefdog, your photos and reports are a boon to the community, even though you've been getting relatively few comments. Excellent job, keep it up with the pics.

+3 You've got a lot of useful info in here.
 
Lift Panels-
I tried to come up with some other lift solution for the roof, but couldn't come up with anything that was as simple and effective as the stock lift panels...

Once I had my new sideliner all installed I compared measurements of how much the roof used to lift up to what it lifts up now. I gained about 4" with the new liner. Using my old lift panels as templates I cut out new panels plus the new height. I chose 5mm luan because of the low cost and painted it white using the same oil based paint I put on the floor pack. I took apart one panel first to reuse the hinges and kept the other old panel complete so I had something to serve as a guide for assembly.

All I can say is wow, there are a lot of rivets. The best source I found to buy rivets in bulk was Napa auto parts. A box of 250 is a little over $20(and I used almost all of them). I choose 3/16" rivets because I drilled out my hinges when I removed the old rivets. My forearms were pumped by the time I got done assembling both panels. I used the bailing wire trick to pre-load the springs to make installation possible. I found this thread really useful-
http://www.wanderthewest.com/forum/index.php?/topic/3267/page__gopid__35430&#entry35430

Actually installing the panels is a little bit of a pain(at least the first one you do). You have to attach it to the roof first and then attach the bottom hinge. The new panels came out perfect in height as they make the canvas nice and taught.

I realized a couple things the first time I closed the roof however...
While I was still trying to brainstorm a different way to lift the roof I had installed gas struts on the outside(like a bunch of you guys have to assist the roof). I wanted to see how strong they were on their own. Well, they provide a lot of lift because the first time I folded the roof down the front kept of springing back up everytime I would go to pull the back down. So I ended up pulling the front struts off for now.

Once the roof was down I found the second mistake I made...The original top hinge was riveted to the roof, I decided to just screw it. This was a mistake because the screw heads stick down and interfere with the panel folding all the way up against the roof. The panels only stick down about 4" from the roof so luckily i can still get the roof latched and everything. I was really frustrated and done for the day, later I searched around and found something interesting...

I think at some point FWC changed the panel design a little so the panels folded better. My panels had the top and bottom hinge on the backside of the plywood, whereas this picture I found from another lift panel rebuild thread has the hinges on the front of the panel. Moving the hinges to the front of the panel would allow better(since the thickness of the plywood isn't inside the hinge). So to anyone looking to rebuild their panels, make yours look like the wood one in the picture below(not like my white panel).

Below are some pictures of how I attached the elastic from the canvas to the lift panels so it pulls in. I used the rivets and elastic ATC sent me with the new sideliner (they include everything!). I'll return again to the lift panels later...I'm thinking of eliminating the springs on the hinges(let the gas struts do the lifting) and doing the panels out of aluminum....

There is also a picture of how I folded my sideliner over to take up the extra length and then riveted it(using a washer on one side of the rivet).
 

Attachments

  • IMG_3035.jpg
    IMG_3035.jpg
    23 KB · Views: 783
  • IMG_3042.jpg
    IMG_3042.jpg
    26.7 KB · Views: 897
  • IMG_3043.jpg
    IMG_3043.jpg
    19.5 KB · Views: 854
  • IMG_3058.jpg
    IMG_3058.jpg
    24.2 KB · Views: 868
  • finished install.JPG
    finished install.JPG
    120.5 KB · Views: 850
Here are a few teaser pictures of the interior(as of today), I'm trying to leave things flexible inside so it will be easy to modify or tweak things down the road as I figure out what I want. One of the big goals with the camper for me is have it be "light and fast"...I'm done typing for tonight so I'll post more soon.
 

Attachments

  • IMG_3040.jpg
    IMG_3040.jpg
    50.1 KB · Views: 912
  • IMG_3047.jpg
    IMG_3047.jpg
    42 KB · Views: 974
  • IMG_3049.jpg
    IMG_3049.jpg
    33.5 KB · Views: 955
  • IMG_3052.jpg
    IMG_3052.jpg
    36.7 KB · Views: 1,059
  • IMG_3054.jpg
    IMG_3054.jpg
    44.8 KB · Views: 1,005
The counter top is a scrap piece of sheet metal that happened to be about the right size. A light sanding and some new paint and it should do the trick. I found a hollow core door that was being thrown out to use for solid support underneath(but light!).

The depth on the cabinets/countertop is 24"(38" to the top of the counter). They extend out to the edge of the door frame. Medium sized rubbermaids slide into the two deep openings on the left. Then there is a propane box behind the bottle that it goes in.

I got all the carpet and trim done over the weekend so all that is left is the wiring(and mounting the solar panel). Hoping to get that done this weekend and put it on the truck.
 
Great read. Thinking of getting an old FWC presently, so your rebuild is pretty relevant. Thanks for sharing. And I certainly look forward to reading more about the latest fixes.
 
Back
Top Bottom