Hawk Shell on a Tundra

Joined
Apr 11, 2016
Messages
21
Location
Denver, CO
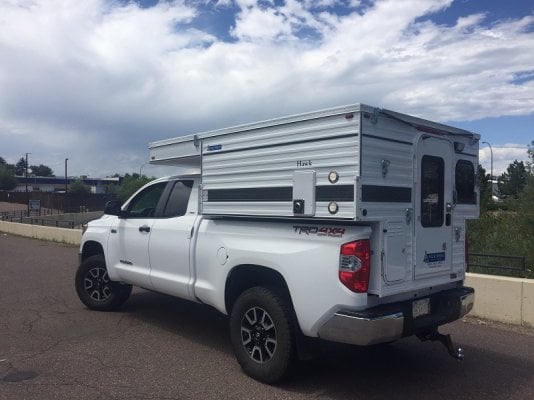
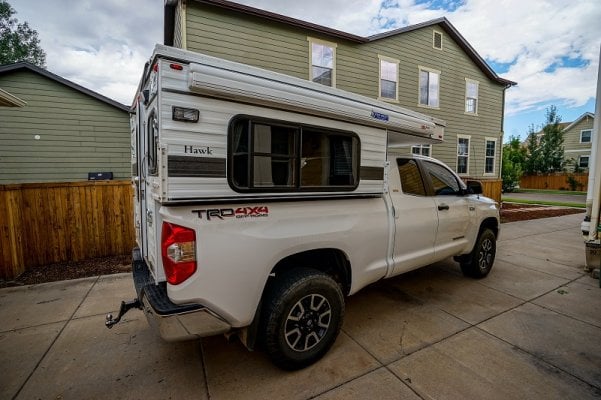
Hi guys, I finally took delivery of my Hawk shell yesterday from Rocky Mountain Fourwheel Campers. Chris was great to work with and helped me dial in the camper as I needed and answered all of my questions. I will try and post to this thread if I have any mods or photos to share. Primarily I will use this for camping and traveling around COlorado with my wife and our 5 year old son. Come winter I hope to chase powder and fun places to ski and snowboard around the West as time permits.

I ordered my shell with:

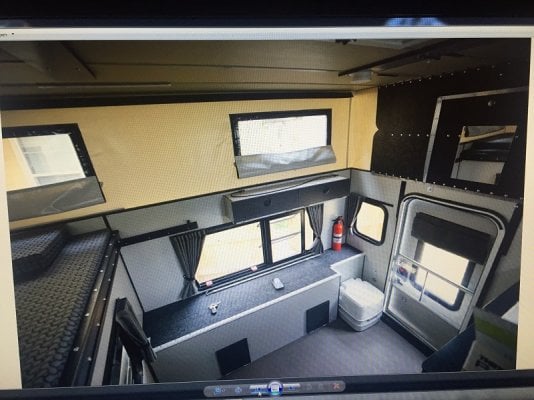
Silver Spur interior
curtains
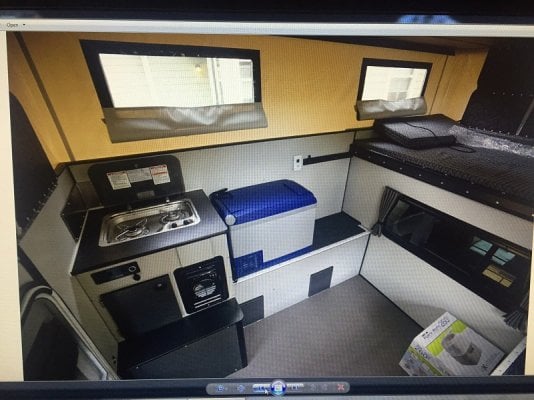
furnace cabinet w/flush mount stove
8' side awning
12 volt recptacles
Powered roof vent
Single Battery system
Roff lift assist
Roll over couch brackets only
Yakima Tracks

Since then I have ordered:

ARB 50 qt Compressor Fridge
Renogy 2x100watt RV Solar kit

So my first mod will be building out a rollover couch, which I will be installing along the front wall. Then I will install a second battery and the solar kit.

On the Tundra I have installed a Toytec Ultimate lift, which is 3 inches in the front using Toytec coilover/bilsteins and add a leaf +block and bilsteins on the rear. I also installed a TRD swaybar and firestone riderite airbags and daystar cradles. The tires are 295/70R18 Nitto Terra Grappler G2s on factory TRD wheels.
 

Attachments

  • IMG_5688.JPG
    IMG_5688.JPG
    149.7 KB · Views: 863
  • IMG_5695.JPG
    IMG_5695.JPG
    182.4 KB · Views: 786
Welcome to the family "Forrest".

Good option list.

I would add one additional item ...The "Thermal Pack". Expensive it is. But worth it as you will lose a lot of heat through the canvass in winter, plus it keeps condensation between the "pack" outer skin, and it keeps the summer heat out (Denvers 96* summers)

If your wife or her friend is handy with a sewing machine, they could make one following "ski3pin" directions for his Home made pack.(click on the link).Less than $150 in material
 
RC Pilot Jim said:
Welcome to the family "Forrest".

Good option list.

I would add one additional item ...The "Thermal Pack". Expensive it is. But worth it as you will lose a lot of heat through the canvass in winter, plus it keeps condensation between the "pack" outer skin, and it keeps the summer heat out (Denvers 96* summers)

If your wife or her friend is handy with a sewing machine, they could make one following "ski3pin" directions for his Home made pack.(click on the link).Less than $150 in material
That is some great work! (my wife doesnt even own a sewing machine :p, but both of our moms still do) I thought awhile on the thermal pack, figured I could try without the first winter and see how my heater kept up. I do appreciate how FWC puts in the velcro to easily add this option later.
 
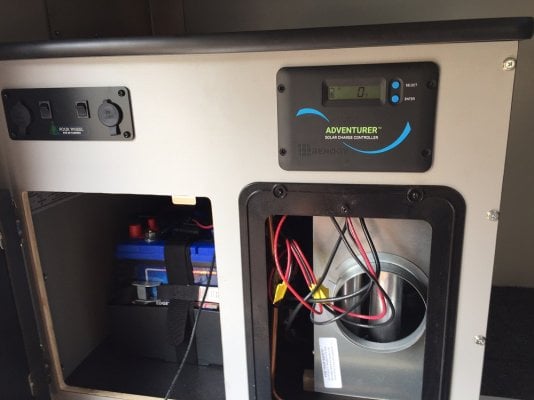
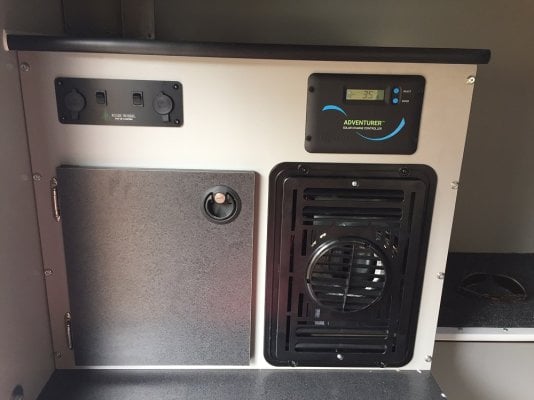
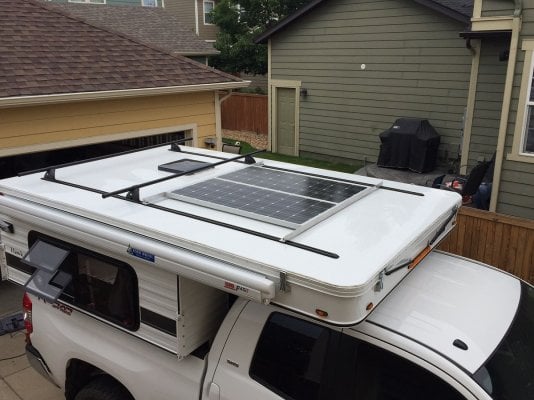
Added the renogy solar panels to the roof. I ordered the RV kit with the Adventure controller (30A PWM). The shell came from FWC with one Exide FP-AGM24DP battery, and I added a second one, which I found on sale at Camping World for $180. I purchased some angle aluminum (96x1.5x1/8) which are pretty stout so that they support both panels on my yakima tracks without sagging at all. I attached them to the yakima tracks using stock yakima hardware and extra washers. For the controller, the FWC furnace cabinet already had a hole for it, I just had to make it about an inch wider. The controller has a flush mount option which looks really good and matches the interior.

I also added a screen door handle, front yakima rack with wind fairing, and removed my backup cam from the tailgate and duct taped it under the camper until I find a better mounting option.
 

Attachments

  • IMG_5801a.jpg
    IMG_5801a.jpg
    190.9 KB · Views: 423
  • IMG_5806a.jpg
    IMG_5806a.jpg
    202.7 KB · Views: 401
Nice install!

Quick note regarding your furnace: Does FWC not connect the ducting between the furnace outlet and the center position on the faceplate or was it just removed for the picture?
 
Thanks guys,

Norcal, they have a piece of flexducting in there. It isn't permanently attached though, it came off easily when i removed the faceplate.
 
forrestthorniley said:
Where did you get the flat nuts to slide inside the Yakima Tracks for your solar panel mount? I am going to be doing the same setup for solar on my little Rogue Trailer which will have Yakima Tracks installed on top of it.
 
Junk yard to get track pcs from expedition/explorer/ ford van all the components fit but threads are metric


Sent from my iPhone using Wander The West
 
camper rich said:
Where did you get the flat nuts to slide inside the Yakima Tracks for your solar panel mount? I am going to be doing the same setup for solar on my little Rogue Trailer which will have Yakima Tracks installed on top of it.
I bought them at Rack Attack, which is a local Yakima/Thule dealer. Yakima sells them in sets of four. like these:

https://www.etrailer.com/Accessories-and-Parts/Yakima/Y8890028.html
 
forrestthorniley,
Do you have any more pictures of the interior (or the same ones that are the originals rather than a picture of the images on a monitor)? Our shell over goes in next week and the picture of your silverspur shell interior just may have us changung to that. I was leaning away from it after seeing it in person on standard hawks and grandby, but I really like the look in the shell. I'll Message you as well with my contact info. Thanks!
 
Chadx said:
forrestthorniley,
Do you have any more pictures of the interior (or the same ones that are the originals rather than a picture of the images on a monitor)? Our shell over goes in next week and the picture of your silverspur shell interior just may have us changung to that. I was leaning away from it after seeing it in person on standard hawks and grandby, but I really like the look in the shell. I'll Message you as well with my contact info. Thanks!
Hey Chad,

I would definitely recommend the silver spur interior shell upgrade. I think the darker looks better. Here are the most recent pics, including my rollover couch. I also added some interlocking floor padding from costco and home depot carpet to the floor. Much warmer and easier on the knees.

15068344_10209353672891144_7898952377259820507_o.jpg


15137645_10209353672811142_6777019018686186227_o.jpg


15068525_10209353672851143_5155305070350021652_o.jpg


15068419_10209353673651163_4501872140839214602_o.jpg
 
Great pics - thanks for sharing. Everything looks clean and I especially like the solar panel mounting. I don't have the solar pack either and I have camped down to the high teens in the winter. I don't have a furnace either so I usually sleep with the top down and that seems to help a lot. I use my 10* backpacking quilt for my bedding. I will be ordering a new ATC soon and a forced air furnace is definitely on the drawing board. You're going to have a great rig!!
 

Try RV LIFE Pro Free for 7 Days

  • New Ad-Free experience on this RV LIFE Community.
  • Plan the best RV Safe travel with RV LIFE Trip Wizard.
  • Navigate with our RV Safe GPS mobile app.
  • and much more...
Try RV Life Pro Today
Back
Top Bottom