Identifying trim pieces

64highboy

Advanced Member
Joined
Feb 4, 2015
Messages
38
Location
Vancouver island
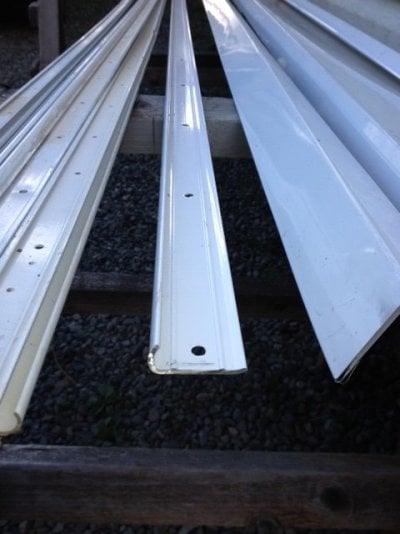
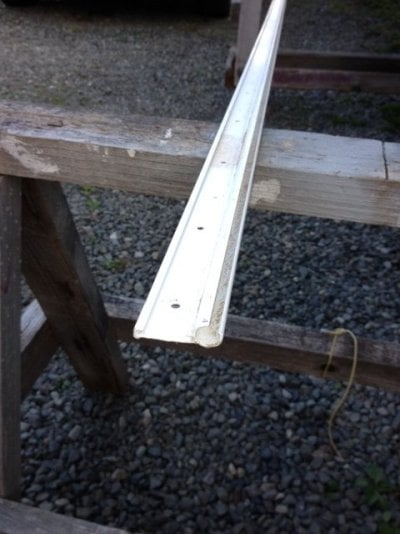
I got a few extra pieces of trim with my new roof skin. I think these must have been used on newer camper as Bryan told my father that I would need them and the camper wouldn't have had them in 1977. The first picture is what I believe are the side trim that runs along the bottom edge under the side windows. I've got two pieces of this just longer than the sides of the camper. The second picture is of a piece that I have know idea where it would go. I thought it might be to hold the Pirelli seal on but it won't fit along the sides with the first moulding and is too wide of a profile to go along the plywood wall at the back. I have four pices about 8ft long. If someone has a newer camper they can get a few pictures of the trim detail it would be very helpful!
 

Attachments

  • image.jpg
    image.jpg
    51.3 KB · Views: 174
  • image.jpg
    image.jpg
    56.7 KB · Views: 184
The first picture is the drip cap it goes along the radius.from the front along the edge to the bottom, this stuff bend easy. I do not have any of the picture two..looks the same stuff I took off that attached an old awning. That's the best I can do from pictures.
 
Bryan sent me these pics, thought I would post them for future reference. The newer Alaskans don't have the gutter at either end just the cleaner looking trim piece, and the trim that goes along the bottom holding the Pirelli on. The rounded edge with the break in it breaks the water running off the edge and keeps it from going underneath.
 

Attachments

  • image.jpg
    image.jpg
    69.2 KB · Views: 169
  • image.jpg
    image.jpg
    72.7 KB · Views: 174
I went out this morning and look at mine. The drip rail around the radius edge isn't as deep so that it can be bent around the edge. I have not seen that moulding in picture 2 used like that but it does make sense, still looks like the moulding for a awning though.
 
I ended up using 1/16" aluminum plate cut to ma:tch the radius on the front and rear of my new roof I ripped some 1/16" angle on my table saw for the long sections, all held on with SS screws. I am sending all the parts out to be powder coated
 

Attachments

  • 20150418194140.jpg
    20150418194140.jpg
    249.7 KB · Views: 171
Those pics Bryan sent make the ends look real clean, did he send any more?
 
Ripperj said:
Those pics Bryan sent make the ends look real clean, did he send any more?
Every time Brian sends a picture out I get closer to that new one...very nice, clean look.....one of the significant problems with the older ones....especially the forward trim...into the wind
 

New posts - WTW

Back
Top Bottom