Newbie, doing a full teardown of an 80's Keystone

Conduit that locks in place and good anchoring will work. If you share your plans, I'm sure there are a million owners who will thank you for not putting them through the rivet and spring loaded hinge exercise!

In case you decide not to reinvent the wheel on the lift mechanism, take a bunch of hinge placement photos and put markings on the attachment spots. Use the old panels as templates. Lift and close the thing a bunch of times, to make sure what you copy is worth redoing (mine was seriously cockeyed)... The geometry is not that tricky, but with three hinges and a ton of rivet work, it's nice to have a good working movement.

Best - HughDog
 
Just chiming in here now. Your project looks great! Glad you came across my videos. Do let me know if you have any more questions. Your timeline is way faster than mine. Like 10X faster :) But get after it!!!


mhskog said:
Going to go with the Conduit lift system, that should give enough space for windows front and rear. Any feed back as to why not go that way instead of rebuilding the existing panels?
Front and rear window sound great. We had played with the idea before but ended up not going with the extra windows. In hindsight I kind of wish we had put one by the bed, it would have been so nice. I would suggest you make the window small enough so that is it "inside" the emt lifters. There is a bit of dull-scissor-effect from the EMT. If you can find a way to mitigate the EMT crunking a part of the canvas I would be interested.
 
WOW,
Very cool you saw my post, I've been giving some thought to the issue of the scissor effect. Going to be end of the month at best before I get there. Yes we are thinking about a smaller window at the front that would be inside the lower EMT loop. I think we will just do netting and material for the front and back no clear window. What we really love about this type of camper is the ability of the wind to blow though. We have a ( ok two ) tent trailers now, and we are really good just unzipping and feeling the breeze when the folks around us in Tin cans are having to fire up the AC.

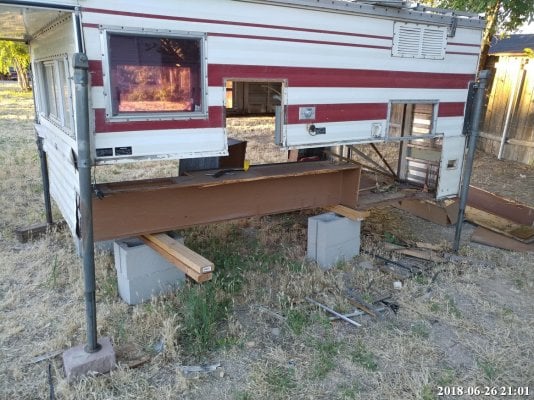
So today I started removing the bottom, I'd say I'm about half way done drilling rivets and unscrewing sheet metal screws. The bottom is in about the shape I'd expect it in flaky, bit water damaged but not super bad. Every screw is rusted and all the caulking has dried up behind the moldings. I'm going to lay out the new bottom to match my truck so I'll gain a few feet here and there. Started doing a spread sheet on cost as well, which I always seem to regret at the end ( if I didn't I think I spent so much less ). Did pickup a king sized foam bed from a neighbor during a yard sale for $10 bucks soft foam on one side memory foam on the other each about 2" thick so bed. Also got a small Kawasaki Generator that runs on starting fluid but the carb seems to be bit jacked up for $40.

Going to see if I can get the bottom removed tomorrow evening I took some video but I think it's going to be exceptionally boring.
 
post-8603-0-60708300-1530072058_thumb.jpg


Tear down
 

Attachments

  • 20180626_210144.jpg
    20180626_210144.jpg
    406.5 KB · Views: 75
don't know why pictures are screwing up this evening, tore out the bottom, it's now just resting on the old one I should have the new bottom fabed tomorrow and then build up from there should be interesting.
 
I did this project this spring and if there is one thing I wish I would have done differently.. it was to take the roof and canvas off first.. (as long as you know you are going that route).. just gets in the way..
 
We've kinda had a change of heart, we want to camp in the damn thing so the fabric is going to live for a bit longer. It's bad but usable long as we don't end up in a hurricane.

Ok so update time.

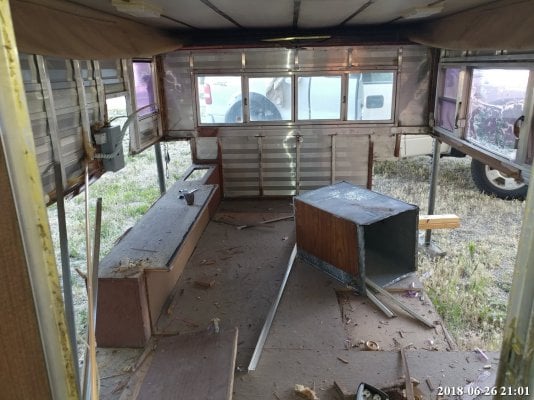
Remove the bottom had three layers of rotted floor, the thing must have weighed over 200LBs I couldn't lift it barely able to flip it over. 400 #8 screws later and a bit of pry bar and it came off. now I had support only a couple of inched under the bottom so that the frame couldn't flex far. I had measured out and created a new floor with 1/2 ply in the driveway made sure it fit into the truck and drove over to my friend's field where the camper is stored.

Picture of the floor you can see all three layers
20180626_210222.jpg


This is the floor I made in the driveway, I did the rear 1 inch too wide so had to cut it down on site but other than that it fit really well.

20180628_214448.jpg

I then boxed in the rest a piece at a time. This little jig was a lifesaver I could not have done it without it.

https://www.lowes.com/pd/Kreg-Mini-Jig-Pocket-Hole-Kit/1058457?cm_mmc=SCE_PLA:sleep:ToolsAndHardware:sleep:BenchtopTools:sleep:1058457:Kreg&CAWELAID=&kpid=1058457&CAGPSPN=pla&store_code=2573&k_clickID=556bf8b9-b3ce-4ad2-9152-4d9b9988c767&gclid=CjwKCAjw9-HZBRAwEiwAGw0QcbR0rHwUaCNxuffEBIr-SE6lZfZDmmtjadJngPTHLYDeenA6-qJvmhoCy1oQAvD_BwE

One side boxed in
20180629_212024.jpg20180630_165837.jpg20180630_165843.jpg20180630_165849.jpg20180630_165900.jpg
 
This is going to be a pretty lightweight build out, so I'm not too worried about placement. In its current form it's not even compressing the suspension at all. Driving I would say was pretty normal to the camper not being on. I guess we'll see when it's done.
 
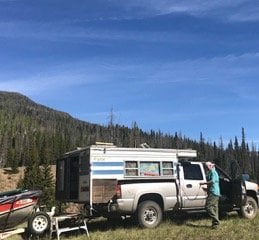
I have the same overhang- its on my 3/4 ton GMC 05 duramax - because I almost always am towing my fishing boat as well, I did see a visual droop in the rear of my set up- but I did many thousands of miles and months and months of camping and never felt any sort of front end wandering or unweighting. I did finally add air bags and that totally solved the "sag look"
 

Attachments

  • camper overhang small.jpg
    camper overhang small.jpg
    57.7 KB · Views: 91
I did pull the trigger on 5k airbags, I think this is going to be way overkill but better than underkill, and we will be taking it on fireroads and other out of bounds areas so ride quality would be nice.

update, lighting is going in, insulation is going in, rebuilt the sleeping shelf but going to redo it tomorrow, wife has been sewing. I hope to have more pics up probably tomorrow.
 
Ok so been really busy and really hot, average afternoon temp has been hovering in the triple digits, so things have been a bit slow going.

20180715_160955.jpg

Starting framing in the box that the battery is going to live in as well as storage,

I used this poly sheeting that I got at Home Depot for the walls, I've got it hanging from the top then tacked here and there, it's supposed to be able to float a bit. My biggest problem with it was not cutting the space needed for the trim, I was constantly going back and having to trim off another 1/8th.

20180715_161002.jpg

I filled in the lower fridge opening and screwed closed the old propane tank access door. this pic I'm still putting in insulation, by the way, I hate that stuff I itched for a week.

20180715_161009.jpg

decided to just box in the bench, this will work as a single bed or an oversized couch, we are going to have pillows and bolsters that can be moved around. the platform is 27x 79

20180722_182150.jpg

I've wired in the old light fixtures, I'll get some LED bulbs for them this week, I've got LED strips that go around the top of the bottom section that change color and look pretty cool. the 110V is just two outlets from the 110v on the side of the camper, just direct wired it, it will be rarely used. Have 2 USB 1 12V and voltage meter in the center panel as well. Sink will be fed from water container on the top cabinet you can just see to the left.

20180722_182154.jpg

I left half of the vent for the old fridge, I'll make a slide down cover for it so in the winter running the Mr Buddy heater we can crack it for 02 to the heater.

20180722_182208_HDR.jpg

rear shot, the poly wall sheeting isn't tacked down yet or the window trim

20180722_182211_HDR.jpg.

another shot of the rear corner, we've just left it open to use for things like chairs and tarps ect.

20180722_182214.jpg

This is a interesting thing I haven't seen before but I'll bet someone else did it, I have read about how converting to a pullout bunk the bunk can slide forward during the night creating a gap. I make a 45 degree cut on the end board so that when it's in the position it naturally locks into place as a happenstance the old brace fits in the groove and the pull out sits even on the shelf.

20180722_182214.jpg

ok so time to play with carpet for the benches and the sleeping area. flooring and cabinet doors, I think I can see the light and only three weeks past schedule.
 
We took it camping !!!!!

20180729_093747.jpg20180729_093757.jpg20180729_093813.jpg

we went about two hours away, 50 plus miles on dirt fire roads over a mountain pass. Things worked great. I did put the airbags on but as I thought the truck only went down about 1.5 inches loading the camper on. The airbags took about 50lbs per bag to get it back up to preload height which might be a bit too stiff. I'll need to play with it a bit.

interior pics
20180729_094728.jpg20180729_094743.jpg20180729_094758.jpg
 
more:

20180729_094827.jpg20180729_094902.jpg20180729_094911.jpg20180729_094917.jpg20180729_094922.jpg20180729_094926.jpg20180729_094931.jpg

so it's functional, UPS guy just dropped off the tarps.com fabric and the sailright pieces so the next project is the canvass but I think we are going to shoot for the fall on that. I've got lots of little things to do, we need curtains ect and to organize a bit better and some trim work to finish.

So should I do a video walk around / through ?

Should I do a large format picture review using imgur ?

any comments?
 
so did a 1000 mile round trip, no issues with the truck or the camper that were not self-induced. I boondock camped two nights and did a KOA on one night. The truck will run 65/ 70 MPH with the camper on without issues on the straightaways. I got about 12MPG average for the whole trip which wasn't thrilling. The F150 suspension with the airbags feels great no wandering or wallowing, my truck has the 4.6 V8 which unfortunately is underpowered I've really got to kick it in the butt to get it to climb hills. I went over several 5K passes. Temps on my trip was in the 104-108 range so I kept my eye on the temp gauge and babied it a bit. I use the Torque App on an android phone to monitor the vitals and I only saw 231 water temp on hard hill climbs. If you're looking to monitor your rig it's a fantastic app. So going to start looking for a Diesel Ram or Ford.
 
Back
Top Bottom