Perili Added to Cab Over of an Alaskan

Oz_70

Member
Joined
Aug 1, 2011
Messages
25
Location
Kitsap Peninsula, WA
Hi all, I am not sure if I should add this to my old topic of "My newly purchased 1971 Alaskan Camper" or start a new topic, I hope I chose wisely? I plan on adding more of the progress I make on my old Alaskan in the future, so moderators.... provide me direction!

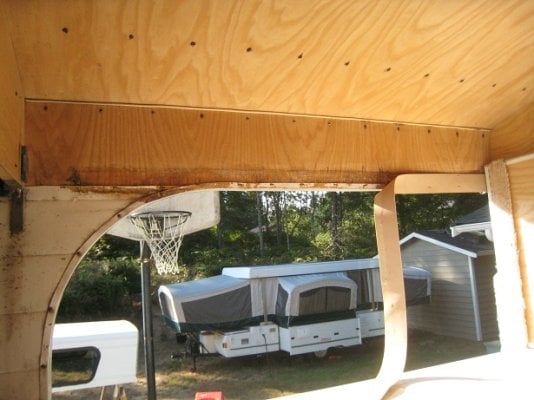
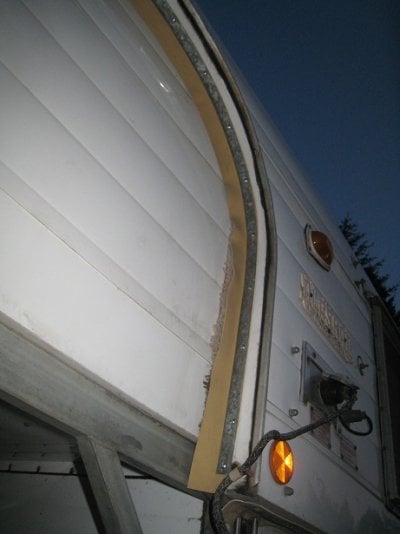
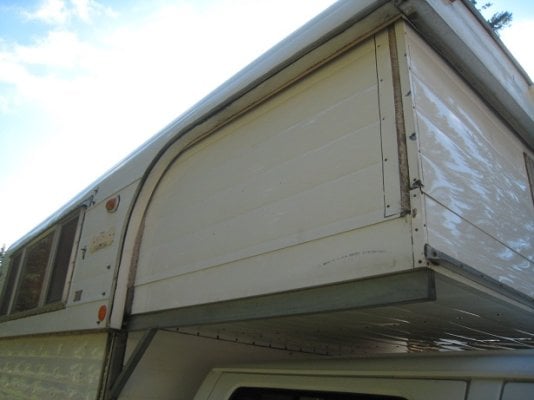
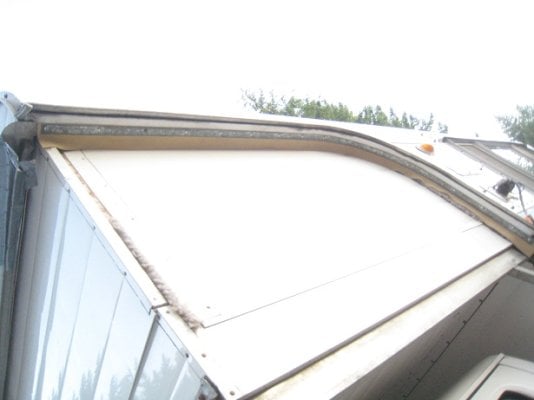
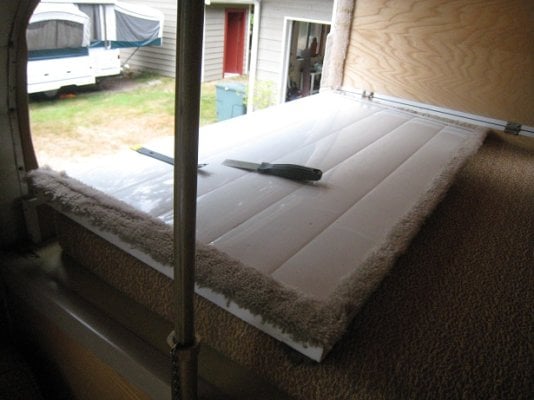
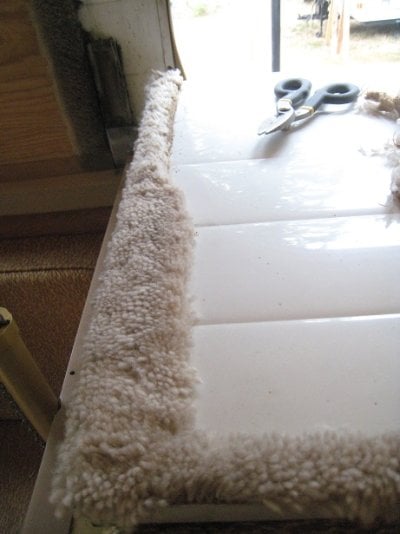
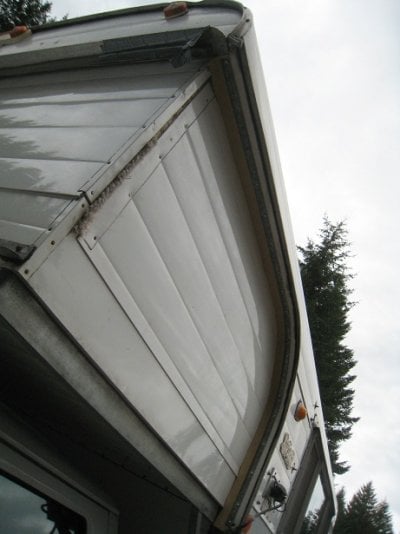
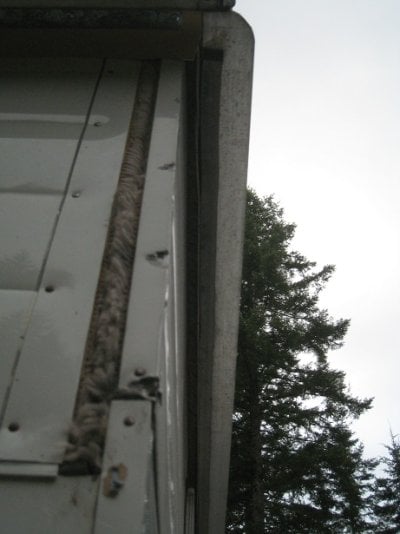
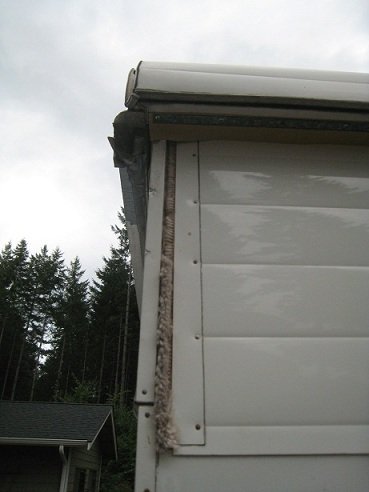
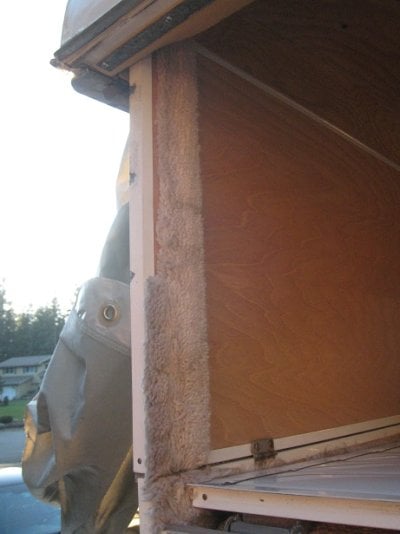
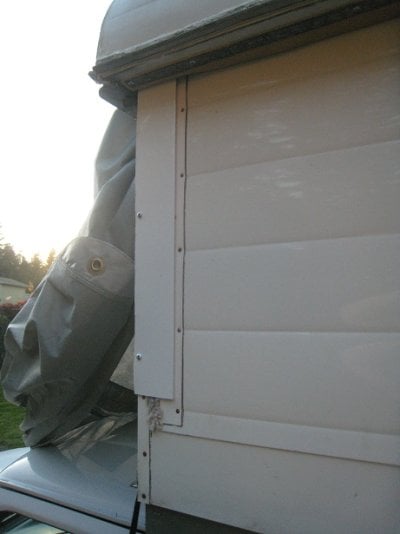
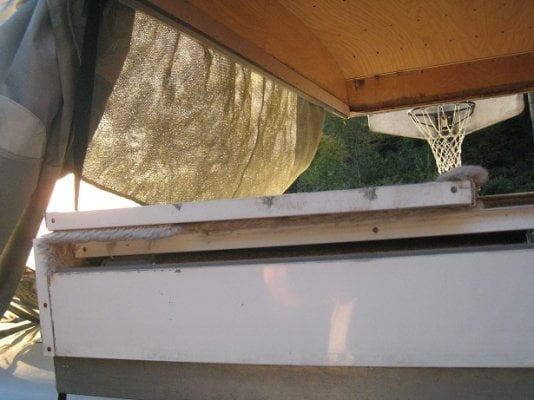
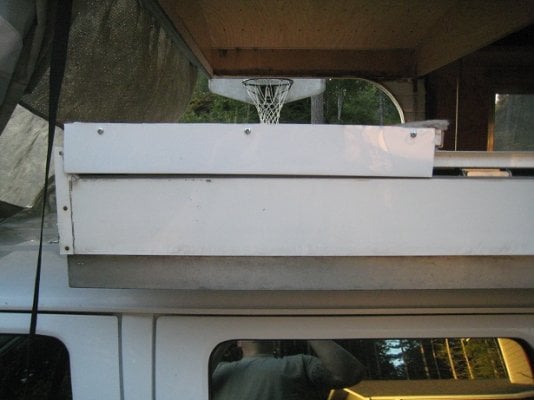
My 1971 Alaskan Camper did not have Perilli on the cab over area, except where a previous owner added it, by stapling it to inside of the fold down/up area to hide what looks to be a removed factory rubber or carpet seal (any one know what it was?????), see attached pictures. When I was at the Alaskan Camper in Chehalis a couple weeks back, the guys there gave me some old metal Perilli trim from an old camper, so I used it to add Perilli to the cab over area. Pictures of tonight's work are attached.

Few questions for the forum:

1. Should I also add the missing rubber or carpet seal?
2. Should I ProflexRV my Perilli screws and holes, or will this make it hard to replace the Perili in the future?
3. Should I cut the carpet sticking out the bottom of the Perilli since I think it will wick moisture?
4. And, was there Perilli on the very front of the cab over area also?

Thanks all!

Oz
 

Attachments

  • Inside.jpg
    Inside.jpg
    117.4 KB · Views: 603
  • Carpet.jpg
    Carpet.jpg
    95.7 KB · Views: 613
  • Before.jpg
    Before.jpg
    84.3 KB · Views: 886
  • After.jpg
    After.jpg
    67.8 KB · Views: 494
My advice is to lose the carpet. Yes, it will wick moisture and it will flatten over time. I tried indoor-outdoor carpet as a seal between the upper and lower sections on my 8'NCO and it lasted for a single season. I bit the bullet and purchased some of the Pirelli and haven't had any problems since.

As to how to attach it to the front section on a cabover model, I haven't had any experience so I'll leave it to the cabover owners to respond.

Good luck with the project and thanks for posting pictures.

Mike
 
Thanks for the gut check Mike! Based on your advice I can now say the carpet is gone, at least the exposed portions. I left the rest of the carpet behind the Perilli for insulation as shown in the attached pictures.

Tonight I replaced my back Perilli and then studied the cab over area again trying to figure out how to seal the front and front sides as shown in the attached pictures. I am thinking on the front sides I will just cut back the carpet and try to find a real thick rubber weather stripping to add to the inside front area? I am just not sure I can find that thick of weather stripping. I think I will try the same on the front.

With all the rain on this side of the mountains, I want a good seal! I know I will have to reseal this area every year or so, since it will just be stuck on with adhesives, but what else can I do?

Oz
 

Attachments

  • Carpet Before.jpg
    Carpet Before.jpg
    110.9 KB · Views: 406
  • Carpet after being cut.jpg
    Carpet after being cut.jpg
    108 KB · Views: 371
  • Final Seal.jpg
    Final Seal.jpg
    105 KB · Views: 362
  • Front.jpg
    Front.jpg
    99.7 KB · Views: 364
  • Side seal.jpg
    Side seal.jpg
    66.4 KB · Views: 367
I am just finishing up my upgrade (all new metal on the top half) and today started the new Perili. Our 94 CO has a larger angle on the front piece that locks the two sides pieces in when the are up. We have a seal on the side pieces but you cannot see it when it is up. Very water and wind proof . I will try tomorrow and take some pictures and post them so you can see how ours is made. I think it would be an easy fix.

I have been procrastinating most of the summer and now the crunch is on, we leave for Baja around the 15 of October for a couple of months. This was to be done for May so we could use it over the summer but had so much company that it just now being completed now. Thats my story anyway and I'm sticking to it.

We bought our Alaskan from the original owner. It was well used. He carried a 14' aluminum boat and two plastic kayaks on a electric boat loader on the roof. Two trips to Alaska and numerous one to Baja took its toll. The rear wall started to flex enough that I had to replace it. I was surprised at how little dry rot there was mainly around the windows(single glaze) an the corners of the back wall. It has had a hard 17 years. Sure proves to me how well the Alaskan's are built.

I will try and post pictures tomorrow.
 
Wow that carpet seal is pretty hacky, but I suppose options were more limited back in the day.

One product to check out locally to see if it might work for you is Frost king side & top garage door seal. Here's a link on amazon but local home depot should have it too: http://www.amazon.com/Frost-SG30WH-Plastic-Weather-strip-4-Inch-b-30-Foot/dp/B000B4IWN2 I was eyeing this up as a potential seal for the overlapping hardsided pop-up I'm building (similar to an Alaskan in some aspects). From memory it is 1.75" wide with a angle to it (maybe 30deg?) and maybe 3/16" thick.
 
Thanks all and yes Mike S, I would love to see pics.

I guess after some thought I could just screw in some lapping aluminum to the front sides and then rubber seal the edge of the side panels that fold up against it. I am wondering how it will fold down however? I think this is what I will try?

Lots more projects still to work on!

Also Mike D. I found out by searching the web Perilli is used as alternative for springs in chairs...huh..I never knew!
 
I am a problem reducing pictures to a reasonable size. I will e-mail them to you.

The front angle is made out of a doubled over thickness of the same aluminum as the sides so that it flexes a little. The only carpet type stuff I have is a small piece between the front and sides that is not exposed to the outside. It is the right stuff for this job. This is one of those that a picture is indeed worth a thousand words.
 
Finally got around to adding aluminum sides. It's not pretty and it still has a little bit of carpet showing, but its better than original! It will help keep out the driving rain.

Pics attached!
 

Attachments

  • 004sm.jpg
    004sm.jpg
    98.2 KB · Views: 377
  • 005sm.jpg
    005sm.jpg
    87 KB · Views: 380
  • 002sm.jpg
    002sm.jpg
    117 KB · Views: 387
  • 010sm.jpg
    010sm.jpg
    103.3 KB · Views: 357
Back
Top Bottom