Snaves
Member
My wife and I recently purchased our first FWC and couldn't be more excited. Here is a pic from our trip home from to UT from MT.

The camper came with some of the original paperwork, which I thought some might find interesting. There is a handwritten note from a former owner (not the most recent) regarding WTW - so I am wondering if you are out here in the forums? We may be able to save others some reading if I could contact you directly with some questions.")

First question - The warranty clearly states that it is a Granby model, but the schematics of the various interior layouts match the Ranger model. Ex: bed slides out to the edge of the stove unit. I have photos of these but seem to be limited by how many I can attach. Any ideas what model we are working with here? Thought it might help to know as we do research.
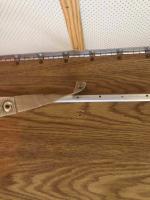
Second question - the rear pop up assembly had a blowout at some point, and now it hits the rear countertops when driving (isn't able to be held up to the roof anymore). it looks like a simple fix as there is only one hole, but my question is what hardware was here? Was it a button? There are two straps with buttons on the end, but I am unsure what they clip through. Or maybe they clip together?

3rd Question - The faucet is cracked, so when I filled the water tank last night and began hand pumping water quickly leaked onto the counter. Wish I would have noticed this when we picked it up as we were promised that everything worked. Easy fix, I am just looking for recommendations for everyone's favorite faucet.
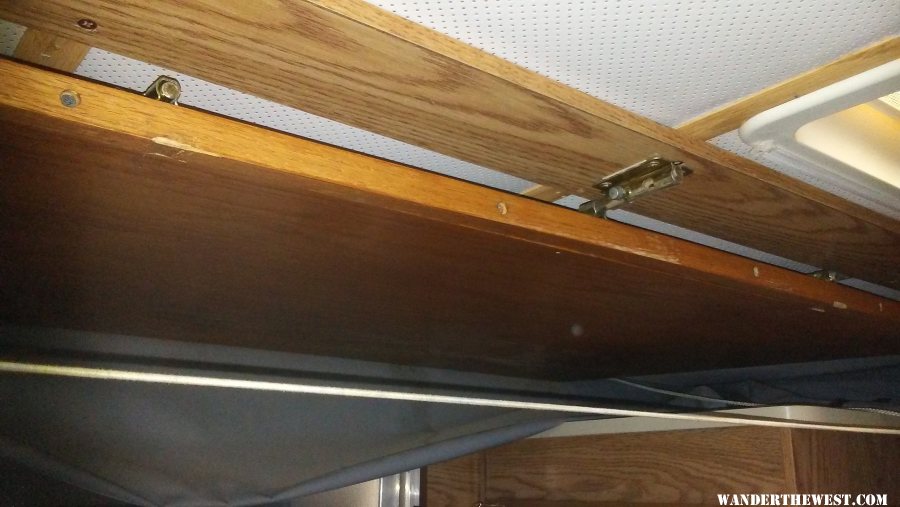
4th Question - Related to the above. Camper is wired for a water pump (I think, see photo below), but there isn't currently a pump installed. We would like to add one back in which shouldn't be too hard as the wiring is already there. What pump/s is everyone using? Looking for something dependable but doesn't need to be top of the line.

The camper has had some wiring modifications, so I may be back with more questions as I attempt to wire it to our truck (if a previous owner who did the wiring is on WTW your insight would be extremely useful!). As of now we have just ordered an AGM battery.
Thanks in advance everyone!
The camper came with some of the original paperwork, which I thought some might find interesting. There is a handwritten note from a former owner (not the most recent) regarding WTW - so I am wondering if you are out here in the forums? We may be able to save others some reading if I could contact you directly with some questions.
First question - The warranty clearly states that it is a Granby model, but the schematics of the various interior layouts match the Ranger model. Ex: bed slides out to the edge of the stove unit. I have photos of these but seem to be limited by how many I can attach. Any ideas what model we are working with here? Thought it might help to know as we do research.
Second question - the rear pop up assembly had a blowout at some point, and now it hits the rear countertops when driving (isn't able to be held up to the roof anymore). it looks like a simple fix as there is only one hole, but my question is what hardware was here? Was it a button? There are two straps with buttons on the end, but I am unsure what they clip through. Or maybe they clip together?
3rd Question - The faucet is cracked, so when I filled the water tank last night and began hand pumping water quickly leaked onto the counter. Wish I would have noticed this when we picked it up as we were promised that everything worked. Easy fix, I am just looking for recommendations for everyone's favorite faucet.
4th Question - Related to the above. Camper is wired for a water pump (I think, see photo below), but there isn't currently a pump installed. We would like to add one back in which shouldn't be too hard as the wiring is already there. What pump/s is everyone using? Looking for something dependable but doesn't need to be top of the line.
The camper has had some wiring modifications, so I may be back with more questions as I attempt to wire it to our truck (if a previous owner who did the wiring is on WTW your insight would be extremely useful!). As of now we have just ordered an AGM battery.
Thanks in advance everyone!