We've got 3 so far. Hebegebe, I'll need to know how much (feet) you need.hebegebe said:I will participate in group buy . My '04 hawk looks the same. Thanks for the effort
Sent from my iPhone using Wander The West
You are using an out of date browser. It may not display this or other websites correctly.
You should upgrade or use an alternative browser.
You should upgrade or use an alternative browser.
Rubber on door seal
- Thread starter kmcintyre
- Start date
hebegebe
Senior Member
I'm not near my door so I would trust your judgement for enough to do one door
Sent from my iPhone using Wander The West
Sent from my iPhone using Wander The West
CALIcamperdad
Senior Member
- Joined
- Sep 10, 2014
- Messages
- 237
Liquid hand soap makes sliding the rubber gasket easier during install. I did something similar on our boat. The liquid soap was a life saver.
Bill D
Senior Member
Any objection to hairspray?CALIcamperdad said:Liquid hand soap makes sliding the rubber gasket easier during install. I did something similar on our boat. The liquid soap was a life saver.
I'm going to let this go a few more days but don't say I didn't warn you.... ") . If you want in, send me a personal message.
. If you want in, send me a personal message.
I suspect that the cost will be the per foot charge, the shipping to my house divided by the number of people, plus a few dollars to ship it out to everyone.
Kevin
. If you want in, send me a personal message.I suspect that the cost will be the per foot charge, the shipping to my house divided by the number of people, plus a few dollars to ship it out to everyone.
Kevin
Lighthawk
Weekend warrior
Big thanks to Kevin and Old Crow for tracking this down.
Like Old Crow, I found my screen door slider to be stamped as Phillips on our 08 Hawk.
I'm encouraged Crow was able to install the bulb seal, since the tech drawing shows a 3mm T flange.
When I tried a sample before it didn't seem to fit, but for a few bucks I'll give it a go. Maybe I just needed dish soap.
Kevin, I need 13 feet to do the 24" x 48" FWC door. Please PM me with a price, if that's okay. Shipping will be to NorCal.
Thanks
Andy
Old Crow
Searching....
Just an FYI....
Before trying to start the seal in the channel, I used a 2" piece of the old, hardened seal to run back and forth in the channel to dislodge any accumulated dirt and then cleaned up the channel as best I could.
I didn't have any kind of significant problem getting the new seal in the slot. The new rubber is more flexible (because it hasn't been weather-hardened like the old seal). It's kind of like pushing a rope.... you have to tug a bit from the leading end and try to keep it as straight as you can where it's entering the channel.
The edges of the channel at the entry point are sharp so the new rubber tends to catch there. You will see tiny curls of rubber getting started there at the entry point when things are starting to go wrong. Just back off a bit and try again. Tugging harder just makes the sharp edge dig in deeper and stops all progress.
You might avoid or reduce this problem by dressing those edges with a small file or sandpaper before starting to put the seal in. I thought of trying a lubricant of some kind but then seemed to be doing okay without it. If I had known about the soap idea at the time, I probably would have tried it.
Also- removing the top and bottom extrusions. After removing the screws on the top one, I saw the extrusion still seemed very tightly in place and thought there might be an adhesive holding it on. I slid my thinnest putty knife under an edge near a corner and was happy to see the extrusion move a bit when I tapped the end of the handle. After that, gripping the extrusion by hand and rocking it loosened it up for removal. On the bottom one, the screws were recessed. That seemed a bit odd. I'm not sure what the screws go into so I only loosened them enough to allow that bottom extrusion to come off just enough to replace the seal.
I stated above the per foot charge (which technically it is) but it's sold by the inch. I haven't called to place the order yet but I think we have 5 people so far.kmcintyre said:I'm going to let this go a few more days but don't say I didn't warn you....
I suspect that the cost will be the per foot charge, the shipping to my house divided by the number of people, plus a few dollars to ship it out to everyone.
Kevin
Product is ordered.
If you are in the group buy, you should have a paypal request for money (or I sent you my paypal account).
The company is closed tomorrow and told me they'd ship it out next week. I'll try to get it out asap assuming your
payment is made.
Thanks,
Kevin
If you are in the group buy, you should have a paypal request for money (or I sent you my paypal account).
The company is closed tomorrow and told me they'd ship it out next week. I'll try to get it out asap assuming your
payment is made.
Thanks,
Kevin
Did everyone get their door seal? I was going to attempt to get my door off today and took some pictures. I re-read OldCrow's description and I think he came to the same conclusion I did. Remove the 6 screws that hold the door onto the hinges. Then work on it.
It does look to be the same rubber and many, many thanks for finding this!
It does look to be the same rubber and many, many thanks for finding this!
hebegebe
Senior Member
I received mine in today's mail, thank you! Raining here now so I will attempt the install when it dries up
Sent from my iPhone using Wander The West
Sent from my iPhone using Wander The West
wuck
Senior Member
Package received!
Many kudos to OldCrow for finding the correct seal, and especially Kevin for organizing,purchasing and shipping
Many kudos to OldCrow for finding the correct seal, and especially Kevin for organizing,purchasing and shipping
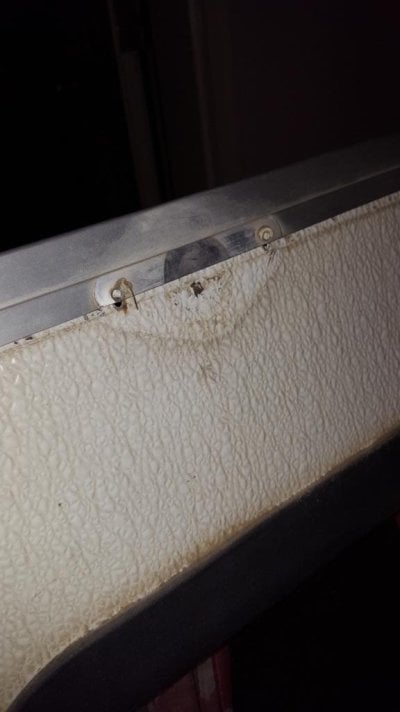
I thought I'd try and document the process of the door rubber/seal on my 2002 Eagle.
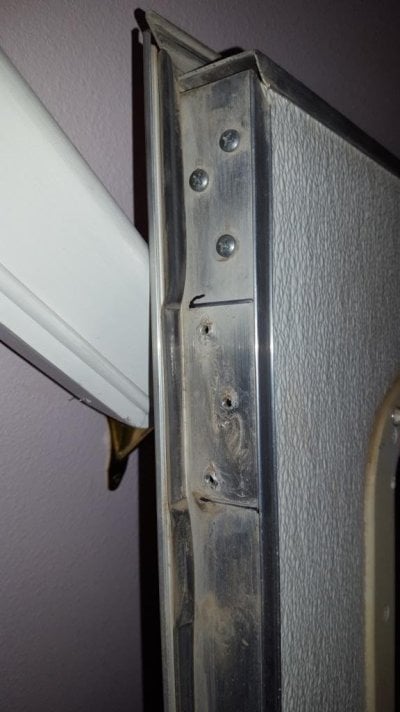
1) Marked where the hinges go on the door frame ; ease of aligning it back when I reinstall
2) Take of top rim of the door frame; remove rubber door stop. I removed all the screws on the top and on the rubber door stop. The top slides (maybe not slide; see all the dirt/dust on my door) or pulls up. It's an alum. frame around the door core. Doesn't appear to hold anything else on.
3) Removed top and side rubber. I'm using a dental pick to clear out the guides for the new rubber seal.
That's as far as I got. I'm going to do the same to the bottom part of the door frame. I don't really want to remove the sides (more things to worry about and there's no need if you get the top and bottom off). I'll then "wash" the frame, etc. next. and ????
See pictures (if they help).
Picture #1: Rubber door stop I removed
#2 : Markings on door frame hinges
#3: Screws on top of door that I removed to pull up the alum. frame and get to the rubber seal
Attachments
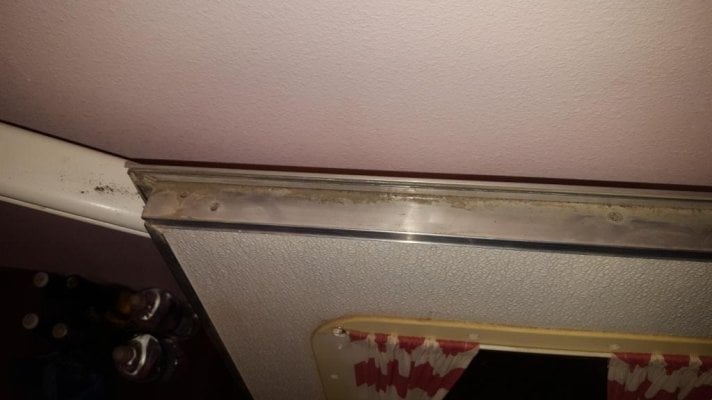
Ok as step #4: the outer alum. of the door is just a frame. I lifted off the top today and it's screwed into the alum. of the door. You can take it completely off (I've only taken off the top so far) and get it all nice and shiny. Can work on this in the house and not in the cold garage. Rubber came out pretty easily but putting the alum in the sink will make getting new rubber in super easy (I hope).
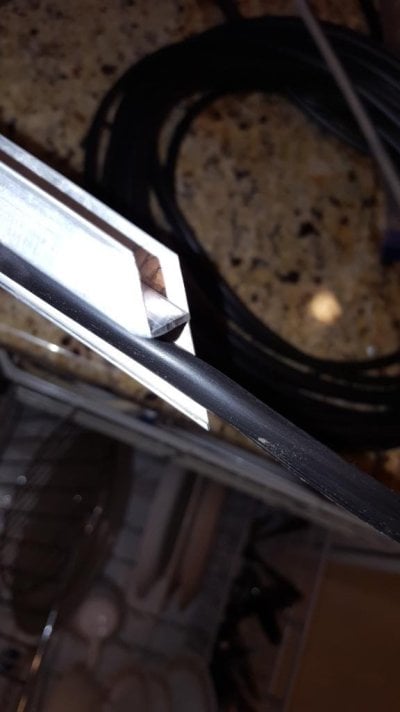
Ok... just take off the pieces (not sure about the piece where the deadbolt, etc. is) as it takes about 15 seconds to feed the rubber seal back on and to get the perfect angle cuts on the ends; they match the angle on the alum. I did the top and one side in about a minute.
Picture #1 shows the door with the alum. frame taken off.
#2 is feeding the rubber seal back into the frame and how the cuts work
Picture #1 shows the door with the alum. frame taken off.
#2 is feeding the rubber seal back into the frame and how the cuts work
Attachments

wuck
Senior Member
Haven't done mine yet, but I was thinking it would be better to cut to length before installing. If the seal is stretched at all on install, it may "shrink" back to original size leaving a gap (My original seals have a 1-2" gap on at least a couple of sides). Or, if the seal is pushed into place as opposed to pulling it in, there should be no stretch.
When I installed the rubber, I pulled it through and didn't notice any stretching. Cut it off about 1" long on each side to allow for fine trimming.wuck said:Haven't done mine yet, but I was thinking it would be better to cut to length before installing. If the seal is stretched at all on install, it may "shrink" back to original size leaving a gap (My original seals have a 1-2" gap on at least a couple of sides). Or, if the seal is pushed into place as opposed to pulling it in, there should be no stretch.
It's really pretty easy to thread it in once you get the old stuff out, etc. I washed my pieces in the sink except for the side where the lock is and that was easy to feed the seal in there too.
Similar threads - WTW
- Glenn
- Trucks, Truck Accessories & Mods
- Replies: 2
- Views: 271
- BlueSky
- All Terrain Camper Discussions
- Replies: 1
- Views: 250
- Tom n N
- Trucks, Truck Accessories & Mods
- Replies: 2
- Views: 473