1988 Four Wheel Camper Grandby renovation and Tundra Fit

longhorn1 said:
Nice job. I like the attachment idea. Looking forward to watching the build. jd
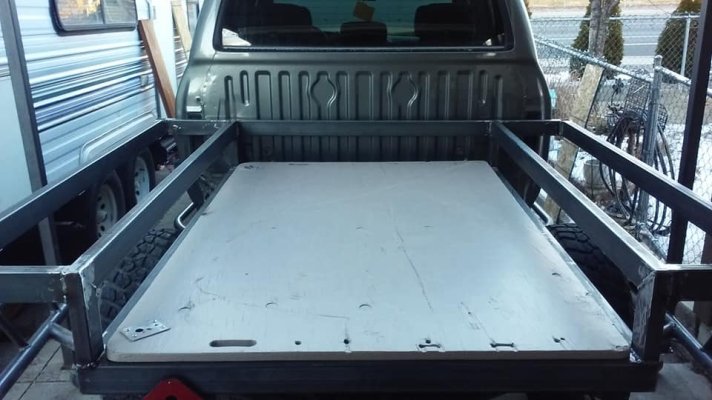
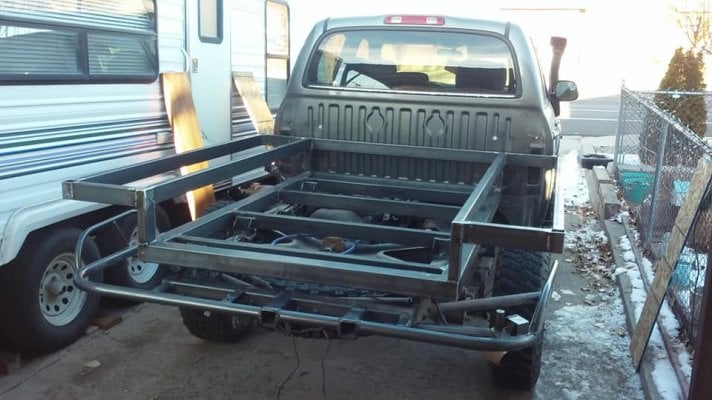
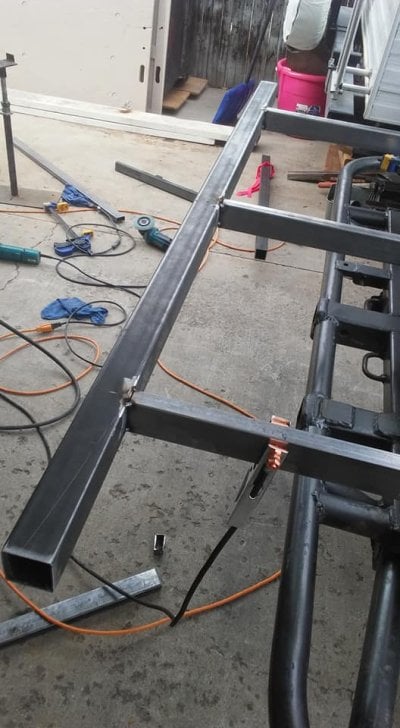
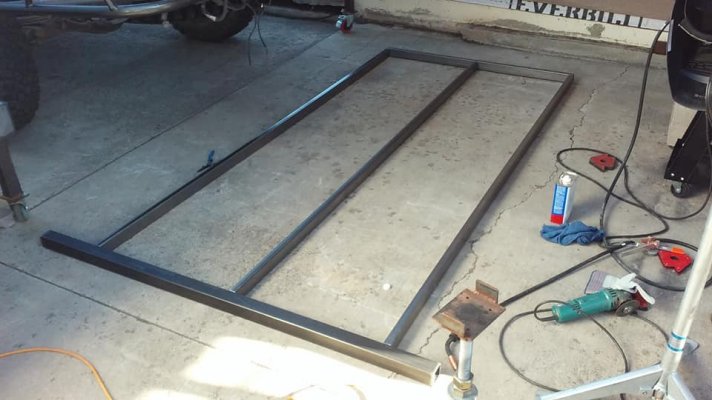
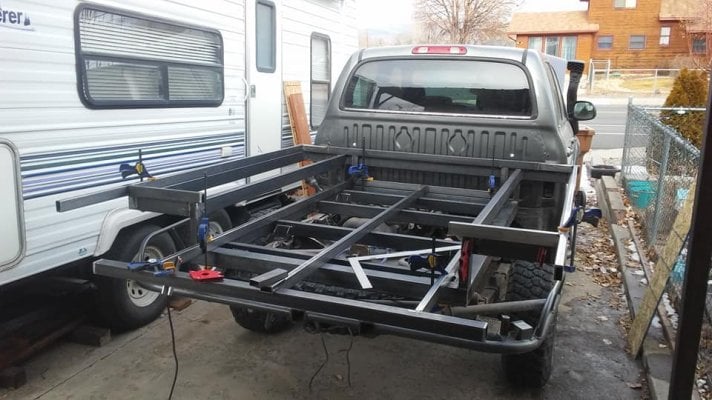
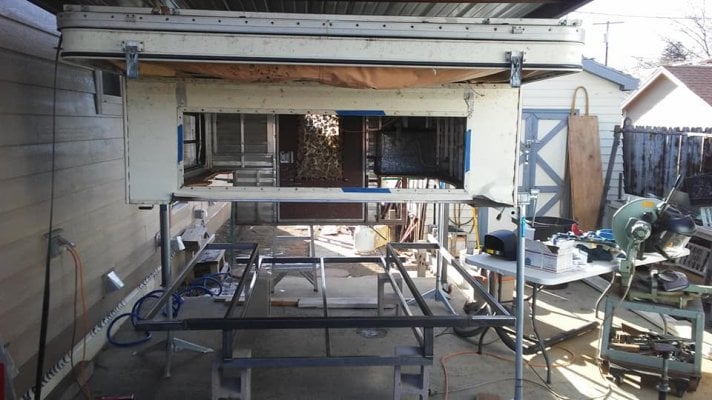
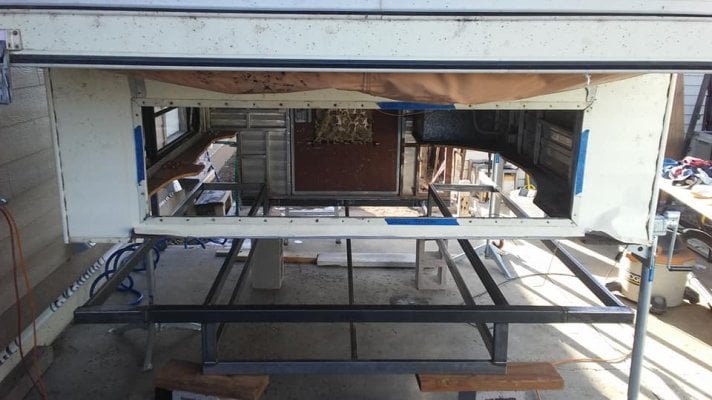
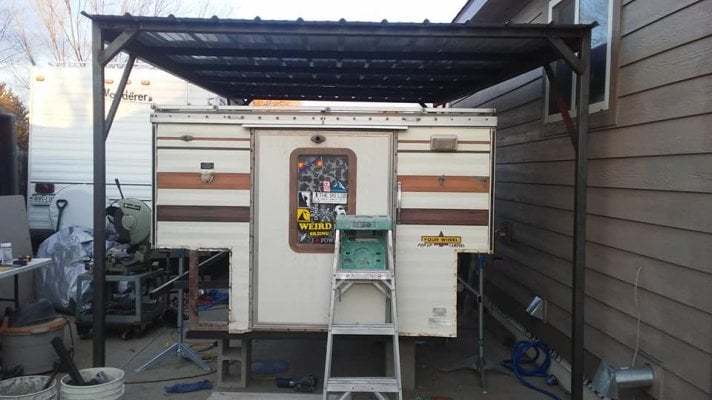
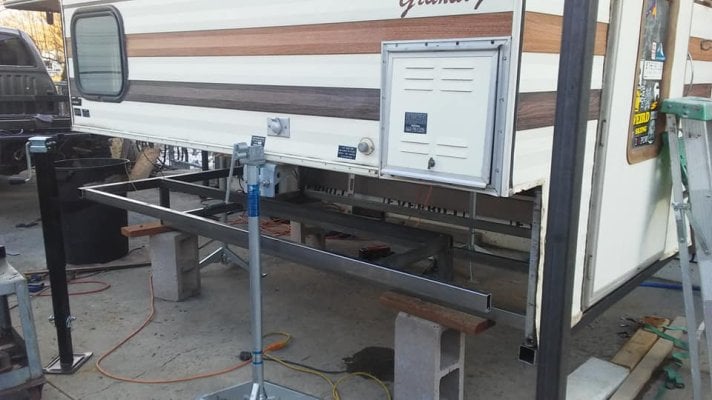
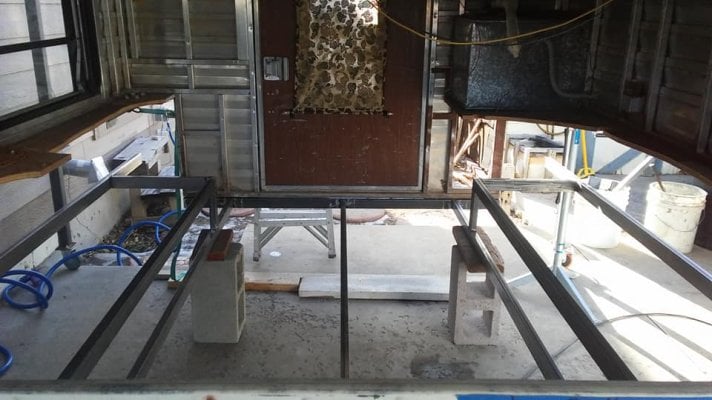
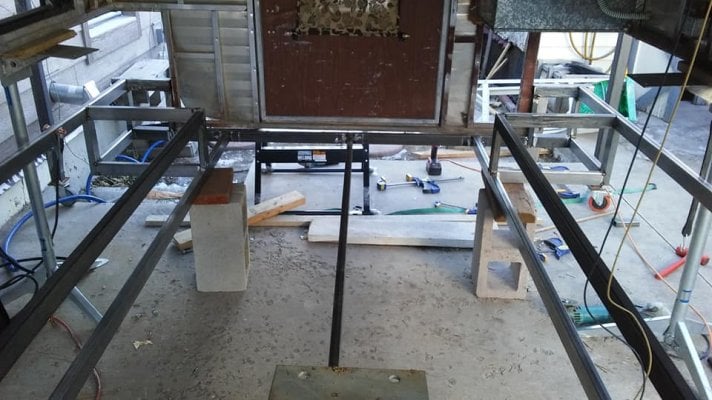
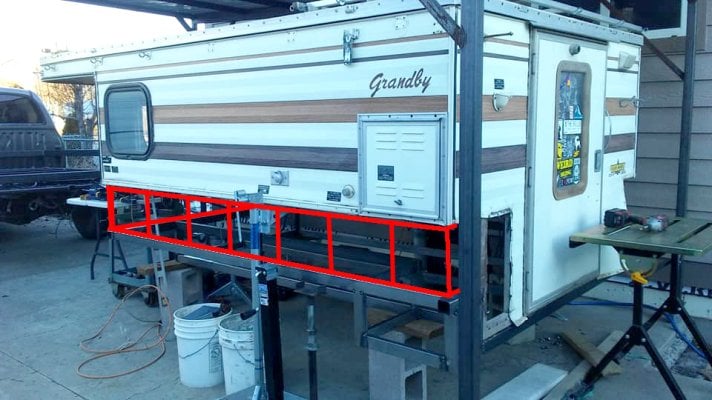
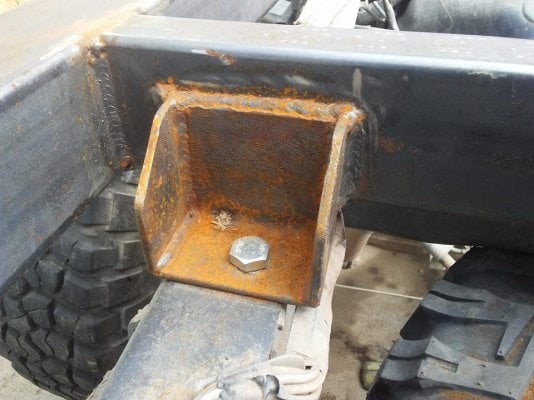
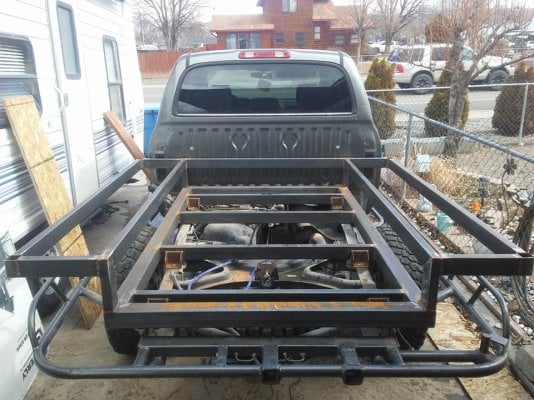
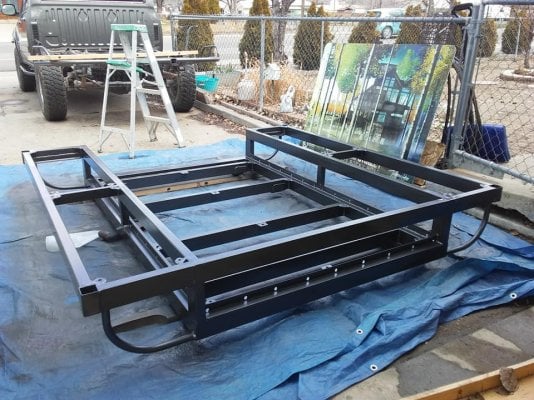
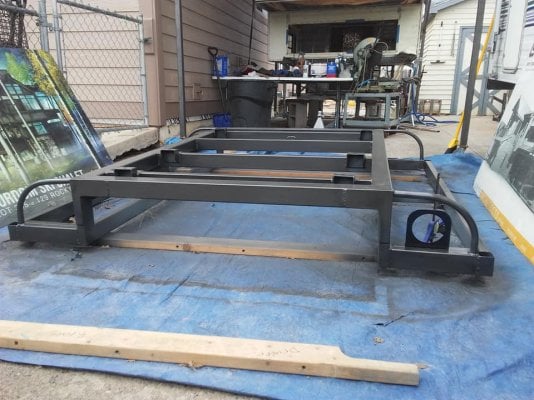
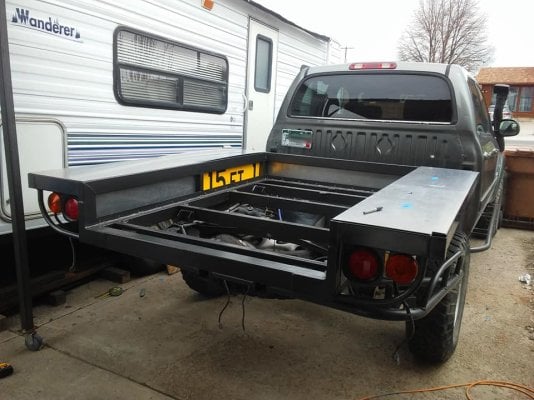
+1 Are the tubes attached to the camper going to be bolted to the jack supports? I'd want those corners in the camper beefed up lots. The jacks do a fine job of holding the camper up, but as those who have hit something (or been hit) with/on the jack while driving can attest, they don't handle being torqued in any other direction. Frame manglement and carnage results.

Unless they are "guides" only and there is another secure mounting method in your plans?
 
Basic bed frame is mostly there. What a job.
Now I need to decide on a final deck material and I can start laying out the new camper base. Aluminum diamond plate would be ideal, but $$$$$$, so searching for some used alum.
Time to design new bumpers as well.
 

Attachments

  • 48088563_10205772854957490_1508352983476207616_n.jpg
    48088563_10205772854957490_1508352983476207616_n.jpg
    57.4 KB · Views: 166
  • 48381394_10205772855957515_6155470553655279616_n.jpg
    48381394_10205772855957515_6155470553655279616_n.jpg
    68.2 KB · Views: 158
Is a deck surface actually needed? There was one fellow on here with a Mexican diesel powered Ford Ranger that had ATC build a straight bolt-onto-the-frame version of a camper for him. No framing like you did, no decking. Maybe a 1/4" sheet of marine plywood to act as a sacrificial layer/buffer between the dirt/water kicked up underneath and the camper itself is all you need?
 
Vic Harder said:
Is a deck surface actually needed? There was one fellow on here with a Mexican diesel powered Ford Ranger that had ATC build a straight bolt-onto-the-frame version of a camper for him. No framing like you did, no decking. Maybe a 1/4" sheet of marine plywood to act as a sacrificial layer/buffer between the dirt/water kicked up underneath and the camper itself is all you need?
Hey Vic, yes that is a simple option, but I am planning to have a working truck bed since the camper will only get mounted for trips. Plywood has crossed my mind, but with the extreme weather here, no matter how it is prepped, it will not last. Pondering other plastics options, but nothing yet. thanks for thoughts
 
Ok, I would be lying if I did not say it is a slow grind, and taking all I have mentally to keep my head in it. Uncharted territory, so I am making a lot of time consuming mistakes. Constantly cutting completed work off and doing it twice. Dont they say "measure 4 times, cut 2 times"? Quite a complicated puzzle, and using light tubing makes it very difficult to keep things straight.
So, when I figure and complete the box transition for the rear section, I can pull it off and slide it under the camper to figure how to bring the 2 together. There will still be a foot or 2 of walls to build to bring it up the the remaining aluminum structure.
 

Attachments

  • 48380413_10205786994830978_7006292734495424512_n.jpg
    48380413_10205786994830978_7006292734495424512_n.jpg
    63.3 KB · Views: 80
  • 48420230_10205783903513697_6313466616470306816_n.jpg
    48420230_10205783903513697_6313466616470306816_n.jpg
    52.1 KB · Views: 86
  • 48384072_10205783902913682_4619967492763156480_n.jpg
    48384072_10205783902913682_4619967492763156480_n.jpg
    65.8 KB · Views: 100
  • 48389854_10205786992830928_8257781359133589504_n.jpg
    48389854_10205786992830928_8257781359133589504_n.jpg
    74 KB · Views: 98
Picked up a couple of aluminum signs from the recycler, we may have a bed deck with character!
 

Attachments

  • signs.jpg
    signs.jpg
    98.4 KB · Views: 127
Ourayphotography said:
Ok, I would be lying if I did not say it is a slow grind, and taking all I have mentally to keep my head in it. Uncharted territory, so I am making a lot of time consuming mistakes. Constantly cutting completed work off and doing it twice. Dont they say "measure 4 times, cut 2 times"? Quite a complicated puzzle, and using light tubing makes it very difficult to keep things straight.
So, when I figure and complete the box transition for the rear section, I can pull it off and slide it under the camper to figure how to bring the 2 together. There will still be a foot or 2 of walls to build to bring it up the the remaining aluminum structure.
Kinda how my build went. Have a plan and execute it. Once done, you get to looking at it and realize that won't work! Back to the drawing board! I bet as many hours sitting in my build figuring how I wanted to to do things, as I did building. The good news is when you are done, it's what YOU want, not the manufacturer.
 
Hey you guys, I appreciate all the positive comments. Most people look at this mess and cant see any logic.
Well,tacked up the basic tub, pulled it, and got it under the camper. Tore out the last of the plywood scraps, unbolted the jacks,and looking good. I ran out of steel to finish the walls so debating to drive 1.5 hours to get 16ga as opposed to 14ga local. Every ounce counts, but at what cost. aha
The remaining shell of the FWC only feels like 4-500 lbs, I can lift one side alone. Cool.
Next,fab the final walls and see how to bolt everything together.
 

Attachments

  • 48909503_10205791076533018_3797616134732120064_n.jpg
    48909503_10205791076533018_3797616134732120064_n.jpg
    71.8 KB · Views: 184
  • 48976762_10205791074772974_4381714584428347392_n.jpg
    48976762_10205791074772974_4381714584428347392_n.jpg
    60.7 KB · Views: 196
  • 49065985_10205791071812900_3017443593225764864_n.jpg
    49065985_10205791071812900_3017443593225764864_n.jpg
    57.4 KB · Views: 198
  • 48374699_10205791073852951_7809249368837455872_n.jpg
    48374699_10205791073852951_7809249368837455872_n.jpg
    58 KB · Views: 200
  • 48383021_10205791075532993_7291503460875239424_n.jpg
    48383021_10205791075532993_7291503460875239424_n.jpg
    62.3 KB · Views: 184
Moving along. Fabbed and tacked up the rear lower box sections. This should be a nice spot for storage and/or a portable toilet. Not too sure how square the camper will be compared to the new base, so pretty soon bringing them together should get interesting.
 

Attachments

  • 48407167_10205798191190880_2898515815655538688_n.jpg
    48407167_10205798191190880_2898515815655538688_n.jpg
    65.4 KB · Views: 149
  • 48417333_10205798191950899_884610808816861184_n.jpg
    48417333_10205798191950899_884610808816861184_n.jpg
    71.3 KB · Views: 168
  • 48411812_10205798192990925_7027296494667431936_n.jpg
    48411812_10205798192990925_7027296494667431936_n.jpg
    65.1 KB · Views: 137
Also watching from the shadows with interest... :ninja:

Not showing the wife tho, that would blow up my, "love to but can't with out a garage" excuse.

... more props to you, brother !
 
klahanie said:
Also watching from the shadows with interest... :ninja:

Not showing the wife tho, that would blow up my, "love to but can't with out a garage" excuse.

... more props to you, brother !
Classic man!! DO anything possible to get a garage. I tried to swing building a small one this year, but the snow flew too soon. Wife was behind it, because she wants my rolling carport to cover her car, not the camper
 
Well, this is the final section to be done before marriage. About 11.5" wall. General consensus from various fabrication pages is to continue with the light steel. My local steel supply does not have the lighter wall, so I am on hold.
A few suggested putting a couple of doors on this section for access, a good idea.
 

Attachments

  • center.jpg
    center.jpg
    257.6 KB · Views: 163
Well, finally coming out of Hibernation. Went overseas and came home to some rust. Yanked the bed again and adding a few tubes and supports. The truck is unusable at this point, so plan to do a few small welding add's and try to at least get some paint on the bed and make the truck to be able to drive/tow. Tail lights next.
Hate to have to fab a whole new swing out bumper and tire carrier, so I am tryin to come up with a plan to blend the new bed and old bumper.
Still have a good amount of design block, so hopefully when the bare bed is on and usable, some ideas will come.
 

Attachments

  • 53788257_10206081462272480_3411968959639977984_n.jpg
    53788257_10206081462272480_3411968959639977984_n.jpg
    113.2 KB · Views: 122
  • rust.jpg
    rust.jpg
    115.7 KB · Views: 158
  • rust 2.jpg
    rust 2.jpg
    103.5 KB · Views: 136
  • 49853240_10205843965175201_4696850151845658624_n.jpg
    49853240_10205843965175201_4696850151845658624_n.jpg
    51.4 KB · Views: 143
Progress on the flatbed.
Basic bed is done and paint today. I can start figuring how the camper will fit once we are mounted. At about 175 lbs. at this pounds, so well below stock bed weight.
 

Attachments

  • 54519907_10206122048167102_6933908899036659712_n.jpg
    54519907_10206122048167102_6933908899036659712_n.jpg
    112.4 KB · Views: 87
  • 54518331_10206115169435138_795054766395752448_n.jpg
    54518331_10206115169435138_795054766395752448_n.jpg
    89.9 KB · Views: 92
  • 55514087_10206122047847094_5097980447816679424_n.jpg
    55514087_10206122047847094_5097980447816679424_n.jpg
    99.9 KB · Views: 76
Welp, we finally have a bed mounted and lights.
Been doing quite a bit of pondering how to marry the old camper structure, to the new steel base, and might have a decent solution. We shall see. I will need to have special steel formed to size here soon and do some test fit.
 

Attachments

  • 56661872_10206162253212203_6009148413814243328_n.jpg
    56661872_10206162253212203_6009148413814243328_n.jpg
    86 KB · Views: 104
Looking good there. Looking forward to seeing the camper mounted.
Keep up with the good work. Weather in your favor now.

Russ
 
Getting the skin mounted up and bed bolted back down. Need to install the top deck nutsets and we are down to the main deck. Might just run with plywood until the camper moves further along.
And yes, all the alum is sheared and re-purposed street signs from the local recycler. Couldn't help myself leaving one as-is for character!!
 

Attachments

  • 56832535_10206193406151007_889793657522094080_n.jpg
    56832535_10206193406151007_889793657522094080_n.jpg
    85.4 KB · Views: 76
  • 57216650_10206193405470990_1393342976289144832_n.jpg
    57216650_10206193405470990_1393342976289144832_n.jpg
    86.9 KB · Views: 90
  • 56927146_10206196043256933_5372151244229967872_n.jpg
    56927146_10206196043256933_5372151244229967872_n.jpg
    230 KB · Views: 83
Back
Top Bottom