'77 roof re-skin

64highboy

Advanced Member
Joined
Feb 4, 2015
Messages
38
Location
Vancouver island
Got my new aluminum for the roof today and all the trim pieces. Any advice on installing is welcome, now that I've got the pieces this seems like its gunna be a big job. The curved pieces that go on the sides of the cab over dont seem to be curved enough, has anyone else encountered this? Also is the skin on the new campers payed out different then the old models because looking at the pieces I have and comparing to pictures of other old campers and newer ones it seems like the end of the roof seem where it meets the back wall has been changed up over the years.
 

Attachments

  • image.jpg
    image.jpg
    133.8 KB · Views: 378
  • image.jpg
    image.jpg
    115.4 KB · Views: 431
  • image.jpg
    image.jpg
    92.9 KB · Views: 563
  • image.jpg
    image.jpg
    91.9 KB · Views: 490
Can I ask where and how much $ the parts were for this part of your rebuild? I have about 8-too many holes in my skin and would like to do the same. Can't wait to see it done, Will look great. Never seen a brand new lookin' 77'. Definetly a project to measure 5x/cut once :D
 
Did my 94 a couple of years ago it was fun!

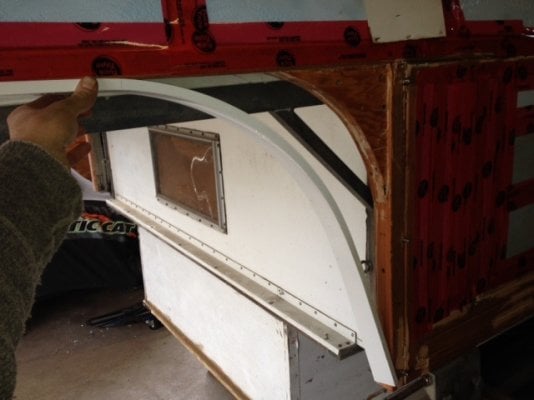
The J Chanel will go with the help of a rubber hammer,

I used a router with a carbide straight bit to finish sizing everything wd40/moveit kept the bit lubricated..go slow or it will fill the bit with aluminum.

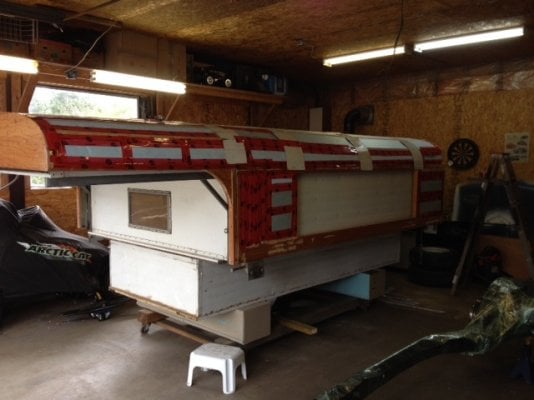
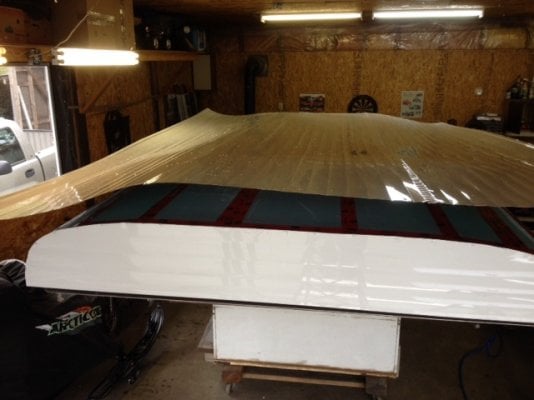
The large panel on the top I held in place with 2" load type tye downs the ratchet type. I used 2, one on the front one on the back. it would have been easier with 3 the 3 in the middle. mine buckled a little the 3 one would have stopped this. Find the centre first on both parts, nail it down front and back then strapped it down tight and stapled it from there.

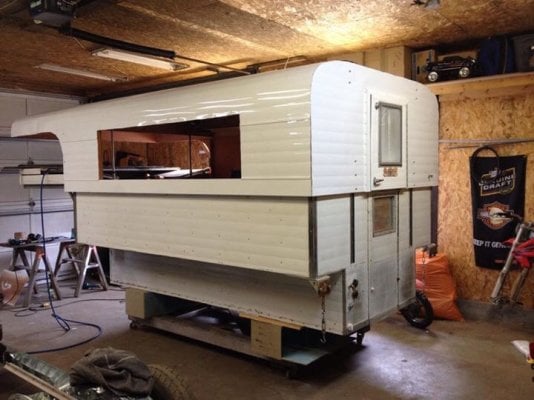
The side panel that fits the bottom has to go on first then the top one, then fit the 3rd one in the middle by trimming the flat side until it just fits. this is the one that adjusts in case you are off square a little. Not to tight thou because it moves quite a bit in the direct sun and will pull the staples if its to tight. Of course if not tight enough it will leak.

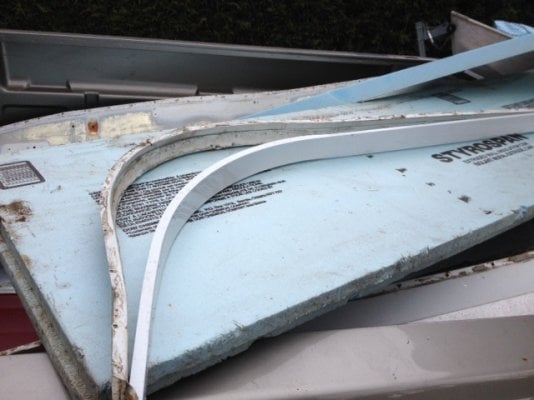
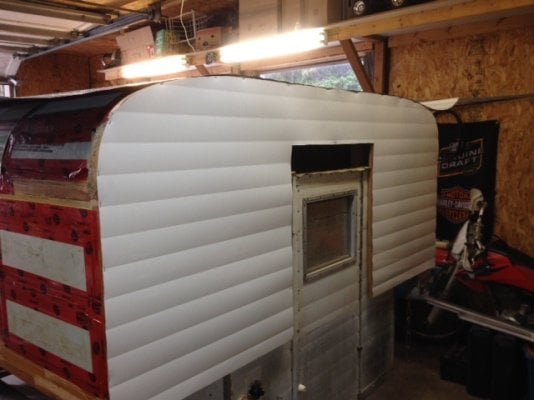
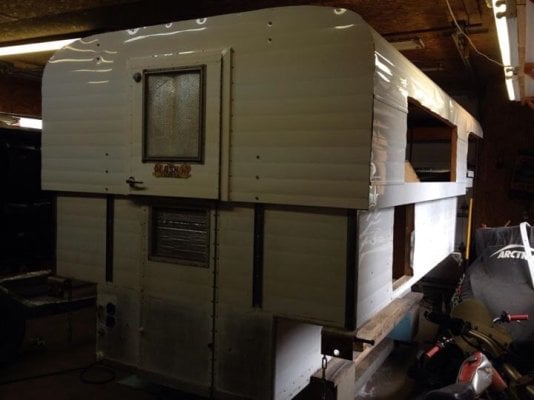
Generous use of good quality seam tape will insure that it never leaks again. The red tape is a good idea I used blue skin on almost everything..no leaks I have removed a side panel to check.

Pm me your phone # if you have a problem don;t know what I can do but i am willing to try,

Have fun!!
 
verynice the cost for the parts was 950usd don't have a break down of the parts prices but you can call alaskan campers in chehalis, Bryan is very helpful.
 
Looking good! You wont regret all the work and money. Mine still look like it just came out of the show room.
 
Looks good, I'm in about the same spot with my build, lost a lot of time because I scratch built a new lower section and extended the roof 2'. Your roof looks longer than mine was. My cabover is now 6'.
 
Verynice- I ordered all new sheet metal for my camper from Hemet Valley RV in CA. I'm in CT, so it was real expensive to ship, but you could maybe pick it up. I think the sheet metal(14' roof and all the lower section) was 1200$
 
Looking good, When I got to this stage I started to slow down, took me almost as long to finish as it did to get to this point, I just didn't it as work on as much. Not a clue why.
 
Looks great!
I'm in the same boat as Mike S. Progress has come to an all stop. I took the last two weekends off, don't lose momentum, you are almost done. Are you reusing the windows? I ordered new from Motion Rv, but I have not got them yet, they have a 8 week lead time
 
Yes I have a tip. If you are re framing the top potion make sure it is straight front to back and there is no bow to it. I got this camper for free and the previous owner who had lost interest re framed the upper half. the centre was slightly higher than the ends so when I stapled the front down the sides of the aluminum buckled really bad. I firred the front up 3/8 of and inch to take some stress off the sides and tucked some more blue foam under a couple buckles to keep them out. I had already put the front piece on so now there is a good 3/8 gap between the front piece and the roof. The only way I could figure to hide this big gap was to run a piece of blue skin along the top and bring it down the front about an inch. So yes there is a blue strip along the front now...which sucks.
 
Yup sucks for sure and I don't know if the blue skin is UV safe. I kind of screwed up on the rear panel but an extra piece of aluninum molding covered it up. Might work for you. Everybody makes mistakes It how you cover them that makes you a craftsman.
 
I wish this had been posted a few months ago. I extended my roof a couple feet and ended up with a slight taper. I ended up having to cut 4' long slits,so I could overlap about 1/2", which I riveted strips over. I then covered the strip with Eternalbond. It came out pretty well, and should last a long time, but took a long time.
 

New posts - WTW

Back
Top Bottom