klahanie said:
Great stuff HughDog

this all makes me feel lazy but I still want to thank you for sharing !
Thanks Klahanie -

Think I'm allowed to repeat that my wife at some point said - "I should have just let you buy a new camper,"
In all honesty - Totally worth the effort!

Oh - Light bulb moment occurring as I type... May have just clicked why she said that.... I got this oldie secured on mother's day with pretty much the entire neighborhood helping it off the garage floor! May be a correlation there!?

Kidding aside, still have a ton of trim work and customizing to get done. I'm taking this old FWC and family to the Flagstaff Expo this weekend to get some more ideas and to have some fun in Sedona-
 

Attachments

  • fwc 11.jpg
    fwc 11.jpg
    140.7 KB · Views: 314
  • fwc 12.jpg
    fwc 12.jpg
    106.1 KB · Views: 282
The Dodge Mega-Cab mated w/the snub nose FWC Fleet leaves some options for truck rooftop, I suppose. Down the road = some type of solar map to the yakima tracks on the camper which are now current place holders.

Had I a little more skill and time, might have pulled that snub nose out over the truck cab vs. having my bunk bed pull inward to the camper. Next one maybe -
 

Attachments

  • fwc 13.jpg
    fwc 13.jpg
    130 KB · Views: 221
  • fwc 15.jpg
    fwc 15.jpg
    93.8 KB · Views: 253
HughDog said:
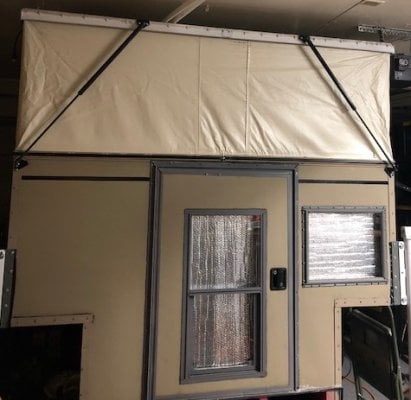
Hey BBZ – I did install the canvas. BTW - Pretty awesome of the wife to sew that bad boy together for ya. Love the teamwork.. Just don’t mess her work up! Haha.

Tips to make life easier… Sailrite has a great window demo if that part is not done. Additionally, “Living the Dream” on the first page has a great youtube on both sewing and overall install techniques… I followed many of those…

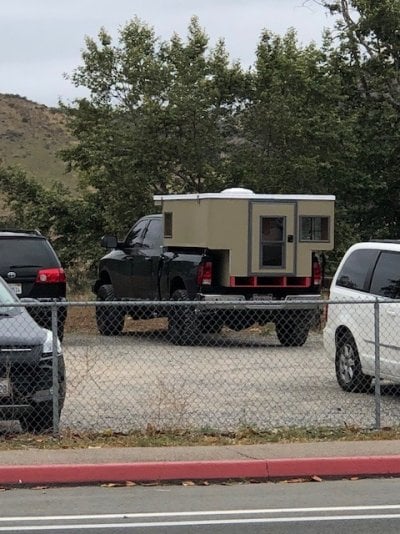
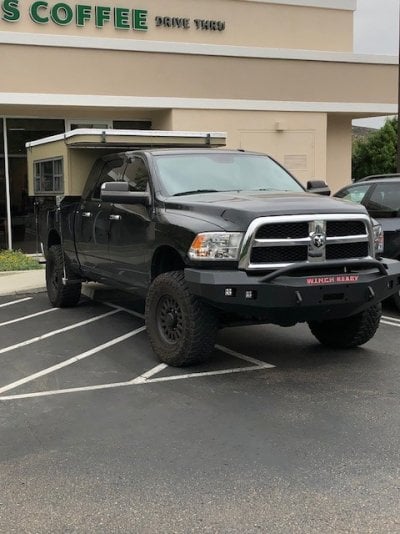
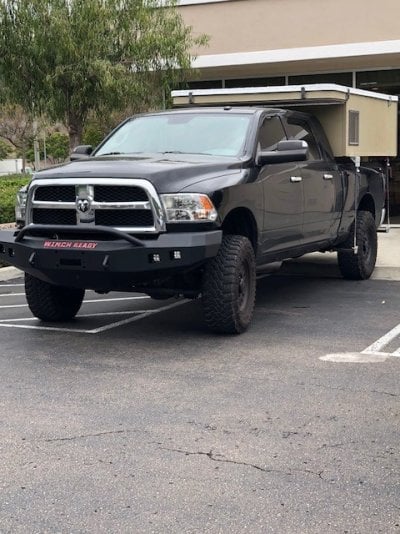
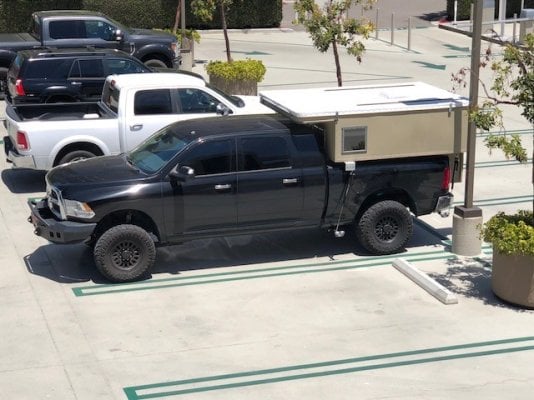
Regarding my advice, I did a some things that I haven’t seen before. But it’s all I could think of at the time and had already redesigned the roof with EPDM….
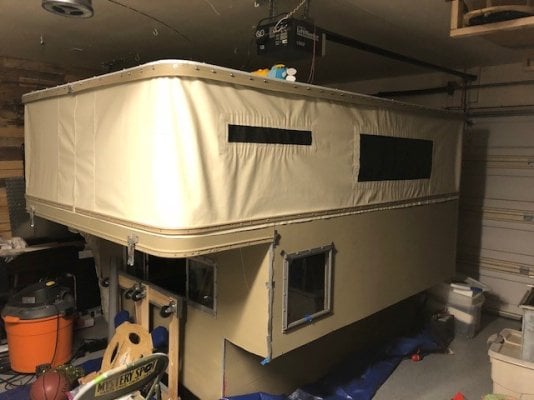
  1. I tucked EPDM roofing membrane to my trim crown line which pushed a little more bulk into the trim’s perimeter... This took me out of the park of using original frame holes for trim (I usually plan and avoid hitting existing frame holes unless they are super easy bullseyes or working w/ limited landscape). Problem is – if you re-use trim and don’t reuse those holes, you got some prettying up to do after. This is where prep, prime, and pre-paint really comes in handy. Beyond thermal reflectivity, this is where white roofing helps mask any ugliness.

  1. On the vinyl, I cut the windows all the way out and made a full rectangle of permanent screen/ removable isinglass / and removable flap….. If you go that way, here’s the deal… You will not enjoy the wet snow or rain, unless you make exterior flaps that can be fixed (velcrow) under the exterior top trim. Truth be told, I like the way it ended up, but got way ahead of myself and cut the whole damn window out! :)
Tools and Basic steps for install:

Extra Hands and Tolerance: Ain’t that complicated, but things are so much easier with two brains and extra hands!

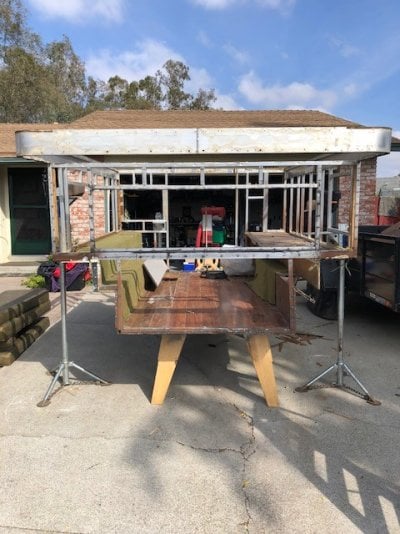
Ladder or Roof hoist: Raising the roof and securing it… My roof need some moral support to stay up w/out the canvas. Figured that one out on the last cut of removing the old canvas. Make sure it's up flat or flat enough and without any forced flexing.

Duct tape: I taped any exterior sharp pokies that the vinyl might come in contact w/ during the install (i.e. window frames, exterior edges, clamps, etc). Then basically allowed the vinyl to move around the base at fitting time(s). I also taped top / bottom contact frame areas that I thought might agitate the vinyl.

Rivets & R-Gun: After a few dry fits and placement, I shot a few rivets in to keep my vinyl in place. I used the moonglow stuff from Sailrite which could perform under the pressure.
However it’s done - Walk the perimeter during your trim install and constantly check the fit before you go around the bend, this way you don’t end up w/unexpected tightness or loose fits down the line.

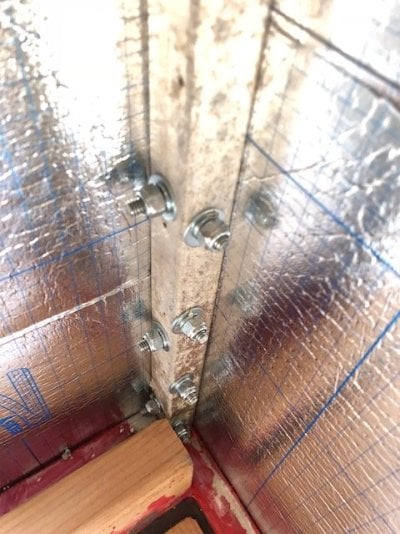
Self-tap Sheet Metal Screws: Start w/ small hex #8, if not attempting to hit the same holes. I’d personally go w/hex #10 if attempting same hole entry – but already mentioned things go wrong quick when trying to hit same frame holes. (I painted screws w/aluminum primer and paint to match new white trim color. Stuck’m in styrofoam and let it rip - doesn’t take much time and blends in screw heads that fall don’t follow your linear pattern).

When installing the top trim, have your extra set of eyes ensure that you are seated properly from an inside camper perspective as well. Seems obvious, but any bulk in the new material will try to force trim off its lines here and there. Repeat this for the bottom trim as well.

Note: I also used roofing washers w/the rubber seating on the top trim for giggles and because they were not going through any butyl putty. Painted those too-

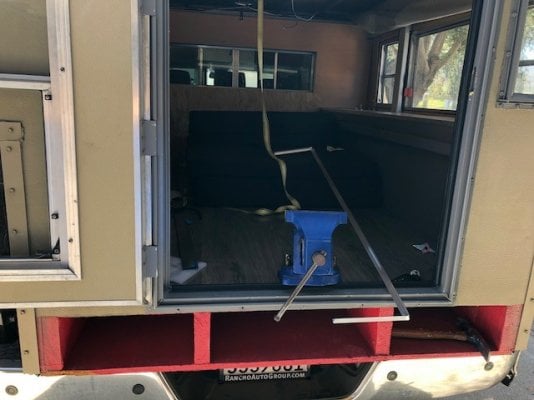
Lower Trim Insert: Mine was beat and needed to be replaced. I did not use rivets at the ends. Instead, just used a nice painted sheet metal screw with a washer for any quick repairs down the road.

Butyl Tape: Need Butyl tape for the lower trim. I did not use any with the top trim, mainly due to my install method of w/ EPDM (required Dicor lap sealant anyway).

Note – Probably obvious, but you should put screws rich in the middle of the lower trim… If you go too low or high, your vinyl insert won’t seat well.

Hole Punch: Should anything puncture or tear that was unintentional and now your wife is super pissed! - You want to use the hole punch at the end of the tear line to avoid a run-away tear (Honest moment here – I poked a hole near the bottom of the vinyl, very late and on one of the last freakin screws! Only reason I didn’t go ape was due to I.) Probably won’t be the last hole. II.) Perfect placement for a tasteful patriotic or pirate patch. III) I was the one who did it!). Still sucked though-

Needle nose pliers: You will pull vinyl under the lower trim for snug fitting and adjustment after that top trim is in. Notably, my vinyl is thick, so I didn’t have problems with that method… besides, anything left below the lower trim is getting cut off.

Non-sag and self-leveling Dicor Lap sealant: If you go butyl tape and are only re-tucking the new canvass w/no other added material, you probably won’t need lap sealant (because my trim is white, and tucked EPDM under it, I created pockets in the trim that needed to be sealed up with Dicor).

Note -Caulking is no fun and I can rarely make it pretty anyway. The only reason I got away with a Dicor caulking job around the crown trim is because I color matched it to the painted trim (white). My opinion is that looks bad at eye level, but once on the truck bed, it looks really good and can’t tell that I’m the worst caulker ever - unless you read this.

Flat Razor and Needle nose pliers – After the install and below the lower trim, I just pushed a flat razor over the extra canvas and firm to the sheet metal. then pulled the extra canvas towards me. Felt like scissors wouldn’t get in close enough, and didn’t want to run a blade… So, I just pushed and pulled till I was all the way around.

Torch and Foil – Step above left me w/a few small stringy danglers under the bottom trim. I went at then with nanosecond torch blasts. If you do this, test it on your scratch material first and gain a firm understanding of reactions and all the bad scenarios that can happen. Keep in mind that even the quickest burst, you can make a mark on your paint too. Definitely create a shield firmly under your trim, but exposing the danglers. Mainly, just make sure you block any heat headed towards your canvass – Even though the flame doesn’t hit anything above the lowest part of the lower trim, the heat will do damage.

Could also use some type of snips I suppose, but the torch allows simultaneous spider kills and creates excitement for everyone waiting for you to be done.

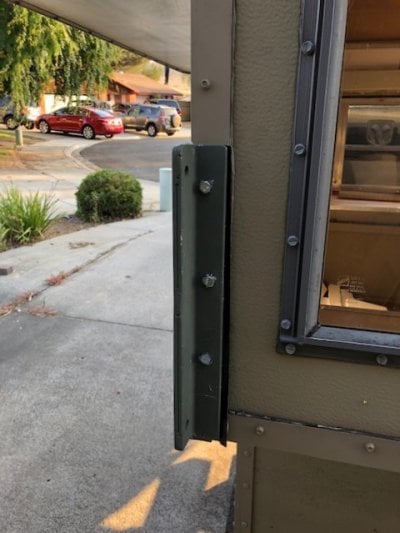
Trim Gaps: I had them where each piece of trim met, because of the extra bulk. Ended up fabricating some sheet metal pieces to bridge the gap.

If you end up with Gaps, its no big deal - There are lot's of ways to tastefully seal and make those ends meet. BUT - If you do end up with a gap, file down the sharp exposed corners of the top trim - I also slipped an extra piece of canvas under the bottom trim corners so they do not rub through.

Think that’s all I got, hit me up if you need any specific detail or photos-
Thanks for all this, great info and much appreciated! Will let you know how it goes...
 
BBZ said:
Thanks for all this, great info and much appreciated! Will let you know how it goes...
You bet- good luck with it... definitely post those money shots! I’ll add a few soon myself.
 
Collected some shots of the canvas. Pretty happy with the material and color that showed up from Sailright.
 

Attachments

  • fwc19.jpg
    fwc19.jpg
    70 KB · Views: 239
  • fwc15.jpg
    fwc15.jpg
    99.5 KB · Views: 268
  • fwc 16.jpg
    fwc 16.jpg
    120.4 KB · Views: 236
Ski Basement -

Needed to elevate the camper to get it on my Dodge because the cabover part wouldn't clear the cab.

Decided early on to just go ahead and make a spacious basement.

Widened out the floor plan of the Fleet about 7 inches or so as well. Not sure how many trucks have 48" clearance between the wells these days, and probably limited my resale market.

But- The idea seemed super cool, and beyond ski's, jack poles, and everything else - Maybe an aircraft grade bladder down the road... Possibly some plumbing, though I am trying to keep it simple!

Locks for the hatch are next.
 

Attachments

  • hsdf.jpg
    hsdf.jpg
    70.9 KB · Views: 223
  • jwet.jpg
    jwet.jpg
    121.7 KB · Views: 239
  • kgdf.jpg
    kgdf.jpg
    101.9 KB · Views: 221
Living The Dream said:
The basement looks great! Nice execution. I am one year in with skis and still do not have a good solution :(
Thanks man!

If I did it any other way, I'd like to incorporate the simplicity / functionality of going "shuttle style," with the vertical pvc trolling cannons behind the rig!

Removable "pallet like" basement, just for ski season and fishing was another option. The on / off with different tie downs seemed to be the thought killer on that one. Would have been way more marketable though, should the rig change down the road.

Good luck. Let me know what you end up doing.
 
Got a new welder . . . Figured it would be fun to fabricate and slap on some jack brackets . . . Check it out!
 

Attachments

  • IMG_1585.jpg
    IMG_1585.jpg
    80 KB · Views: 173
  • IMG_1582.jpg
    IMG_1582.jpg
    98.9 KB · Views: 166
  • IMG_1579.jpg
    IMG_1579.jpg
    97.4 KB · Views: 161
Finally got the new brackets mounted and tested with some RT jacks that I bought on Craig's List. Still need to cut some barrier tape that separates the steel brackets from the aluminum trim and repaint, but couldn't wait to get this baby up in the air!

The combination of my truck's lift and oversized tires created an issue for the camper's loading/unloading process. I typically do this on a sloped / uneven & cracked driveway - It was taking way to long and always a white knuckle process . . .

I really needed to either dedicate time to making a jig for the 3 tripod jacks or just commit to fabricating 4 brackets that allowed some stability - I was having to run around the camper like a mad man making sure the tripods were still in place and that the camper would not come crashing down at full extension - especially if any part of my truck came in camper contact while squeezing through the wheel wells (Previous process included shimming in wood blocks on top of the old jacks to create extra lift and loading on the tips of the jacks so that the front two had more width to clear tires).

Net Result = I now get about 5 more inches of height and have width you could drive a semi through (I don't intend to drive with the jacks on except for short trips here and there). The stability is awesome now and I anticipate reducing load/unload time by half an hour!
 

Attachments

  • IMG_1592.jpg
    IMG_1592.jpg
    92.1 KB · Views: 145
  • IMG_1589 (2).jpg
    IMG_1589 (2).jpg
    117.2 KB · Views: 167
  • IMG_1267.jpg
    IMG_1267.jpg
    142.9 KB · Views: 152
Do yourself a favor and get the drill chuck adaptor for the jacks. I always leave the over hang 1-2” higher just in case! Love the extensions
 
Thanks hebegebe - All about making it easier!.

Finally did the roof lift strut thingy. Used the Suspa 19x35.5 (40# each) on amazon, like a lot of other folks have posted. Thanks for the great info share WTW - Went on like a snap!

The only thing I can share from my experience is that I connected the struts to the camper in different positions than what I have typically seen on the back because of aftermarket flat corner / side trim used for my rebuild (path of least resistance where I did not have to modify trim, flashing, or anything else). I did however have to shim the top brackets or back them w/a layer of aluminum as the camper top’s crown trim is not flat.

Additionally, and in regards to using 40# struts – They provide an unbelievable amount of controlled help going up and require ever so little sweet-talk to bring the roof down on my camper. I was worried about having to do pullups to get it down based on what I have read, but apparently my roof is heavy enough to come down with little pulling effort on my end using the 40lbs’ers. BUT, I used much heavier material on my roof rebuild than what is typically a layer of light aluminum. For no other reason than material access and desire to create brain damage, I used a sheet of rubber roof applied over wood, which probably added 30-40lbs or so. I used plastic sheeting vs cloth on the ceiling, which probably added another 5lbs. Other than that, I have a Max-air fan with some Yakima racks – for whatever that’s worth.
 

Attachments

  • IMG_1610.jpg
    IMG_1610.jpg
    84 KB · Views: 142
Between the jack bracket fab, lift strut things and other recent random adds, I'm dedicated to being mostly finished over these next couple of weeks.

Finally got to the interior mostly tuned and I'm trimming it off now. . .

Converted the snub nose top storage to having extension rails coming into the camper so I can have a full bed up top, . . .

Also made a removable bench and drop down table with leafs so we can have a big dining area and a second bed, but also be able to move around it and clear out all the clutter having the access when needed (shell like).

Since I was aiming for a "stash and go" concept w/MTN Bikes inside, I have a goal zero battery set-up paired to an ARB fridge with a panel for power that hog a little bit of room, so I throw this stuff in it's place when ready to roll.

Will have to post more pictures as we go for other accessories, storage and other adds, but here's a picture of where it's at so far.
 

Attachments

  • IMG_1606 (1).jpg
    IMG_1606 (1).jpg
    84.9 KB · Views: 204
Had to say goodbye to this Fleet last month. Went to a good home!

For whatever reason, I decided to pick up an old beat up Grandby (I think?), and stripped it this weekend.

I think I'll do a "shell-only" build that sits on the bed rails. Been dreaming that up for years and with build envy every time I see one!

Here is a shot of the new project's frame - Probably will start another build thread w/more pics and idea gathering this time.
 

Attachments

  • IMG_1824.jpg
    IMG_1824.jpg
    136.7 KB · Views: 136
Nice! That looks hauntingly familiar... haha.. Good luck with the project. We love the extra room of the Granby vs. Fleet..
 
BBZ said:
Nice! That looks hauntingly familiar... haha.. Good luck with the project. We love the extra room of the Granby vs. Fleet..
You did a Fleet and a Grandby too - Total recall - I'll bet! I checked out your Grandby build - looks awesome!

Certain that this Grandby frame is is wider at 80" than my Fleet was, but can't recall. I'll see the Fleet on Weds and have to do a quick measure.
 
HughDog said:
You did a Fleet and a Grandby too - Total recall - I'll bet! I checked out your Grandby build - looks awesome!

Certain that this Grandby frame is is wider at 80" than my Fleet was, but can't recall. I'll see the Fleet on Weds and have to do a quick measure.
Yup.. we bought a older 7.5 foot Fleet and used it for about a year, including a trip to Baja for 3 weeks. It just felt narrow, especially with 2 dogs. I think the floor width was 39 inches. The Granby has 48 inches. (I could be making these numbers up but I do recall it was 9 inches wider).. Granby is only 1/2 foot longer, but feels so much bigger.. both were stripped and made as open as possible..
 

New posts - WTW

Back
Top Bottom