AK Camper Factory visit Pirelli seal replacement

flyboykev

Advanced Member
Joined
Nov 21, 2016
Messages
52
Went to the factory to replace my old pirelli seals on my 95 10' CO.
Two shop guys took 4 hours to replace all the seals and they did an amazing job.
Total cost was about $500 and they gave me a small spare roll to go.
They had a lot of new builds going on and its always good to see Bryan.
Gave the tech's a nice tip to buy them each lunch.
see attached pics
flyboykev
 

Attachments

  • IMG_3143.JPG
    IMG_3143.JPG
    52.5 KB · Views: 834
  • IMG_3146.JPG
    IMG_3146.JPG
    97.2 KB · Views: 1,008
  • IMG_3149.JPG
    IMG_3149.JPG
    50.4 KB · Views: 1,043
  • IMG_3151.JPG
    IMG_3151.JPG
    101.2 KB · Views: 882
I replaced all the Pirelli seals myself except for the front outer one as I ran out of material. My '76 CO probably had never had them replaced as they all exhibited the "fringe" look on the exterior. I found that it was imperative to lay out the new stuff with the old stuff to get all the cuts you need done correctly as trying to cut the notches, etc. while you go is nuts. Mine were installed with nails and I used the same nails and nail holes because there was no soft wood on the perimeter. The curves up on the top at the front did have some slightly rusty screws holding the metal trim so I bought stainless steel ones a bit longer and sure enough, I got into solid wood to secure them and the butyl.

If you faithfully do this replacement you will be very surprised at how much warmer it will stay overnight and actually how much cooler it will be in the daytime as the exchange of air no longer is quite so easy. I think it also makes small "visitors" less likely to show up during the night...like mosquitos or even other critters!
 
rolling to Elfendahl pass Belfair this weekend for my first camping trip. With it being so dry, these new seals will definitely help keep the dust out and unwanted visitors; except female cougars, late 40's - they're ok :p
 
Was wanting to replace the seals myself due to them being dryroted. How difficult is it and were would I start.
 
It seems to me that the process was slightly different either over time or at different factories. Some are stapled but mine were held with a small nail. I started on the long runs inside and after removing the wooden trim which I subsequently cleaned up and put a light walnut stain on to restore the looks. Then I very carefully pried up the nails and removed them (I actually reused them as they were not rusted) and then used the old seal as a template for the new one.

Then I attacked the door seals and rear panel seals; and note that they were cut-out around the vertical tracks and copied those cut-outs to prevent as much drag when lowering the top as possible...you will need to do this elsewhere also!

After I had finished the inside I checked the up/down and noticed it was much smoother because the Pirelli seals centered the top and it helps to guide the top when it is lowered.

On the outside, I did the sides first and noted any cut-outs again and simply started at one end and ended at the other.

If you have a CO like mine, take a good look at how yours was constructed and try to determine if someone has tried to seal up the curved section before. Again, I think at different times or different builders did it slightly different. This is where soft/rotted wood can be found because the nails and/or screws used there will practically fall out and certainly won't grab when reinstalled. You are using stainless steel nails or screws to replace the old ones! I had good luck with the curve on my Alaskan but I chose SS screws a 1/4" longer and when I installed them they grabbed the old thread area just fine but when that last 1/4" was tightened they needed some torque to seat them....meaning no rot in there!

Don't forget the butyl seal and Pro-Flex as added protection on other places!

Oh yeah...I let the Pirelli seal sit in the sun a few minutes before installing as it is a bit more pliable then.

There are more threads here I think that may be much better than my feeble attempt here to explain it, but bottom line is, when you are done you can't see daylight when inside the Alaskan where the old shredded Pirelli was. I happened to go check mine with the top up one morning when it was 55F outside and it was still warmer from the sun the day before. Conversely, I left it closed all day and the temps were in the mid-high 80s and I found that it was a bit cooler inside.

Simply making it airtight as possible means warmer at night and cooler in the daytime.

Good luck!
 
Thks PackRat! Very helpful. Trying to take care of it. I went out and bought a dehumidifier to put in the camper while sitting in my driveway plus just ordered a custom cover to fit over the camper and truck. This Florida weather is brutal.
 
"Rust Never Sleeps"....and a covered parking space is not always available so tarps are a very good idea! Looking in the corners at the roof/rear panel area inside for stains and around the roof vents can be excellent ways to tell if they are leaking and how bad. Then you are left with the choice of replacing rotted wood or, as many do, stopping further water intrusion and leaving well enough alone!

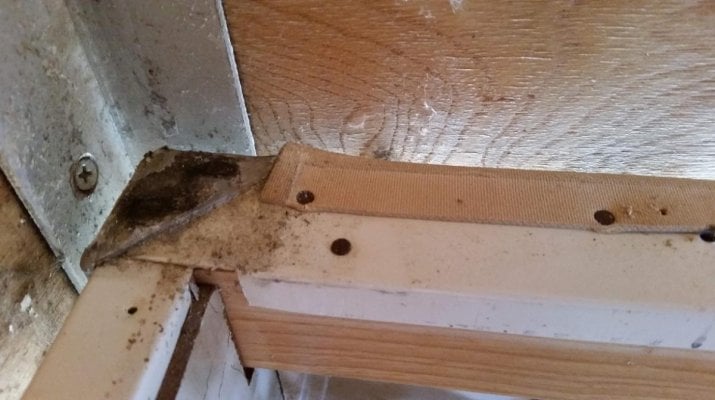
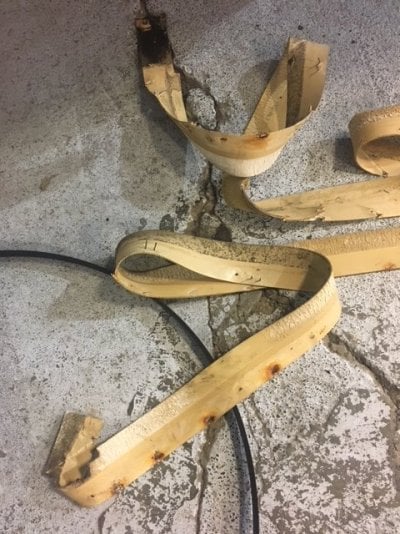
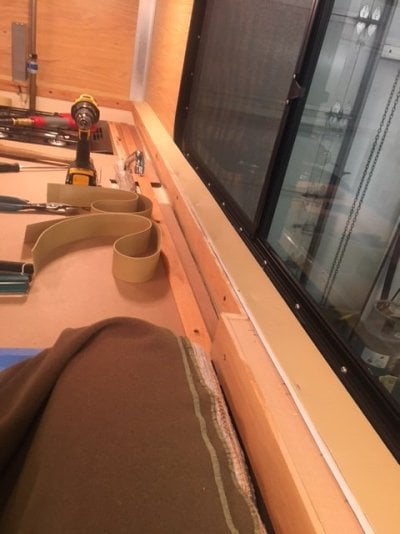
Checking the side panels below each side window for damaged wood is needed also...and there are two reasons the wood may show damages....one is simply due to condensing moisture on the inside of the glass and the aluminum from dripping down and secondly, once the inner and outer Pirelli seals on each side are reduced to shreds, water from the road and rain when driving can get up and under the side wall and wet that plywood. I haven't heard anything about it, but I suppose moisture could condense on the water tank and rot the floor as well so at the end of the season, drain it and try to get ALL the water out....you'll be doing a water/bleach cleaning in the spring of the tank and the lines Into it, to the faucet and to the drain tube. Maybe put a plug in the drain tube for the tank and the icebox and the sink as they may be collecting bugs and algae.

Your idea of battling moisture inside can be achieved by a dehumidifier as you mentioned or by using a 100-watt lightbulb in there burning 24/7 to warm it up. These only work AFTER you have good Pirelli seals in place so air exchange is almost non-
existent.

While you are at it, check the roof vent seals. If they are dried out and do not seal or are missing, replace them. Check and prevent it from becoming an Ant Farm or other haven for pests over the winter.
 
Good advice! Everything looks good seals are not bad just a little dry and getting stiff.
 
Very glad I found this thread. I posted a new one but this is an excellent thread. I just got in the mail 60 ft. of Pirelli for the inside of the trailer. I noticed the old Pirelli did not go to the four corners but the sides and ends all stopped about 1 inch from each corner. Shouldn't they go to the corners and butt against each other? This way, there's no gap in each corner??

I pulled the old gasket off so now I'm on "holding pattern" until I can find out about the corners so if someone could reply asap, I would greatly appreciate it. Tomorrow is suppose to be a beautiful day and hope to install them after church while the weather is still nice.

Another question that came up when I was reading this thread was the outside gasket. I didn't even think about that but now that its been brought up, where do I purchase those at? Alaskan Camper.com??

Thanks so much,
Joe
 
Here's a picture of what I'm talking about. Do I match the stop/start of the old existing that I'm replacing or go all the way to the end?
Thanks,
Joe
 

Attachments

  • Gasket1.jpg
    Gasket1.jpg
    93.4 KB · Views: 217
My guess is the factory did it that way for a reason. I wonder if going to the end would cause binding of the lift, or tearing of the new seal.
 
I think you're right Wandering Sagebrush. I'm going to wait and talk to Brain tomorrow. Wish I could have done it today but that's the way it goes sometimes.
 

New posts - WTW

Back
Top Bottom