Direct Bolt on Flatbed

MexiDan

Member
Joined
Jun 13, 2016
Messages
22
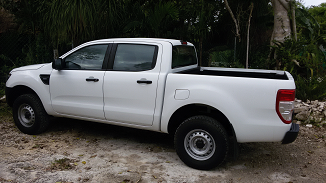
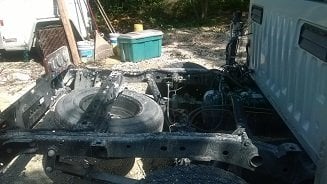
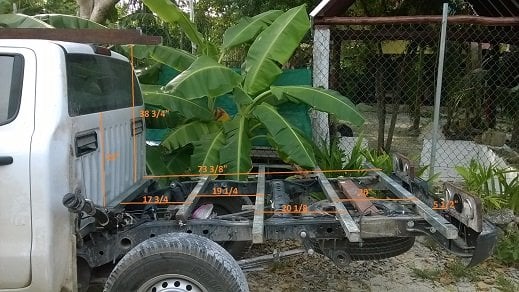
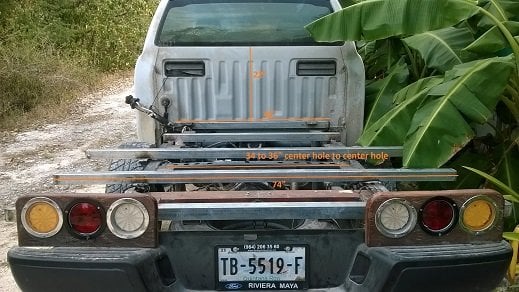
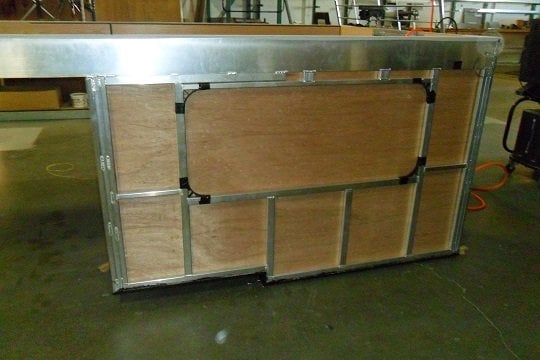
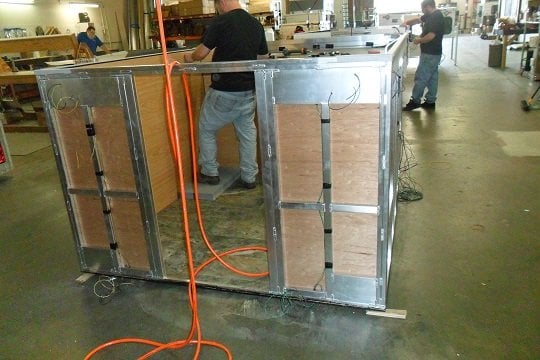
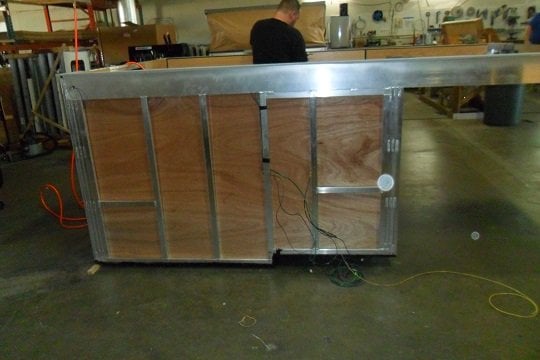
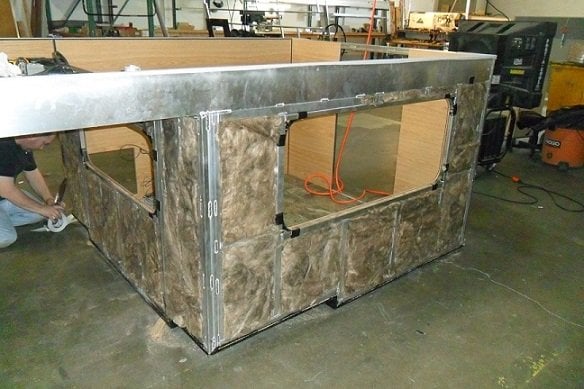
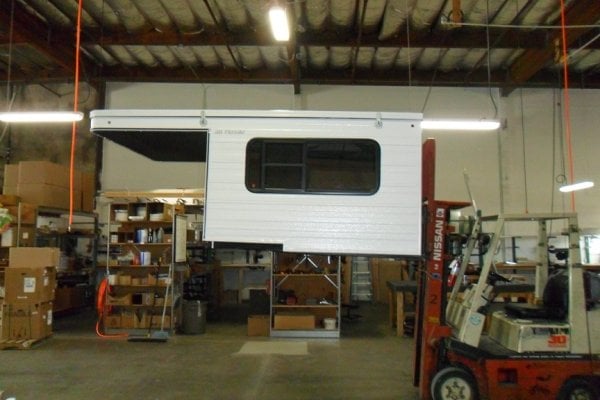
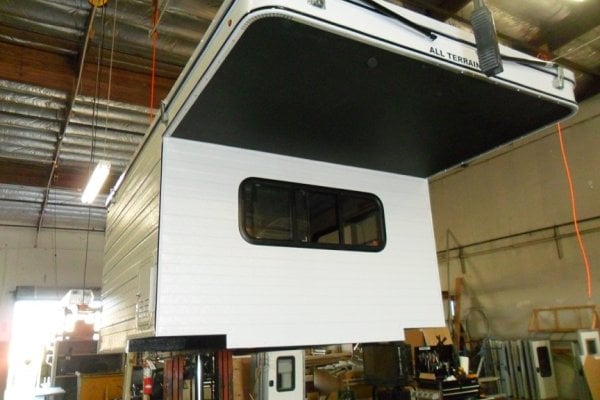
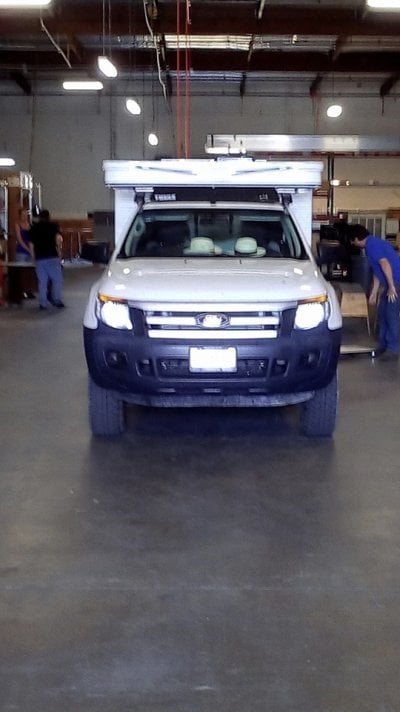
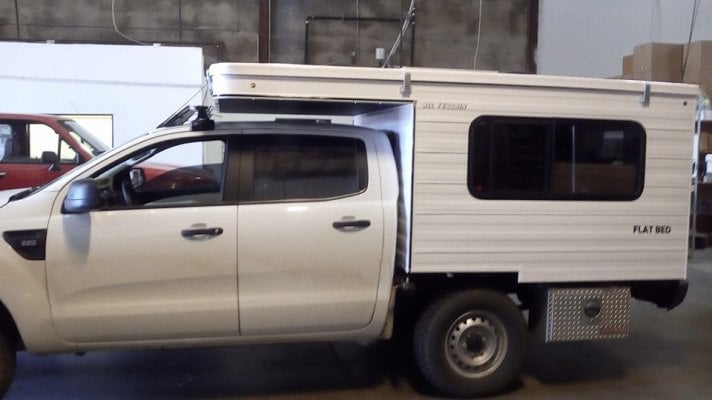
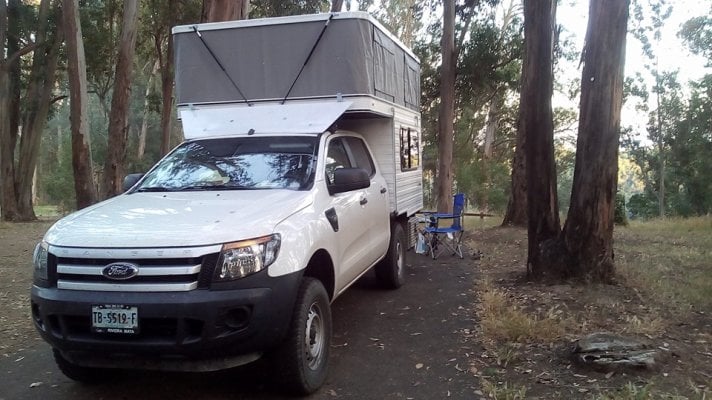
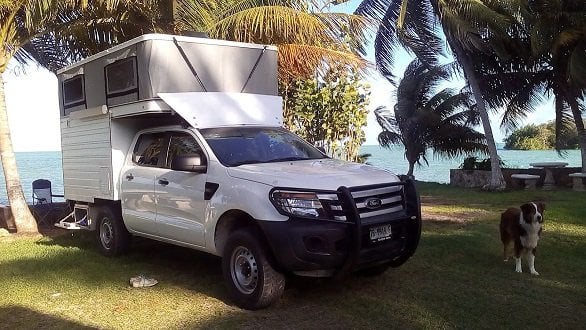
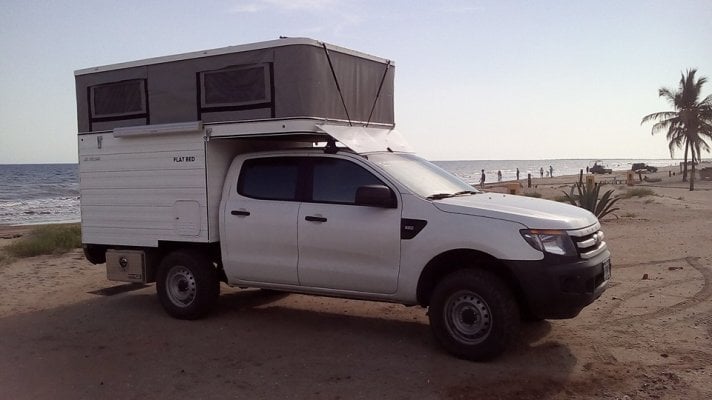
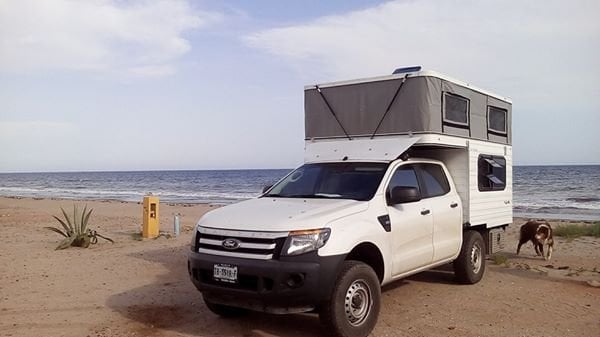
Just joined, but long time reader who just picked up our new ATC two weeks ago and today arrived home to the Tulum MX area. Something a bit new as I understand it, a flat bed bolted directly to cross supports on the frame of the truck. I meet the ATC gang last January while in the Bay Area for business and worked long distance with them to design something for my Mexican Ford Ranger 2.2L Diesel. The pics from the Pacific coast of MX are what we came up with. I can not say enough nice things about the entire group at ATC, thanks guys!!

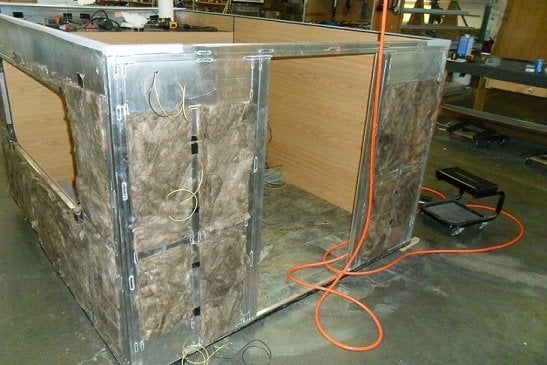
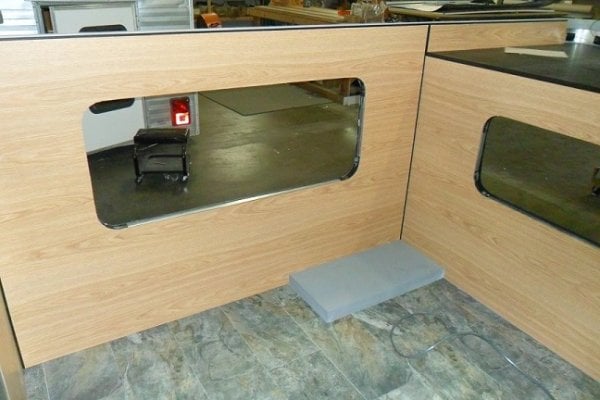
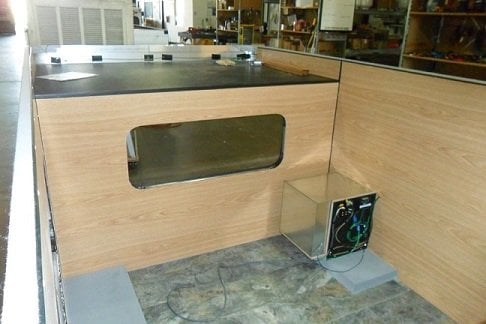
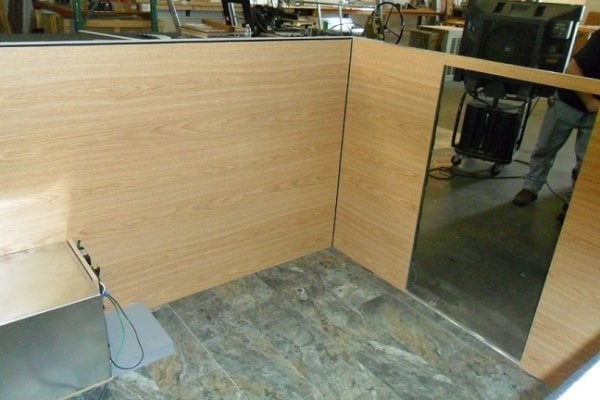
Now that I'm home I need to outfit the inside and will continue to post more but after 11K km in 2.5 weeks I need to rest and get some other work done first. Hope to be back on line later this week with some pics of the prep of the truck, the camper and the inside prior to build out.
 

Attachments

  • Pacific Beach 2.jpg
    Pacific Beach 2.jpg
    101.2 KB · Views: 494
  • Pacific Beach.jpg
    Pacific Beach.jpg
    30.2 KB · Views: 488
yep, some more pics would be great. I may see a rig for retirement forming...... That is why I like the ATC crew, doing custom work with them is great!
 
Thanks for posting about your new camper! Please also include some information and photos, if you can, on your Ranger. Congrats on your new camper!
 
An interesting concept. Are the frame rails on your rig flat? (Like on a "chassis cab) How did they protect the underside of the unit against weather and moisture from the road?

If they've got it figured out it would have saved me 400# of aluminum flatbed and 5,000.00! :)
 
ski3pin said:
Thanks for posting about your new camper! Please also include some information and photos, if you can, on your Ranger. Congrats on your new camper!
+1... I wish we could get that Ranger in the US. I'd love to see more photos on the camper and truck. Very nice!
 
Finding some other photos, some may be forever lost due to a smashed phone on the trip home. The Ford Ranger sold in MX was available last year in a gas or diesel option, and I wanted diesel for what I think are obvious reasons. The only other diesels down here that were not 8cyl were the Nissan NP300 and the VW Amorok. The NP300 has quite a bit less payload and just not built as well. A real work horse but not a long haul type of truck as the Ranger. The VW is quiet a bit more expensive and the design of the cab in relationship to the bed did not seem to lend itself to a camper (it curves back reducing the space available for the camper).

I would have rather had a shorter cab but they only sell the extended four door down here and I needed something for the dog, so I had to deal with a shorter bed. They offered 4WD or 2WD. I went 2WD based on where I typically drive (we'll see if I live to regret it). The rated payload is 1,400kg. The engine is 2.2L turbo that has been in use down here for a good number of years so they appear reliable. The truck is pretty basic, air bags and AC. No power windows, cruise or anything available with the diesel option and the color choice was white. Prior to the camper going on I was getting around 28-30mpg and now with it on approximately 22 to 25 mph range at pretty high speeds (75mph). More on the build as I find photos and have time.
 

Attachments

  • Puma small.png
    Puma small.png
    152.9 KB · Views: 237
Finding photos that I still have. Below is the frame with the bed removed. The other two show the side and back view after it came back from the metal shop. They extended the rear frame by about 0.5 meters. Essentially making it the length of the truck with the tail gate down (plus the length of the bumper). They then added five 2" square bars to the frame, assuring that they were level on the top portion of the bars. On each of the bars the added two tabs with 3/8" holes in them. The metal shop also moved the mounting system of the spare tire back so that it could be reached more easily.

Note the very fine tail lights built out of what I could find locally. I need to by some nicer LEDs in the near future. I took it in for an oil change at the local Ford dealer prior to driving it north to pick up the camper and they rust proofed the entire frame for me for a relatively small fee (no pictures of this).

I had to move the fuel hose around slightly to place it as close to the cab as possible and still keep it up high. It's worked out quiet well like this.

While there is quiet a bit of space beyond the rear axle my plan is to put very little weight back in this area and keep as much as possible over the axle itself (more in future posts).
 

Attachments

  • Truck bars small.jpg
    Truck bars small.jpg
    69.4 KB · Views: 360
  • Side Truck small.jpg
    Side Truck small.jpg
    124.9 KB · Views: 386
  • Truck back small.jpg
    Truck back small.jpg
    118.1 KB · Views: 368
Thanks for the info on your Ranger.

Most of us that are Ranger fans, are looking forward to the re-start of production of the Ranger in the U.S. as indicated back in April, 2016 in a L.A. Times newspaper article...

"The UAW's new four-year contract with Ford, signed last year, guarantees new vehicles for the Wayne, Mich., assembly plant in 2018 and 2020 and a $700-million investment that preserves the plant's 3,924 jobs. Union members have said they expect the factory to get a new version of the Ranger small pickup and a new small SUV called the Bronco."

We're looking forward to this becomming a reality, not just some "story".
 
Some photos of the build (thanks to the guys at ATC for taking these). Note the small "bump up" in the front to assure that the wheel will not ever hit the floor of the camper.
 

Attachments

  • Camper Frame side 2.jpg
    Camper Frame side 2.jpg
    145 KB · Views: 264
  • Camper Frame back.jpg
    Camper Frame back.jpg
    161.3 KB · Views: 265
  • Camper Frame side.jpg
    Camper Frame side.jpg
    138 KB · Views: 248
A few more pics for today.
 

Attachments

  • Camper Frame back 2.jpg
    Camper Frame back 2.jpg
    162.1 KB · Views: 248
  • Camper Frame side 3.jpg
    Camper Frame side 3.jpg
    172.4 KB · Views: 260
  • Camper Frame side 2.jpg
    Camper Frame side 2.jpg
    145 KB · Views: 237
Some shots of the inside during the build. I had the propane box put toward the front to keep weight forward. The grey rectangles are the painted "bump ups" so that the tires do not hit the floor. Also can see the "temporary" electrical board for the solar system that I had ATC install.
 

Attachments

  • camper inside no roof.jpg
    camper inside no roof.jpg
    172.3 KB · Views: 196
  • camper inside no roof 2.jpg
    camper inside no roof 2.jpg
    125.9 KB · Views: 192
  • camper inside no roof 3.jpg
    camper inside no roof 3.jpg
    173.7 KB · Views: 193
The final shell, ready to bolt on.
 

Attachments

  • sied at ATC.jpg
    sied at ATC.jpg
    238.4 KB · Views: 222
  • front at ATC.jpg
    front at ATC.jpg
    233.8 KB · Views: 223
Only took a couple of shots while they bolted the shell on in the shop. Marty, his son and daughter-in-law came in on a holiday morning and finished the job in about 3 hours. I will post some close ups of the bolt on system later this week when the truck is back from it's 20K km servicing at the Ford dealer. I think we spent more time making certain we had the shell square on the truck frame than the actual drilling and bolting required.

Prior to leaving home I had bought a Thule bar and used an old faring from another style Thule along with a piece of Makrolon to build a faring system before I knew the exact size that I needed. It worked pretty well for the 3000+km home (shown below during the first night of camping just east of Oakland Ca). I have cut a larger piece of Makrolon and plan to bolt it on over the current one. I think this will last me for a good number of trips before I do something a bit "nicer looking".

The center of gravity of the shell turned out to rest just about 1 to 2 inches behind the center of the rear axle, so should not bee too bad as long as I keep the bulk of the weight forward, which I plan to do. The total weight is just over 600lbs, I will post the exact number once I have the camper home from the shop.
 

Attachments

  • bolt on front.jpg
    bolt on front.jpg
    107.7 KB · Views: 248
  • bolt on side.jpg
    bolt on side.jpg
    94.7 KB · Views: 263
  • first night.jpg
    first night.jpg
    163.1 KB · Views: 265
Wow, I'm jealous of your diesel truck, camper and MPG. I've thought of doing something similar with my Frontier, the bed is really just added weight and wasted space since my camper is on all the time. Looks like a great set up. I'm looking forward to your interior build.
 
Squatch said:
Love the Camper!

I thought my little truck had a lot of the bed behind the axle. WOW.
The "bed" of the camper is 78" long, outside to outside. The original bed on these Rangers are about 62" from the back to the front of the bed, 85" with the tailgate down.

The center of gravity of the camper empty is about 1 to 2 inches behind the axle (may have posted this already).
 
Been busy with various things and have not done much with the camper yet. Did make the fairing wider and taller. It's too tall in this pic and I've since taken some off the top. Also bought a tumba burro (bull pusher) for the front and headed to southern Quintano Roo for a couple of nights. I have a Shady Boy awning mounted on the passenger side. I've used these on past VW Eurovans and really like them for their light weight and fairly easy set up.
 

Attachments

  • chetumal ATC 2.jpg
    chetumal ATC 2.jpg
    110.2 KB · Views: 169
Back
Top Bottom