In the event that you have trouble finding the the unterminate Solar wires in the ceiling after removing the fan cover I offer the following.
The FWC Aluminum roof skin is thin enough that you can press down and feel the wires under it. I used that technique to find the wires in the ceiling of my 2007 FWC Keystone. They were terminated next to a square plate with a square hole in it that was welded into the ceiling rib structure (under the roof skin).
After careful outside and inside measurements. It turns out the inside location was under the transverse wood lift point board on the drivers side of the centerline and in front of the over cab bed. I removed the board then
I drilled a a 1/8" dia pilot hole from the outside down through the center of the hole in the square plate.
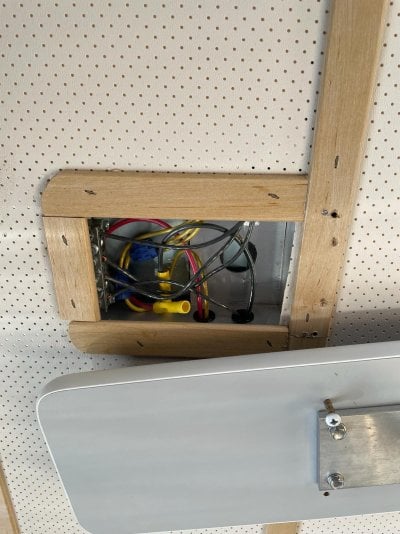
I found that small hole location inside the camper and carefully cut an X in the ceiling fabric and exposed the underside of the plate. After removing a small amount of the styrofoam insulation, I was able to use a pair of needle nose pliers to reach in and pull the wires down through the hole. After measuring the space available I bought a small plastic junction box and installed it into the ceiling. I made my electrical connections there then carefully used a patch kit to mend the ceiling fabric. After reinstalling the board the patch on the ceiling fabric is not visible.
I used the 1/8" hole in the roof as a pilot hole for a hole cutter (I think I used a 7/8" dia hole saw). After I drilled the the hole in aluminum roof I put a rubber grommet in the hole so the sharp edges would not cut into the wires over years of driving bumpy roads. I bought a Go Power entry plate that came with pigtail wires having MC4 connectors on one end. I mounted the entry plate on the roof and sealed it under the flange as well as around the edges with 3M 4200. No leaks after 5+ years.
Here is a link to images in my gallery.
https://www.wanderthewest.com/forum/gallery/album/1151-2007-keystone/
I hope this information is helpful.
Craig
Great! Thanks a lot!


")