EdoHart
Grasshopper
After much thought and inspiration from others on this site I finally decided to actually do something about the small cabinet doors I had in the kitchen side of my Hawk. I bought 2 24x48X1/2 inch pieces of birch finish grade plywood (for the front piece, the 2 doors and the 4 sides of the drawer), 1/2 pint of Minwax Cherry 235 stain, 1/2 pint of Minwax Polycrylic finish, and 2 door latchs for about $50 total.
The 1/4 inch plywood used for the bottom of the drawer and the interior of the cabinet, hinges, drawer handle, knobs, 5/16 machine thread eyebolts, 5/16 machine thread wood inserts for the eyebolts, corner braces, wood screws, cargo netting, and mini bungee cords were all either left over or recycled from other projects or taken from the original camper. Which explains why the hinges are chrome and everything else is brass.
Every thing is screwed together except for the drawer which is glued. The drawer took the longest to build because I don't have enough clamps to do all four sides in one day. The dividers in the drawer are screwed into place.
I'm calling this version 1.0 because even as I was building it I was envisioning version 1.1, 1.2, 2.0, etcetera, but I figured I had to start somewhere and field test it to decide what I like and don't like. I'm leaving for a week to the Sierras early Sunday morning.
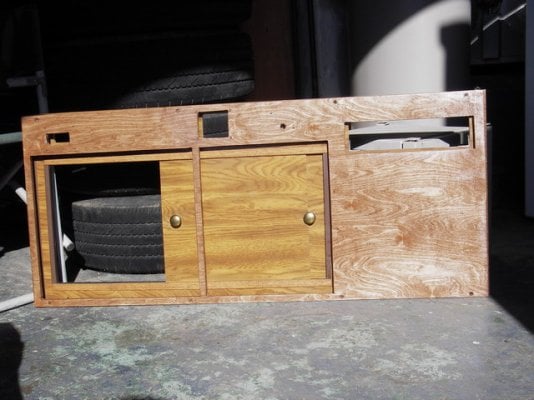
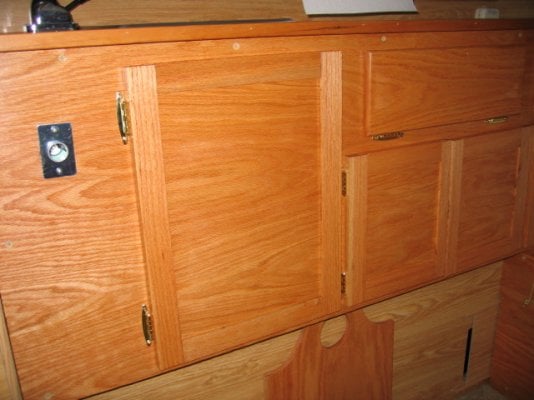
The first picture shows the new cabinet in front of the old cabinet to give a comparison of the size of the openings. As you can see I didn't get the color of the stain right. It looked good under florescent lights, but not in sunlight.
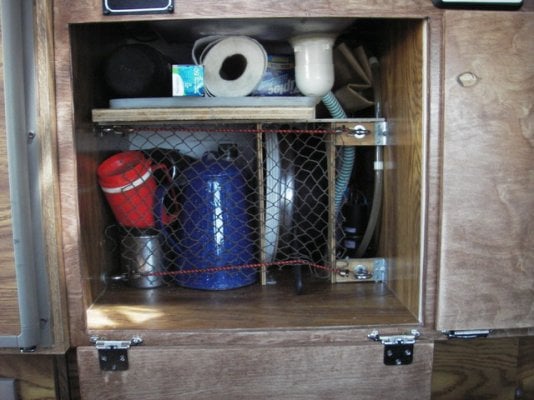
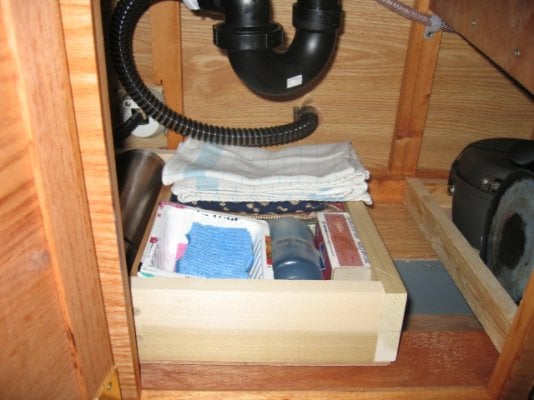
The second picture shows the protection I built for the electric water pump and sink drain (the later is hard to see, but it's there) as well as the dividers to stow most of my kitchen stuffl.
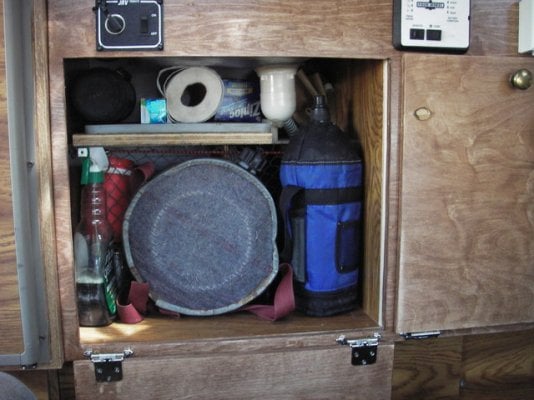
The third picture shows what else I can put in the cabinet.
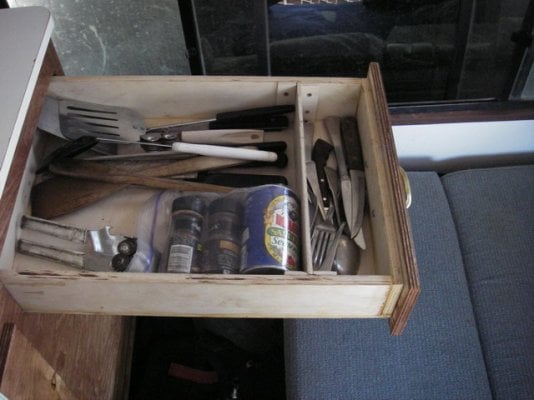
The last picture shows the drawer, which is 1/4" deeper, 1/2" inch wider, and about 6" longer than the original. I re-used the drawer slide, handle and safety catch from the original drawer.
The 1/4 inch plywood used for the bottom of the drawer and the interior of the cabinet, hinges, drawer handle, knobs, 5/16 machine thread eyebolts, 5/16 machine thread wood inserts for the eyebolts, corner braces, wood screws, cargo netting, and mini bungee cords were all either left over or recycled from other projects or taken from the original camper. Which explains why the hinges are chrome and everything else is brass.
Every thing is screwed together except for the drawer which is glued. The drawer took the longest to build because I don't have enough clamps to do all four sides in one day. The dividers in the drawer are screwed into place.
I'm calling this version 1.0 because even as I was building it I was envisioning version 1.1, 1.2, 2.0, etcetera, but I figured I had to start somewhere and field test it to decide what I like and don't like. I'm leaving for a week to the Sierras early Sunday morning.
The first picture shows the new cabinet in front of the old cabinet to give a comparison of the size of the openings. As you can see I didn't get the color of the stain right. It looked good under florescent lights, but not in sunlight.
The second picture shows the protection I built for the electric water pump and sink drain (the later is hard to see, but it's there) as well as the dividers to stow most of my kitchen stuffl.
The third picture shows what else I can put in the cabinet.
The last picture shows the drawer, which is 1/4" deeper, 1/2" inch wider, and about 6" longer than the original. I re-used the drawer slide, handle and safety catch from the original drawer.