Low Cost Mods

Central Toast said:
Here is my low-cost dust cover for the water heater. Mine is on the back wall so it gets caked in dust which I believe was the death of the original thermostat/controller unit in the water heater that I just replaced. I got a car door magnet like you use for a business ad on the side of your vehicle and cut a piece to go over each vent. For the left side vent louvers the magnet is on the inside, for the big screened vent the magnet goes on the outside. I've been driving around for weeks with them and they stay on just fine. I just need to remember to take them off when I fire up the water heater. You can find this stuff on line for several dollars per sheet.

attachicon.gif
dustcover.JPG
attachicon.gif
dustcover2.JPG
Cool idea, Central Toast.
 
You've heard of the "TRASHAROO," let me introduce you to the "POOPEROO." They have yet to invent a plastic dog poop bag or a knot you can tie onto it that will totally trap the smell. I found myself with no place to put the filled bags other than inside the camper or cab of my truck, so I borrowed the Trasharoo concept. After a quick trip to a local thrift shop, a $3.00 nylon bag and a cheap caribiner: the Pooperoo was born.


IMG_0534.JPG

IMG_0535.JPG
 
Tried using a plastic container like mixed nuts are sold in at Costco? Put the acquired and bagged deposit in the jar & screw on the lid tightly. Dump the jar as necessary & reuse. Might be able to carry/store jar in turnbuckle space.

Paul
 
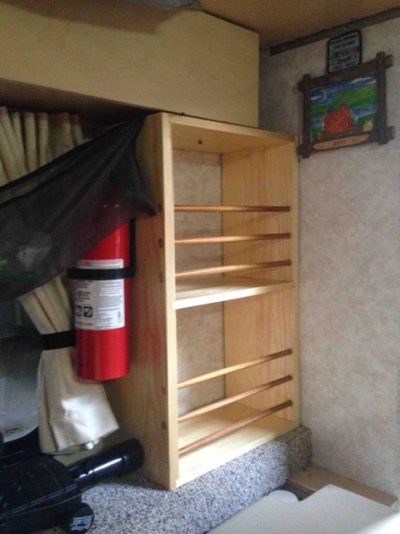
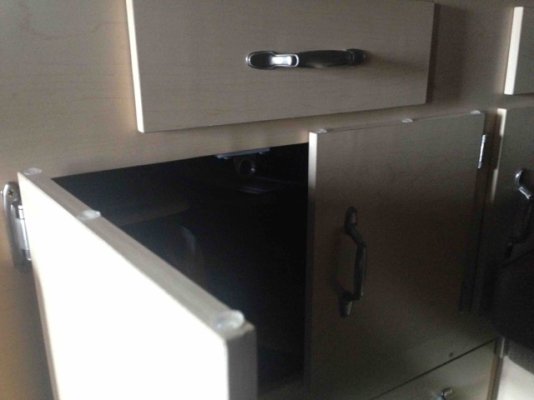
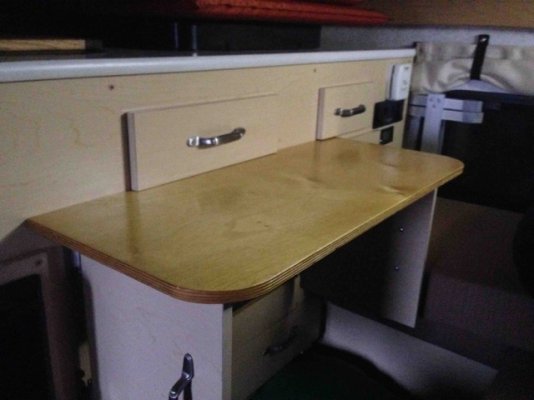
Well ... I had some eastern white pine (light) left over from a job and a broken clothes drying rack so I thought I'd put them together and make a couple cubby holes that are handy to stuff hats and loose clothes into...one for me and one for the Mrs. It fills that void by the door behind the loo. And I know this isn't my idea but I hated the FWC table so I sold it on craig's list. I bought some of the rubber nubbies with adhesive for $1.95 and cut a piece of birch ply scrap, a couple coats of urethane later It tucks right under the drawers and works as our table when we have to stay inside to eat.
 

Attachments

  • IMG_8550.jpeg
    IMG_8550.jpeg
    74.1 KB · Views: 578
  • IMG_8551.jpeg
    IMG_8551.jpeg
    47 KB · Views: 638
  • IMG_8536.jpeg
    IMG_8536.jpeg
    61.7 KB · Views: 609
buckland said:
Well ... I had some eastern white pine (light) left over from a job and a broken clothes drying rack so I thought I'd put them together and make a couple cubby holes that are handy to stuff hats and loose clothes into...one for me and one for the Mrs. It fills that void by the door behind the loo. And I know this isn't my idea but I hated the FWC table so I sold it on craig's list. I bought some of the rubber nubbies with adhesive for $1.95 and cut a piece of birch ply scrap, a couple coats of urethane later It tucks right under the drawers and works as our table when we have to stay inside to eat.
I like it! I didn't see it at first, but using the cabinet doors as support for the table counter is genius.
Cubby stuffer is great too.

I am playing with a similar idea of supporting a lightweight piece of ply between our two strongback chairs. I think it could work by simply placing the chairs the right distance apart. Pics to follow.
 
Fantastic thread. I hope the ideas keep coming. Me, just got Hawk last week and I appreciate all the ideas.
 
Wow. I started this thread four years ago, and there are now 270 posts and over 67k views!
Let's keep it going!

Today hack is for those that travel with a companion and desire a table adjacent to their chairs.

Like many others on the forum, we invested in the Strongback chairs. We like being able to sit at full height when out in some of the rougher terrain. The problem is that there's no place to put your dinner or your cocktail! :p There is a silly drink bag hanging off the chair, but it's of no use to us.

Here's my idea:
Take an 1/8" piece of plywood from garage. I had a wall cabinet "skin", prestained cherry, nonetheless.
Cut to pleasing shape. I used a 5 gal bucket for the front radius.
Punch four holes to hang plywood from chair arms.
Scrounge two bootlaces or cord. I used loops for the front and a couple of mini-biners to clip the back tethers.
Play with length of knots to level the plywood, hanging off slanted chair arms. It's an opportunity to try out a figure 8, clove hitch, bowline, etc.

Result: Room for two plates and drinks in a compact platform we can stow under the bed or seat.
Field testing to happen soon.

Cost = zero, nada, zilch! :D :D :D


Callie approves!
 
Use the bungee cords that pull the fabric together when you lower the pop up to hang dish towels from. Just clip them to the scissor panels at the rear of the camper. We don't use paper towels or other single use conveniences. Yeah, I know, the high moral ground is so annoying. We even use cloth shopping bags! Freakin' liberals,,,,
 
We do same thing with the bungee cord with the top up. I clove hitch the bungie to the push knob on the rear panel and stretch the bungie over the barrel bolt. Great spot to dry hats and gloves, as well as dish towels.
 
Nice table idea if you already have folding camp chairs with no side table.

We have two older folding Director chair style camp chairs (Coleman) with attached folding side tables bought for about $20 each years ago. We love them and use them for picnic outings with the car as well as for camping. Ours have round tubing. The newer chairs seem to have a rectangular flat tube.

Newer models have cup holders built in too.

They can be had at Walmart, Target, Sears, Camping World and Amazon for as little as $35 - $40 each (brands are Coleman, GCI, KampRite, etc).
 
I good rainy day project was installing Love Lights in the camper. Someone other than me on Wander the West came up with the name. We have been lacking an interior light that had an easy on/off switch directly inside the door so might as well add a little romantic ambiance.

I used a strip of self adhesive led lights I bought from Amazon along with a 12V rocker switch -

led strip

switch

Since I built the interior of the camper and ran all the wiring and remember where everything is tucked away at, this was a straight forward install and easy to add to my blue seas fuse block.

We are happy with the results.

gallery_1902_252_248617.jpg


gallery_1902_252_183134.jpg
 
What is in the hole to the left of the switch? An awesome idea on the love lights. I too wish I had something that operated from the doorway, but don't have the skills to do this. Very nice!
 
I ran led strip lights in my bedroom, have a roll leftover. Hadn't thought of the camper. Not a bad idea.
 

Latest posts

Back
Top Bottom