roof lifting helper shocks thingys

Thanks to everyone who contributed to this thread, I now have roof lifting helper shocks thingies on my 1991 Grandby.

I think every camper has a different screw pattern, roof clamp placement and accessories so every install varies a bit. For me, I was able to reuse holes and screws for top and bottom brackets, one screw hole per bracket. I use SS #10 3/4" screws like suggested, squirting silicone caulk in the holes and behind the brackets.

I used x4 40lbs struts and have to gently pull down the roof from the inside to get it to close. Once all the way down, it stays down. And to raise it, I only have to give it a gentle start before the struts kick in. I plan on installing solar at some point, and it will still work well then.

One thing I haven't read in this thread is that these struts take a lot of load off of the lifter panels. I have the original panels, now 20 years old, and they're not in good shape. Some rivets have pulled out, the piano hinge is wracked, all the metal parts are rusty, the wood is splintering, etc. On every trip, I fear a panel completely tearing. But now with these struts, I know I'll get many many years of use out of these otherwise totally shot panels. And adding struts is probably about one million times easier than replacing the panels, and will ultimately help the panel replacement job by holding the roof up while redoing them.

IMG_1342.JPG
IMG_1343.JPG
IMG_1344.JPG
IMG_1345.JPG
 
Thanks to everyone who contributed to this thread, I now have roof lifting helper shocks thingies on my 1991 Grandby.

I think every camper has a different screw pattern, roof clamp placement and accessories so every install varies a bit. For me, I was able to reuse holes and screws for top and bottom brackets, one screw hole per bracket. I use SS #10 3/4" screws like suggested, squirting silicone caulk in the holes and behind the brackets.

I used x4 40lbs struts and have to gently pull down the roof from the inside to get it to close. Once all the way down, it stays down. And to raise it, I only have to give it a gentle start before the struts kick in. I plan on installing solar at some point, and it will still work well then.

One thing I haven't read in this thread is that these struts take a lot of load off of the lifter panels. I have the original panels, now 20 years old, and they're not in good shape. Some rivets have pulled out, the piano hinge is wracked, all the metal parts are rusty, the wood is splintering, etc. On every trip, I fear a panel completely tearing. But now with these struts, I know I'll get many many years of use out of these otherwise totally shot panels. And adding struts is probably about one million times easier than replacing the panels, and will ultimately help the panel replacement job by holding the roof up while redoing them.

View attachment 12671
View attachment 12672
View attachment 12673
View attachment 12674

Don't they make the whole use much easier and more enjoyable.Some of us are up in age and they sure help save the back.My bobcat carries a #70 canoe and with less effort than no struts/no canoe it goes up nicely.Every camper should come with them standard,IMO.

Frank
 
I'm about to mount a solar panel on the roof of my Hawk. It only weighs about 22lbs, and I probably don't need these lifter-helpers for that additional weight...but I wouldn't mind having some help, either. So, I'm going to read through this thread and at least get the parts.
Thanks to the many who contributed to this long thread!
smile.gif

(but first...guess I also should also read threads about mounting a solar panel to the roof...
huh.gif
...what screws/brackets to use, etc.)
 
(but first...guess I also should also read threads about mounting a solar panel to the roof...
huh.gif
...what screws/brackets to use, etc.)


That info is also helpful to the site, and I plan on doing it in the future too. So once you get it figured out please post your findings and results!
 
I'm about to mount a solar panel on the roof of my Hawk. It only weighs about 22lbs, and I probably don't need these lifter-helpers for that additional weight...but I wouldn't mind having some help, either. So, I'm going to read through this thread and at least get the parts.
Thanks to the many who contributed to this long thread!
smile.gif

(but first...guess I also should also read threads about mounting a solar panel to the roof...
huh.gif
...what screws/brackets to use, etc.)


Do you have a factory roof rack? If so you can mount them to it.I have a 45w panel about 23"x22" and it fits nicely on the right rear portion of the rack and is just bolted through the rack and panel frame.The lifters are so easy to install no special tools needed.Good luck,you will like them,and good luck with the cat.Try placing it in a carrier,that might help,and make sure it can see you it helps.

Frank
 
Do you have a factory roof rack?

No -- no rack...so it's not as simple as it could be.
But I know it's been covered on WTW before...and I actually have an assortment of aluminum channel and angle stock (purchased to build other PV-panel/camper-related things...as yet undone
rolleyes.gif
), and I'm sure I can use that to rig up mounting brackets on the roof. I just need to look into details like "what kind of screws?", etc.

once you get it figured out please post your findings and results!

When I get it figured out I'm sure I'll be very proud of myself, so I'll definitely post the results!
tongue.gif
 
Finally got around to this upgrade to my Finch with my recent purchase of a canoe and all the great fishing on the high lakes recently.
Struts_installed_popedup.jpg

With 20 pages of posts read, I decided to follow LTZ's lead and attempt the side strut install (looked at the front, but seemed to have the same placement issues with the narrower Finch. Figured my placement using one of the existing screws on the top panel and drilled a pilot hole for the other hole on the bracket and screwed it in with the standard #10 3/4" sheet metal screws everyone's using. Figured the span back toward the rear I'd need to accommodate the length of the strut compressed and drilled the pilot holes on the lower section and installed the lower bracket...SCREW-UP #1. Went to the other front side and did the same...SCREW-UP #2. Opened the pop-up, installed the strut on the upper bracket...and...TOO SHORT of a length with it up! Despair, frustration, trigonometry refresher on google, drink some beer and just look at my frustrating setup, etc. for an hour or so...and then my resolution.

**In a fit of frustration, keep the top of the strut attached, take the bottom with the bracket already attached, drill one of my pilot holes and install one screw in the bracket where it extends to as far up as possible (without getting in the way of the top with it down) on the bottom section, do the same on the other side (not measuring the approximate span between the brackets when it's down, and then go pull the top down and hope for the best. Well, you can see by the pictures below that the span was a bit short and rotated the bracket on the attached screw point. Then I drilled my other pilot and screwed it in in situ. There's for just muscle-ing it! I did it on the rear with the same kind of over-extended with the top up - all the way compressed with it down - setup.
Struts_down.jpg

So now I enjoy the same lift help success and am enjoying it, I'm just hoping the shocks stretch out a little and I'm not ruining them...or the camper!
Strut_closeup.jpg

And as far as the trigonometry concepts - how could I have a 30" popup accommodated with a 36" strut extended and still have it collapse to a full 21" span? Don't know how, but it seemed to work...BARELY! I don't see how the front would have worked any better on the popup dimensions of a Finch/Eagle (if there was space in-between the front latches).

Any thoughts/critiques gladly solicited!
 
I put this in another thread recently and it should probably be in this thread...

This relates to,

1) the force of the gas struts based on having a solar panel far forward on the roof (fixed, not removeable), and kayaks or no kayaks on the roof (thinking ahead about the need to switch out gas struts depending on a variable roof load, and thus knowing what a person might want to purchase),

and,

2) that the two common brands of gas struts that have been mentioned often, are slightly different in length and not really interchangeable with each other (something mentioned in a previous message, I believe).

- - - - - - - - - - - - - - - - - - - - - - -

While doing my initial visit to ATC last year I got to try out raising a Bobcat roof without the gas sturts and that made me decide on getting the ATC supplied Suspa 40 lb gas struts installed at the time of build.

After picking up my Bobcat, the Suspa 40 lb gas struts worked really great, easy up and easy down... no problem with the front poping back up. I loved 'em.

- - - - - - - - -

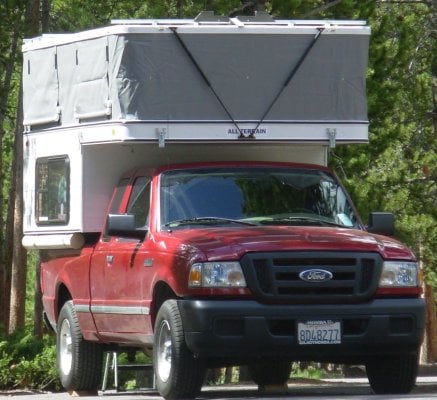
Then I installed my 24 lb. solar panel as far forward as possible, virtually right at the front edge of the top.
Front is a little hard to raise up (but not as hard as without the solar and without the gas struts, like when I visited ATC) , and it comes down very easy, as in... I have to slow it down, but doable, no real porblems.
Rear works just about the same as prior to the solar panel, easy up & down.

- - - - - - - - -

Then I placed my two, 9' long, fat, lake kayaks (each weigh about 30 lbs) on the rear section of the roof using the Thule roof rack load bars, no special mounting components, just strapped to the horizontal racks which are covered with water pipe foam insulation tubes, with fore and aft safety lines attached to the kayaks.

Front behaved a little heavier, not too bad, however, it did take more effort to raise and I had to slow it down even more on the descent. 50 lb gas struts might be nice up front.
Rear was really hard to raise with the 40 lb gas struts, and it wanted to crash on the way down, not good at all.

- - - - - - - - -

So, I got a pair of the Ebay 60 lb'er gas struts from Strut-your-stuff (not made by Suspa). Put them on the rear with the top in the UP position (the only way to do that, IMO). They were just a little longer than the Suspa ones from ATC, and it was sort of hard to compress the gas struts to get them mounted. I tried to figure out a way to have a second set of top or bottom mounting brackets for the two different lengths of gas struts, but, after a while my brain hurt, and I didn't come up with a good solution (except to get some Suspa 60 lb gas struts that are the same length as the ATC supplied Suspa 40 lb'ers).

No kayaks on the roof yet. The front behaved the same as before, I still had the 40 lb'ers up there. The rear was just about impossible to drop from the inside. I had to step out the back door, stand on my back porch with my hands over the top of the roof and pull down with my body weight. Once down, it didn't want to go up on it's own, so, I'm OK.

Added the Kayaks.
The rear went up nice and came down nice from inside, 60 lb'ers are great, except for compressing them in the mounting, that was a bear.
The front was about the same as before, still had 40 lb'ers up there, wished I had 50 lb'ers.

- - - - - - - - -

So, I'm thinking this is OK, except for one thing, I'd like to get a pair of Suspa 60 lb'ers for the rear that are the same length as the Suspa 40 lb'ers, so it's easy to mount them using the brackets that ATC installed. On the rear I can just switch between the 40 lb'ers (no Kayaks) and 60 lb'ers (Kayaks to be carried) when I want to, and it's easy to do when standing on my back porch.

I remember a WTW message in this thread on the gas struts saying that the Suspa 50 lb gas struts were "custom built" and the cost went thru the roof (pun intended), so I'll live with the 40 lb'ers on the front.

So, that's my experience.

I'll probably have the Strut-your-stuff 60 lb'ers for sale (hardly used at all, with metal end fittings, not plastic end fittings) once I get the Suspa 60 lb'ers in hand. Anybody need non-Suspa, 60 lb'ers?

- - - - - - - - -

Update:

I sent Suspa an email (esupport@suspa-inc.com) today and got a prompt reply on some part numbers and prices, not including shipping.

I've provided web links to some of the Suspa items.

Here's the web link to the Suspa Online Web Store.

The original ATC supplied Suspa 40 lb gas struts on my Bobcat are part number # C16-15952 (page 145 in the Gas Spring Replacements section - sorry can't get the web link to work right).

Prices for other Suspa gas struts that are the same length with different forces are;


A pair of 50 lb = C16-17336 $190/pair

A pair of 60 lb = C16-10198 $60/pair

A pair of 70 lb = C16-19632 $190/pair (seems to be the wrong part number sent by eSuppport, part not found)

A pair of 80 lb = C16-10944 $60/pair


Looks like the 50 lb & 70 lb ones are the custom made ones, at least by the indicated price of 3+x & 3-4 week delivery time.

So, I'm going to order the Suspa 60 lb'ers for the rear.
I don't think I'll be getting the 50 lb'ers for the front at their current price.

- - - - - - - - -

Hum, I wonder if you can mix a 40 lb'er and a 60 lb'er on the front, without causing any damage to anything? If that works I could get the 100 lb lifting on the front, instead of the current 80 lb lifting. Maybe I'll cautiously try that with one of the 60 lb'er when they arrive. Naw, I'm guessing that one side would try to go up faster than the other side, might cause some damage to the inside lift panels.
 
Any thoughts/critiques gladly solicited!


Thanks for posting. Always good to learn from someone else's mistakes! :D

To be honest, I hadn't thought of the issue of compressed/extended length when installing these. And as I haven't done them yet, now I will have time to think about it.

I don't recall anyone else specifically mentioning how they measured out where to put the top and bottom brackets for the struts in this giant thread. Anyone want to contribute how they did it?


This is a huge thread.When i installed my struts I popped the roof.Than opened the struts to their full length.Measuring to the center on the front(bottom) of the frame I secured the brackets,which on the bobcat you can use the flat ones not the offset.Than with the strut attached to the lower it is just a simple placement for the upper bracket using one of the existing screws on the roof.Than drill and screw the other hole.

The project is pretty straight forward.Remember to seal the screws and don't over tighten them.I did use stainless screws just because.

With the roof up the struts are fully extended.When down there is less than 2" of the piston showing.

The rear is just as easy,measure the bottom to the center and repeat the front procedure.

It does help to place the bracket on the strut when alining the top placement holes,front and rear.

Hope this helps.Saves you from searching the whole thread.

Frank
 
I don't recall anyone else specifically mentioning how they measured out where to put the top and bottom brackets for the struts in this giant thread. Anyone want to contribute how they did it?


I have this saved in my build thread.

"The horizontal distance between center of pivot to center is 22 3/4" for the suspa lifters, when the top is down, of course."

I am almost certain it came from somewhere in this thread.
 
I have this saved in my build thread.

"The horizontal distance between center of pivot to center is 22 3/4" for the suspa lifters, when the top is down, of course."

I am almost certain it came from somewhere in this thread.


Yup, that was a post by me using information given to me by Jeff of ATC.
Cracks me up now that I said it had to do with the top down. The horizontal distance is the same with top up or down. :oops: It's just a lot easier to measure when the top is down. :rolleyes:

We still like our 40# struts and notice they are a bit easier to retract than when I first installed them. Susan can lift the top by herself, which was not possible before.
 
I just measured my struts.Mine are 19 1/2" rear and 20 1/2" front.Don't know what they should actually be,since I installed them myself.They work perfectly no problems.You might check with Marty to see if there is an specific measurement or a range. Since I installed them fully extended with the roof up I don't see how I could have gotten a measurement of 22 3/4".Except that I have a bobcat and the actual liner height could be an inch or so lower.At any rate I am pleased with my install and they work would like to know if there is a specific measurement.

Frank
 
After seeing how easy Bob got his top up at Black Rock I had to do the mod. Finished it today and it works great. No more messing with compressors, air hoses and rams. Just unlatch, give the top a push and you"re camping. Excuse me I meant to say - Just unlatch, give the top a push, open a cerveza and you're camping.

I got the SUSPA struts off eBay for $34.95 a pair with free express shipping http://www.ebay.com/itm/SUSPA-C16-15952-GAS-SPRING-PROP-STRUT-SHOCKS-2-/170711040590?pt=Motors_Car_Truck_Parts_Accessories&vxp=mtr&hash=item27bf2bc24e#ht_1915wt_940
 
One thing I haven't read in this thread is that these struts take a lot of load off of the lifter panels. I have the original panels, now 20 years old, and they're not in good shape.


If the panels are in real bad shape would they need to be replaced after you have the shock assist? Would you even need the end panels????
 
If the panels are in real bad shape would they need to be replaced after you have the shock assist? Would you even need the end panels????

The end panels lock into place and support the roof.The lifters are great don't know why they aren't standard equipment.Glad you installed them you will really like them.Saves the back,especially when you have something on the roof.

Frank
 
If you install the struts while they are extended the distance between the two brackets shouldn't really matter at all, am I right? Whatever distance is required to install them this way is the correct distance for the given roof height.
 
If you install the struts while they are extended the distance between the two brackets shouldn't really matter at all, am I right? Whatever distance is required to install them this way is the correct distance for the given roof height.


The horizontal distance between the brackets must be greater than or equal to the length of the compressed strut. Place the extended strut at the points you want to attach it. Mark both the bottom and top bracket points. Lower your roof and measure the horizontal distance between these points. If it is greater than the length of the compressed strut, then you are good.
 
Back
Top Bottom