Running heavier wire for solar panels

I have a 2007 Eagle and apparently, it is not prewired for a panel on the roof. I'm getting a 100 watt Renogy kit and plan to attach it to the roof. I'm not worried about the attachment, but where to run the wiring intermally, down to the the battery box. I'll install the solar controller there in line with the battery.
Any tips?? They would be most appreciated.
 
Cerdahl said:
I have a 2007 Eagle and apparently, it is not prewired for a panel on the roof. I'm getting a 100 watt Renogy kit and plan to attach it to the roof. I'm not worried about the attachment, but where to run the wiring intermally, down to the the battery box. I'll install the solar controller there in line with the battery.
Any tips?? They would be most appreciated.
Link Here
 
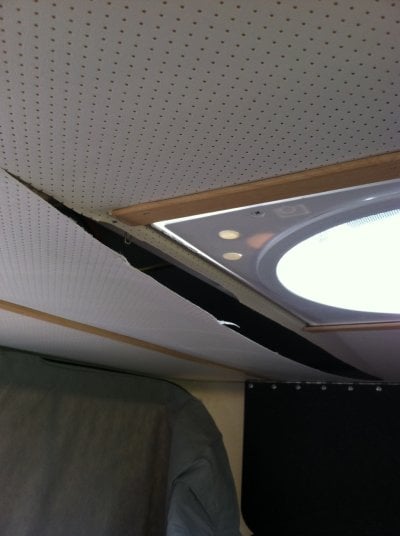
Great minds think alike. I had been trying to figure out how to run heavier 8 gauge wire from the front of the camper to the controller near the battery box. The obstacle was the thickness of the cable wouldn't go down behind the trim piece on the bed platform and clear the frame. And then this morning, I read ski3pin's post about routing a channel on the backside of the plywood behind the trim and it all came together. My camper was wired for solar so aside from about a 6-7 foot run from the ceiling box to the front of the camper, the wire is now 8 gauge instead of 12.

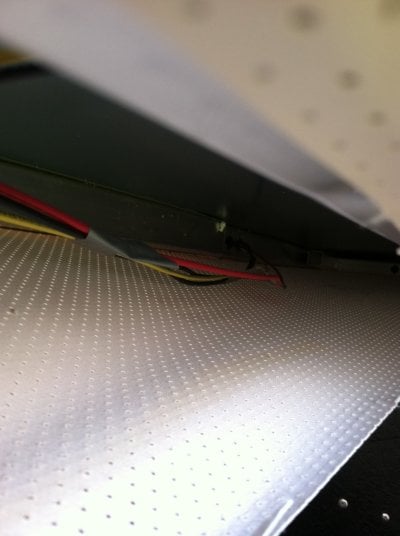
I didn't take a picture of the routed panel but essentially, I used a straight bit and notched the bottom of the plywood piece FWC installs behind the trim along the side of the bed platform. The 8 gauge cable sits in that groove.

20150501_122656.jpeg

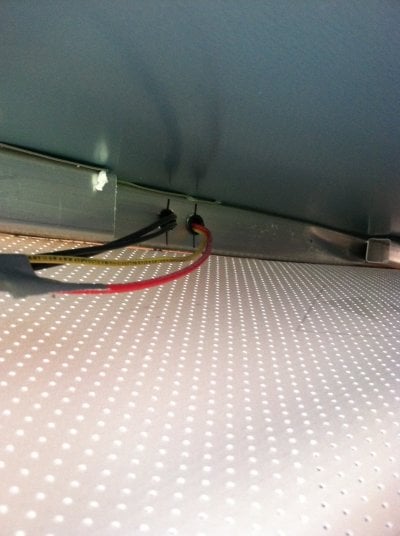
I then removed the wood that supports the platform when extended, and cut a hole in the end. The wire exits the groove in the plywood and angles out until it passes thru the support. The bed platform slides on top so is not affected at all.

20150501_132405.jpeg

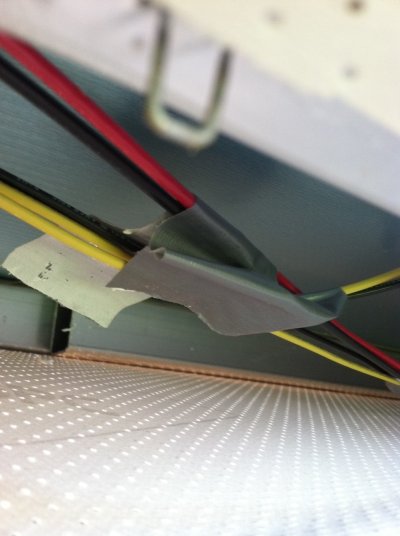
Using reducing butt connectors, I connected the 8 gauge wire to the 12 gauge coming from the roof and heat shrinked it all together. The connection now hides behind the carpet so its out of sight.

20150501_133215.jpeg

Once the bed platform is on, you can see just a bit of cabling. It runs down in the gap next to the cabinet, over the water tank and into the battery box.

20150501_133225.jpeg

Thanks to everyone who contributed to this thread. I will be installing two 100w rigid panels in the next few weeks, and I will document that process as well.

Cheers
 
Nice work. I like it. I think you will really love it once it is all together.
I am curious to know how it all works out for you.
If you have any way to measure the power to your battery, I'd love to know any data (amps and voltage) you get.

I think you are right on with 200 watts of solar.
I live in Idaho and don't get the same amount of sunlight as some of the California and Nevada crowd so I added even more.
Plus I occasionally run 2 compressor fridges at a time. My system works great for that.
 
Thanks DrJ. I have a Trimetric battery monitor so should be able to report data when I get it finished.
 
I finally got around to installing the 2 100w rigid panels on my Eagle camper. I went rigid instead of flexible because I wanted airflow under the panels to optimize performance and I wanted the ability to remove them if necessary.

I bought 2 Grape GS100 panels from AM Solar -- great people to work with. I wanted to install them utilizing the Yakima tracks that were already installed. First thing I did was buy some aluminum angle to mount the panels to.

20150515_105110.jpeg

Once everything was measured and cut, I secured the panels to the aluminum using stainless 1/4 20 bolts after drilling through the frame.

20150515_105152.jpeg

To mount the frame to the yakima tracks, I used 3/8 stainless carriage bolts -- the heads fit perfectly in the tracks. In order to get them positioned, you have to remove all the screws holding the track to the roof to slide them down. The shoulder on the carriage bolt sits a little high so it requires two large washers and an aluminum spacer to allow the nut to tighten everything down.

20150515_130726.jpeg

20150515_130751.jpeg

The panels mounted are nice and secure. Here is a view looking back and you can see they have a really low profile. Plus, they can be easily moved forward or removed altogether if needed.

20150515_131843.jpeg

Cheers
 
Nice job. Did you have to increase the lift of your air cylinders? I used the yakima nuts and purchased stainless allen screws to hold the angle, no need to remove the screws holding the tracks.
 
I don't have the lift assist so use a speaker stand.

I thought about elevator bolts but didn't want to mess with grinding down the heads. And while the Yakima nuts would probably work with the panels, I have seen them fail more than once when heavier things are carried on the tracks, especially off road.

Taking the track screws out took no time and it allowed me the opportunity to re-caulk underneath them all.

Cheers
 
The answer to the original question about the wire run from the ceiling box to the exit at the top of the folding panel. Photo 1 solar wires connected to the +/-, Photo 2 sliced open the ceiling fabric to look inside.
 

Attachments

  • 1.JPG
    1.JPG
    261.4 KB · Views: 193
  • 2.JPG
    2.JPG
    220.8 KB · Views: 198
Photo 3 - I removed the Styrofoam insulation and you can see the wires - red/black for solar and yellow/black for fan, lights. You can also see how the one piece roof is adhered to the frame with Butyl tape. Photo 4 shows that you cannot use the wires to pull new wires because of the duct tape.
 

Attachments

  • 3.JPG
    3.JPG
    221.1 KB · Views: 174
  • 4.JPG
    4.JPG
    248 KB · Views: 173
Photo 5 - making a turn thru the frame, you can see the Butyl tape for the roof.
 

Attachments

  • 5.JPG
    5.JPG
    221.1 KB · Views: 173
From here I am unable to tell if the wire exits out the end of the frame or on the other side then to the end and the support boards. I didn't want to make another cut to find out. I had my answer that I wont be able to run the heavier gauge wire this way.
Cheers
 

Attachments

  • 6.JPG
    6.JPG
    321.5 KB · Views: 202
Captm thank you for the pictures, good information for anyone looking to increase wire size. Note pictures 1 and 2 will not enlarge do you have them set private?
 
Bill, I'm not sure what the photos are set at :oops:. I'll see what I can do. I haven't learned the best way to post photo's yet. Once we're on the road I'll have lot's of time to figure it all out.
......OK try it now
 

New posts - WTW

Back
Top Bottom